2010 Yamaha Motorsports C3 Owners Manual - Page 44
2010 Yamaha Motorsports C3 Manual

Page 44 highlights
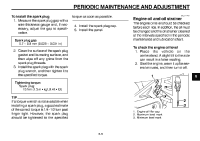
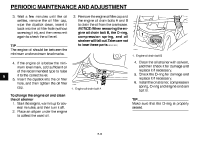
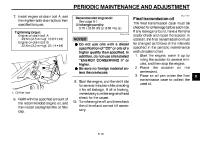
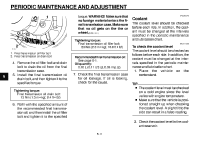
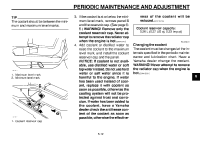
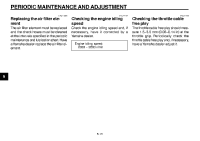
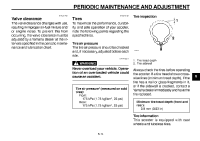
PERIODIC MAINTENANCE AND ADJUSTMENT 3. Wait a few minutes until the oil settles, remove the oil filler cap, wipe the dipstick clean, insert it back into the oil filler hole (without screwing it in), and then remove it again to check the oil level. TIP The engine oil should be between the minimum and maximum level marks. 4. If the engine oil is below the minimum level mark, add sufficient oil of the recommended type to raise it to the correct level. 5. Insert the dipstick into the oil filler hole, and then tighten the oil filler cap. To change the engine oil and clean the oil strainer 1. Start the engine, warm it up for several minutes, and then turn it off. 2. Place an oil pan under the engine to collect the used oil. 3. Remove the engine oil filler cap and the engine oil drain bolts A and B to drain the oil from the crankcase. NOTICE: When removing the engine oil drain bolt B, the O-ring, compression spring, and oil strainer will fall out. Take care not to lose these parts.[ECAT1021] ZAUM00** EAU1722A 1 2 3 4 5 6 7 8 9 1 1. Engine oil drain bolt B ZAUM00** 1 1. Engine oil drain bolt A 4. Clean the oil strainer with solvent, and then check it for damage and replace it if necessary. 5. Check the O-ring for damage and replace it if necessary. 6. Install the oil strainer, compression spring, O-ring and engine oil drain bolt B. TIP Make sure that the O-ring is properly seated. 6-44 6-9
-
 1
1 -
2
-
3
-
4
-
5
-
6
-
7
-
8
-
9
-
10
-
11
-
12
-
13
-
14
-
15
-
16
-
17
-
18
-
19
-
20
-
21
-
22
-
23
-
24
-
25
-
26
-
27
-
28
-
29
-
30
-
31
-
32
-
33
-
34
-
35
-
36
-
37
-
38
-
 39
39 -
 40
40 -
 41
41 -
 42
42 -
 43
43 -
 44
44 -
 45
45 -
 46
46 -
 47
47 -
 48
48 -
 49
49 -
50
-
51
-
52
-
53
-
54
-
55
-
56
-
57
-
58
-
59
-
60
-
61
-
62
-
63
-
64
-
65
-
66
-
67
-
68
-
69
-
70
-
71
-
72
-
73
-
74
-
75
-
76
-
77
-
78
-
79
-
80
-
81
-
82
-
83
-
84
 |
 |
