3Com 3CRWER101U-75 Installation Guide - Page 7
Installing Your Router
 |
View all 3Com 3CRWER101U-75 manuals
Add to My Manuals
Save this manual to your list of manuals |
Page 7 highlights
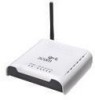
5 E 1. INSTALLING YOUR ROUTER 1. Connect the power adapter to the Router and wait for the Power LED to solid. 2. Ensure that your modem and computer are both switched on. 3. Insert one end of the supplied Ethernet (RJ-45 Category 5) cable into the Cable/DSL port on the rear panel of the Router. 4. Insert the other end of the cable into the RJ-45 port on your cable or DSL modem. Check that the Cable/DSL status LED lights on the Router. 5. Connect the cable or DSL modem to the Internet. 6. Connect your computer to one of the four LAN ports on the Router using an Ethernet
-
 1
1 -
 2
2 -
 3
3 -
 4
4 -
 5
5 -
 6
6 -
 7
7 -
 8
8 -
 9
9 -
 10
10 -
 11
11 -
 12
12 -
13
-
14
-
15
-
16
-
17
-
18
-
19
-
20
-
21
-
22
-
23
-
24
-
25
-
26
-
27
-
28
-
29
-
30
-
31
-
32
-
33
-
34
-
35
-
36
-
37
-
38
-
39
-
40
-
41
-
42
-
43
-
44
-
45
-
46
-
47
-
48
-
49
-
50
-
51
-
52
-
53
-
54
-
55
-
56
-
57
-
58
-
59
-
60
-
61
-
62
-
63
-
64
-
65
-
66
-
67
-
68
-
69
-
70
-
71
-
72
-
73
-
74
-
75
-
76
 |
 |

1. INSTALLING YOUR ROUTER
1.
Connect the power adapter to the Router and wait for the Power LED to solid.
2.
Ensure that your modem and computer are both switched on.
3.
Insert one end of the supplied Ethernet (RJ-45 Category 5) cable into the Cable/DSL
port on the rear panel of the Router.
4.
Insert the other end of the cable into the RJ-45 port on your cable or DSL modem.
Check that the Cable/DSL status LED lights on the Router.
5.
Connect the cable or DSL modem to the Internet.
6.
Connect your computer to one of the four LAN ports on the Router using an Ethernet
E
5