3Ware 3W-7410 User Guide - Page 56
Reboot the machine, RAID array initialization, Disk Administrator, Administrative Tools, Start - bios manager
 |
View all 3Ware 3W-7410 manuals
Add to My Manuals
Save this manual to your list of manuals |
Page 56 highlights
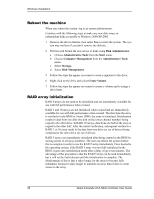
Windows Installation Reboot the machine When you reboot the system, log in as system administrator. Continue with the following steps to make any new disk arrays or independent disks accessible to Windows 2000/XP/2003. 1 Remove the driver diskette, then select Yes to restart the system. The system may not boot if you don't remove the diskette. 2 Partition and format the new arrays or disks using Disk Administrator: a Choose Administrative Tools from the Start menu. b Choose Computer Management from the Administrative Tools menu. c Select Storage. d Select Disk Management. 5 Follow the steps the appear on-screen to write a signature to the drive. 6 Right click on the drive and select Create Volume. 7 Follow the steps the appear on-screen to create a volume and to assign a drive letter. RAID array initialization RAID 0 arrays do not need to be initialized and are immediately available for use with full performance when created. RAID 1 and 10 arrays are not initialized when created and are immediately available for use with full performance when created. The first time the array is verified (via the BIOS or 3ware 3DM), the array is initialized. Initialization results in data from one disk (the disk on the lower channel number) being copied to the other drive. In RAID 10 arrays, data from one half of the array is copied to the other half. After the initial verification, subsequent verifies to a RAID 1 or 10 array result in the data from one drive (or set of drives) being compared to the other drive (or set of drives). RAID 5 arrays are immediately initialized after being created in the BIOS by writing zeroes to all array members. The user can reboot the system before this is complete in order to use the RAID 5 array immediately. Once booted to the operating system, if the RAID 5 array was not fully initialized in the BIOS, it goes into initialization mode after a delay of up to ten minutes. The advantage of this procedure is that the RAID 5 array can be used immediately, but it will not be fault tolerant until the initialization is complete. The disadvantage of this is that it takes longer for the array to become fully redundant, because it takes longer to initialize an array than it does to write zeroes to the array. 48 3ware Escalade ATA RAID Controller User Guide
-
 1
1 -
2
-
3
-
4
-
5
-
6
-
7
-
8
-
9
-
10
-
11
-
12
-
13
-
14
-
15
-
16
-
17
-
18
-
19
-
20
-
21
-
22
-
23
-
24
-
25
-
26
-
27
-
28
-
29
-
30
-
31
-
32
-
33
-
34
-
35
-
36
-
37
-
38
-
39
-
40
-
41
-
42
-
43
-
44
-
45
-
46
-
47
-
48
-
49
-
50
-
 51
51 -
 52
52 -
 53
53 -
 54
54 -
 55
55 -
 56
56 -
 57
57 -
 58
58 -
 59
59 -
 60
60 -
 61
61 -
62
-
63
-
64
-
65
-
66
-
67
-
68
-
69
-
70
-
71
-
72
-
73
-
74
-
75
-
76
-
77
-
78
-
79
-
80
-
81
-
82
-
83
-
84
-
85
-
86
-
87
-
88
-
89
-
90
-
91
-
92
-
93
-
94
-
95
-
96
-
97
-
98
-
99
-
100
-
101
-
102
-
103
-
104
-
105
-
106
-
107
-
108
-
109
-
110
-
111
-
112
-
113
-
114
-
115
-
116
-
117
-
118
-
119
-
120
-
121
-
122
-
123
-
124
-
125
-
126
 |
 |
