3Ware 3W-7810 User Guide - Page 71
Welcome to Red Hat, expert, Local CD-ROM, Create disk arrays, Boot with the Red Hat CD-ROM or diskette
 |
View all 3Ware 3W-7810 manuals
Add to My Manuals
Save this manual to your list of manuals |
Page 71 highlights
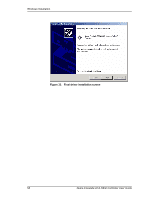
Red Hat Linux Installation Create disk arrays Refer to the 3ware Hardware Installation and 3ware Disk Array Configuration Utility chapters. Note: If you want to boot to an array that is larger than 1 TByte, you must use the LILO boot loader in Red Hat versions 8 and 9. The default boot loader (GRUB) will cause the system to hang if you attempt to boot to an array larger than 1 TByte. Earlier versions of Red Hat could not boot to arrays larger than 1 TByte. Boot with the Red Hat CD-ROM or diskette Note: The boot diskette is optional since most computers can boot directly from the Red Hat CD-ROM disk. 1 Insert the Red Hat boot diskette into the floppy drive of the computer. If your BIOS supports it you may boot directly from the Red Hat installation CD-ROM instead. 2 When the Welcome to Red Hat display appears type expert at the boot prompt. boot: expert Install the driver 1 After loading a number of files, you will be asked to insert your driver disk. Insert the 3ware driver installation diskette for Red Hat and press OK. The system automatically reports: Loading 3w-xxxx driver 2 Select the proper language and keyboard types for your locality. 3 If asked for what type of media, select Local CD-ROM since you are installing from CD-ROM. RAID array initialization RAID 0 arrays do not need to be initialized and are immediately available for use with full performance when created. RAID 1 and 10 arrays are not initialized when created and are immediately available for use with full performance when created. The first time the array is verified (via the BIOS or 3ware 3DM), the array is initialized. Initialization results in data from one disk (the disk on the lower channel number) being copied to the other drive. In RAID 10 arrays, data from one half of the array is copied to the other half. After the initial verification, subsequent verifies to a www.3ware.com 63
-
 1
1 -
2
-
3
-
4
-
5
-
6
-
7
-
8
-
9
-
10
-
11
-
12
-
13
-
14
-
15
-
16
-
17
-
18
-
19
-
20
-
21
-
22
-
23
-
24
-
25
-
26
-
27
-
28
-
29
-
30
-
31
-
32
-
33
-
34
-
35
-
36
-
37
-
38
-
39
-
40
-
41
-
42
-
43
-
44
-
45
-
46
-
47
-
48
-
49
-
50
-
51
-
52
-
53
-
54
-
55
-
56
-
57
-
58
-
59
-
60
-
61
-
62
-
63
-
64
-
65
-
 66
66 -
 67
67 -
 68
68 -
 69
69 -
 70
70 -
 71
71 -
 72
72 -
 73
73 -
 74
74 -
 75
75 -
 76
76 -
77
-
78
-
79
-
80
-
81
-
82
-
83
-
84
-
85
-
86
-
87
-
88
-
89
-
90
-
91
-
92
-
93
-
94
-
95
-
96
-
97
-
98
-
99
-
100
-
101
-
102
-
103
-
104
-
105
-
106
-
107
-
108
-
109
-
110
-
111
-
112
-
113
-
114
-
115
-
116
-
117
-
118
-
119
-
120
-
121
-
122
-
123
-
124
-
125
-
126
 |
 |
