AIWA CA-DW235 Operating Instructions - Page 6
Use Type I normal
 |
View all AIWA CA-DW235 manuals
Add to My Manuals
Save this manual to your list of manuals |
Page 6 highlights
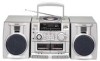
DUBBING SPEED II PAUSE ¤/~ sTop/EJEcT q REC POWER/(!) STANDBY/TAPE, RADIO, CD q Use Type I (normal) tapes only. q Note that recording is done on only one side of the tape. q Wind the tape to the point where recording starts. ~ Insert a tape to be recorded on into deck 1 with the side to be recorded facing out. Deck 1 @ z Get ready to record from the source. To record from a CD, press CD and load the disc. To record from a radio broadcast, press RADIO and tune to a station. 3 Press q REC on deck 1 to start recording. * PLAY is pressed simultaneously, When the selected function is CD, CD play and recording starts simultaneously. To record only the selected tracks of a CD 1 Follow steps 1 to 3 of PROGRAMMED PLAY on page 4 to program tracks. 2 Press q REC. To stop recording, press H/A STOP/EJECT on deck 1. When recording from a CD, play pauses. To stop CD play, press s STOP/MEMORY. To pause recording, press 1I PAUSE. To resume recording, press again. To erase recording, press q REC on deck 1 while the power is off. After recording, press POWER/~ STANDBY to turn the power off. 1 Press TAPE to turn the power off. 2 Insert a tape to be recorded on into deck 1 with the side to be recorded facing out. 3 Insert a tape to be played into deck 2 with the side to be played facing out. 4 Press 1I PAUSE then press q REC on deck 1 to enter recording pause mode. The power is turned on. - PLAY is pressed simultaneously. 5 Press DUBBING SPEED to select a dubbing speed. The HIGH SPEED speed. The HIGH SPEED normal speed. DUB indicator DUB indicator lights up: Dubs at high disappears: Dubs at 6 Press P PLAY on deck 2. 11 PAUSE on deck 1 is released and recording starts. To stop recording, press WA on deck 1 and deck 2. The power will be automatically turned off. NOTE When recording near a television, noise may be recorded. Move the unit away from the television. To prevent accidental erasure, break off the plastic tabs on the cassette tape with a screwdriver or other pointed tool after recording. To record on the tape again, cover the tab openings with adhesive tape, etc. 6 ENGLISH
-
 1
1 -
 2
2 -
 3
3 -
 4
4 -
 5
5 -
 6
6 -
 7
7 -
 8
8 -
 9
9 -
 10
10 -
 11
11 -
 12
12 -
13
-
14
-
15
-
16
-
17
-
18
-
19
-
20
-
21
-
22
-
23
-
24
-
25
-
26
-
27
-
28
 |
 |
