AIWA XP-SP911 Operating Instructions - Page 2
Using On Ac House Current, Before Playback
 |
View all AIWA XP-SP911 manuals
Add to My Manuals
Save this manual to your list of manuals |
Page 2 highlights
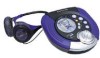
3 D HOLD RESUME OFF E DC 5~6 V STOP OFF/CHARGE STOP OFF/CHARGE PLAY/ PAUSE DSL F VOLUME G1 PHONES/ LINE OUT 2 3 H use. • When using on rechargeable batteries for the first time, charge them until the battery indicator goes out. • Before charging the batteries, close the disc compartment. You cannot charge the batteries while it is opened. 1 Insert the rechargeable batteries with the 0 and 9 marks correctly aligned. 2 Connect the AC adaptor. Pull out the rubber cap before connecting the adaptor. 1 to DC 5 ~ 6 V jack 2 to wall outlet 3 Keep sSTOP/OFF/CHARGE pressed for about 1 second to start charging. "Con" is displayed and the battery indicator blinks. After charging, disconnect the AC adaptor. Time to recharge the batteries Recharge the batteries when lights. If the unit remains in use after lights, "LobAtt" is displayed and the current operation will stop. To stop charging Press sSTOP/OFF/CHARGE during charging. ATTENTION: The product you have purchased can be powered by nickel cadmium batteries which are recyclable. At the end of their useful life, under various state and local laws, it is illegal to dispose of these batteries into your municipal waste stream. Please call 1-800-289-2492 for information on how to recycle these batteries. USING ON AC HOUSE CURRENT Connect the supplied AC adaptor in the same way as when recharging the batteries. During operation on AC house current, all of the battery indicators disappear. BEFORE PLAYBACK HOLD switch → D Release the HOLD switch before playback. → a When not using the unit, set the HOLD switch to the HOLD position. Accidentally pressed button will not function. → b If buttons are pressed when the HOLD switch is set to the HOLD position, "HOLd" flashes in the display. Turning on and off → D Turning the power on Press e PLAY/PAUSE. Power is turned on and playback starts. Note "Err" appears on the display in the following cases: - When you try to play the unit without a disc in the disc compartment. - When you play a disc placed upside-down or a defective disc. Turning the power off If no new operations are done within 30 seconds from the end of last operation, the power is turned off automatically. (Auto power off function) • You can turn off the power before it is automatically turned off by pressing sSTOP/ OFF/CHARGE. Standby mode → D When an operation finishes, the unit goes into standby mode until the auto power off function automatically turns off the power. To enter standby mode, press e PLAY/PAUSE to start playback, then press sSTOP/OFF/CHARGE. Adjusting the sound → E Volume Press + to increase the volume. Press - to decrease the volume. DSL Press DSL for more powerful sound and deeper bass. : Deep bass is emphasized. : Deep bass is strongly emphasized. : Normal sound Connecting the headphones → F Pull out the rubber cap and connect the supplied headphones to the PHONES/ LINE OUT jack. Inserting a disc → G 1 Set the dial to the OPEN position to open the disc compartment. 2 Place a disc in the center with the label side facing up. 3 Close the disc compartment tightly and set the dial to the LOCK position. To remove the disc → H Pick up the disc, holding its edge, while pressing the pivot gently. Note • The unit may not play a CD-R/RW disc that is recorded on personal computers or some kinds of CD-R/RW recorders because of differences in recording platforms. • Do not attach any seal or label to either side (the recordable side or the labeled side) of a CD-R/RW disc. It may cause malfunction.
-
 1
1 -
 2
2 -
 3
3 -
 4
4 -
 5
5 -
 6
6 -
 7
7 -
 8
8
 |
 |
