ASRock A55 Pro3 User Manual - Page 36
Serial ATA SATA / Serial ATA2 SATA2 Hard Disks Installation, Serial ATA3 SATA3 Hard Disks - hudson d2
 |
View all ASRock A55 Pro3 manuals
Add to My Manuals
Save this manual to your list of manuals |
Page 36 highlights
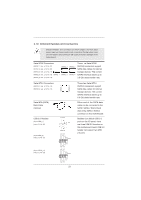
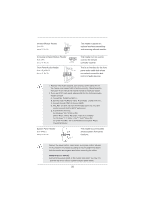
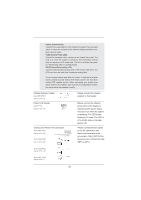
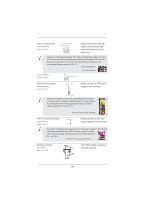
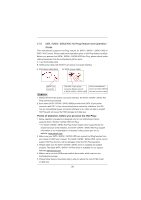
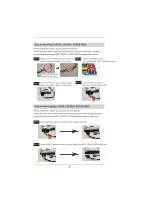
2.11 Serial ATA (SATA) / Serial ATA2 (SATA2) Hard Disks Installation This motherboard adopts AMD A55 FCH (Hudson-D2) chipset that supports Serial ATA (SATA) / Serial ATA2 (SATA2) hard disks and RAID (RAID 0, RAID 1 and RAID 10) functions. You may install SATA / SATA2 hard disks on this motherboard for internal storage devices. This section will guide you to install the SATA / SATA2 hard disks. STEP 1: Install the SATA / SATA2 hard disks into the drive bays of your chassis. STEP 2: Connect the SATA power cable to the SATA / SATA2 hard disk. STEP 3: Connect one end of the SATA data cable to the motherboard's SATA2 connector. STEP 4: Connect the other end of the SATA data cable to the SATA / SATA2 hard disk. 2.12 Serial ATA3 (SATA3) Hard Disks Installation This motherboard adopts ASMedia ASM1061 chipset that supports Serial ATA3 (SATA3) hard disks. You may install SATA3 hard disks on this motherboard for internal storage devices. This section will guide you to install the SATA3 hard disks. STEP 1: Install the SATA3 hard disks into the drive bays of your chassis. STEP 2: Connect the SATA power cable to the SATA3 hard disk. STEP 3: Connect one end of the SATA data cable to the motherboard's SATA3 connector. STEP 4: Connect the other end of the SATA data cable to the SATA3 hard disk. 36
-
 1
1 -
2
-
3
-
4
-
5
-
6
-
7
-
8
-
9
-
10
-
11
-
12
-
13
-
14
-
15
-
16
-
17
-
18
-
19
-
20
-
21
-
22
-
23
-
24
-
25
-
26
-
27
-
28
-
29
-
30
-
 31
31 -
 32
32 -
 33
33 -
 34
34 -
 35
35 -
 36
36 -
 37
37 -
 38
38 -
 39
39 -
 40
40 -
 41
41 -
42
-
43
-
44
-
45
-
46
-
47
-
48
-
49
-
50
-
51
-
52
-
53
-
54
-
55
-
56
-
57
-
58
-
59
-
60
-
61
-
62
-
63
-
64
-
65
-
66
-
67
-
68
-
69
 |
 |