ASRock TRX40 Creator User Manual - Page 51
CrossFireX, 3-Way CrossFireX, and 4-Way CrossFireX, Operation Guide, Installing Two CrossFireX,
 |
View all ASRock TRX40 Creator manuals
Add to My Manuals
Save this manual to your list of manuals |
Page 51 highlights
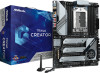
2.9 CrossFireXTM, 3-Way CrossFireXTM and 4-Way CrossFireXTM Operation Guide This motherboard supports CrossFireXTM, 3-way CrossFireXTM and 4-way CrossFireXTM that allows you to install up to four identical PCI Express x16 graphics cards. 1. You should only use identical CrossFireXTM-ready graphics cards that are AMD certified. 2. Make sure that your graphics card driver supports AMD CrossFireXTM technology. Download the drivers from the AMD's website: www.amd.com 3. Make sure that your power supply unit (PSU) can provide at least the minimum power your system requires. It is recommended to use a AMD certified PSU. Please refer to the AMD's website for details. 4. If you pair a 12-pipe CrossFireXTM Edition card with a 16-pipe card, both cards will operate as 12-pipe cards while in CrossFireXTM mode. 5. Different CrossFireXTM cards may require different methods to enable CrossFireXTM. Please refer to AMD graphics card manuals for detailed installation guide. 2.9.1 Installing Two CrossFireXTM-Ready Graphics Cards Step 1 Insert one graphics card into PCIE1 slot and the other graphics card to PCIE3 slot. Make sure that the cards are properly seated on the slots. CrossFire Bridge Step 2 Connect two graphics cards by installing a CrossFire Bridge on the CrossFire Bridge Interconnects on the top of the graphics cards. (The CrossFire Bridge is provided with the graphics card you purchase, not bundled with this motherboard. Please refer to your graphics card vendor for details.) English 44
-
 1
1 -
2
-
3
-
4
-
5
-
6
-
7
-
8
-
9
-
10
-
11
-
12
-
13
-
14
-
15
-
16
-
17
-
18
-
19
-
20
-
21
-
22
-
23
-
24
-
25
-
26
-
27
-
28
-
29
-
30
-
31
-
32
-
33
-
34
-
35
-
36
-
37
-
38
-
39
-
40
-
41
-
42
-
43
-
44
-
45
-
 46
46 -
 47
47 -
 48
48 -
 49
49 -
 50
50 -
 51
51 -
 52
52 -
 53
53 -
 54
54 -
 55
55 -
 56
56 -
57
-
58
-
59
-
60
-
61
-
62
-
63
-
64
-
65
-
66
-
67
-
68
-
69
-
70
-
71
-
72
-
73
-
74
-
75
-
76
-
77
-
78
-
79
-
80
-
81
-
82
-
83
-
84
-
85
-
86
-
87
-
88
-
89
-
90
-
91
-
92
-
93
-
94
-
95
-
96
-
97
-
98
-
99
-
100
-
101
-
102
 |
 |
