ATI V5700 User Guide - Page 7
Installing ATI CrossFire Pro Graphics Cards - ati firepro
 |
UPC - 727419414982
View all ATI V5700 manuals
Add to My Manuals
Save this manual to your list of manuals |
Page 7 highlights
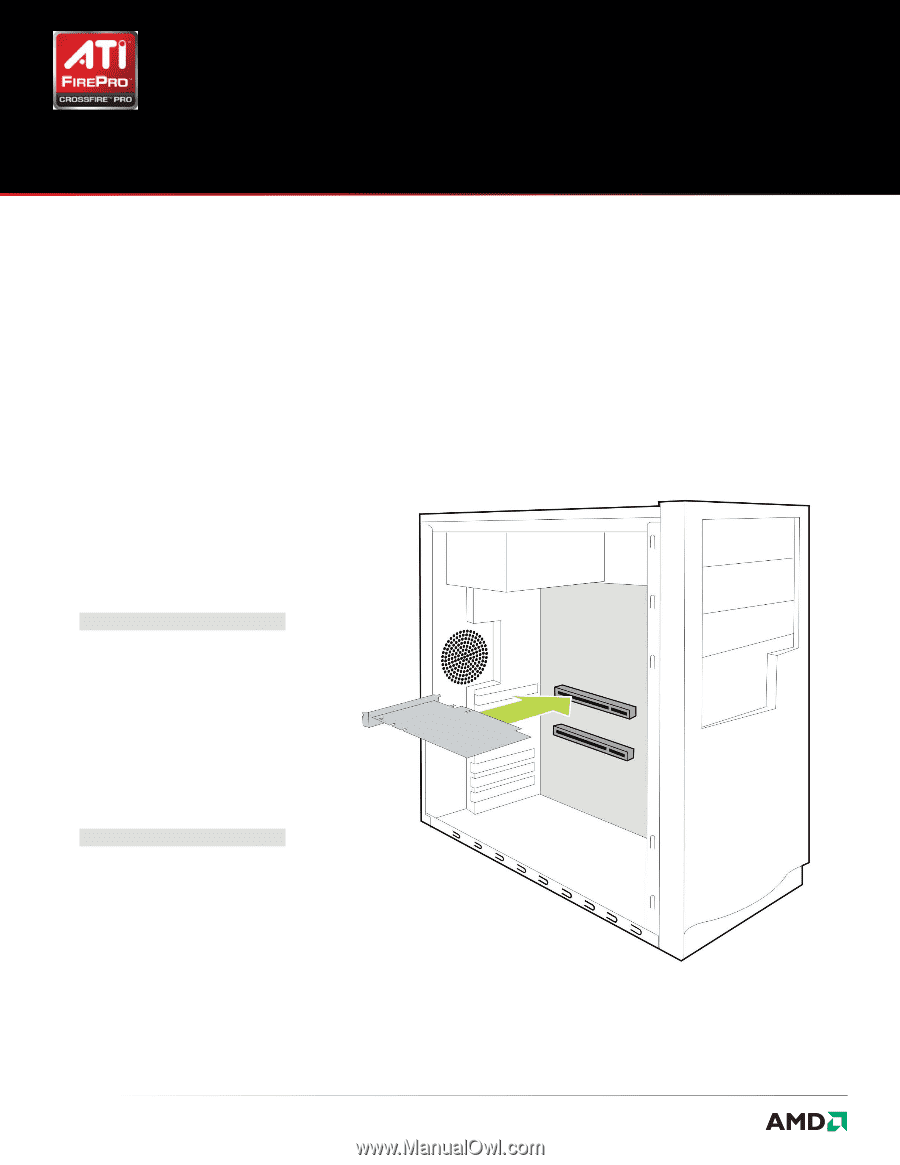
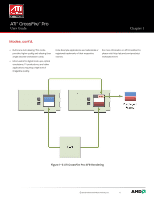
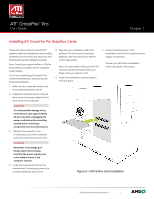
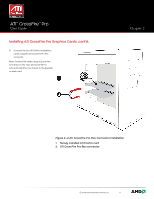
ATI™ CrossFire™ Pro User Guide Chapter 2 Installing ATI CrossFire Pro Graphics Cards These instructions assume that a PCIe® graphics card has already been successfully installed in the secondary slot (slot one), and that the primary slot (slot zero) is empty. Note: Consult your system builder or OEM to ensure that your system has an adequate power supply. For an up-to-date listing of CrossFire Pro certified motherboards, see ati.amd.com/ products/certification 1. Make sure the computer, monitor, and other peripheral devices are off. 2. Unplug the computer power cord and disconnect the monitor cable from the back panel of the computer. 5. Align the new workstation card in the primary PCIe slot next to the existing graphics card and press firmly until the card is fully seated.. . Note: You may need to hold open the PCIe card slot-locking mechanism with your finger when you seat the card. 7. Connect external power to the workstation card from the systems power supply, if necessary.. . Consult your ATI FirePro workstation card's user guide, if necessary 6. Fasten the workstation card securely to the back panel. CAUTION: To avoid possible damage to the motherboard, wait approximately 20 seconds after unplugging the power cord before disconnecting a peripheral or removing a component from the motherboard. 3. Remove the computer cover.. If necessary, consult the computer manual for help removing the cover. CAUTION: Remember to discharge your body's static electricity by touching the power supply case or the metal surface of the computer chassis. 4. Locate the primary PCIe slot on the motherboard. If necessary, remove the corresponding back panel cover. Figure 2-1 ATI FirePro Card Installation © 2009 Advanced Micro Devices, Inc. 7
-
 1
1 -
 2
2 -
 3
3 -
 4
4 -
 5
5 -
 6
6 -
 7
7 -
 8
8 -
 9
9 -
 10
10 -
 11
11
 |
 |