Acer AL1713 AL1713bm/AL1713m User's Guide - Page 5
Detaching the monitor, Adjusting the Viewing Angle, Connecting the Devices - manual
 |
View all Acer AL1713 manuals
Add to My Manuals
Save this manual to your list of manuals |
Page 5 highlights
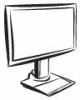
User manual (CD) Quick setup guide VGA cable Installation instruction Assembling the monitor 1. Position the monitor on top of the stand. 2.Connect the stand into the neck of monitor along the track. Detaching the monitor Important First, find a clean, flat surface to place the monitor after removing it from the stand. Place a clean dry cloth under the monitor to protect it further. Pull the monitor slightly up and away from the stand. Adjusting the Viewing Angle The viewing angle of the monitor ranges from forward 5° to backward 20°. Caution: Do not force the LCD Monitor over its maximum viewing angle settings as stated above. Attempting this will result in damaging the Monitor and Monitor stand. Connecting the Devices Please shut down the power of computer and monitor before you do the connection. 4
-
 1
1 -
 2
2 -
 3
3 -
 4
4 -
 5
5 -
 6
6 -
 7
7 -
 8
8 -
 9
9 -
 10
10 -
 11
11
 |
 |
