Acer AL532 AL532 User Guide - Page 5
Acer AL532 Manual
 |
View all Acer AL532 manuals
Add to My Manuals
Save this manual to your list of manuals |
Page 5 highlights
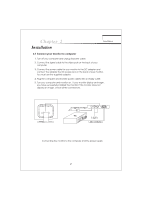
Chapter 2 Installation Installation 2.1 Connect your monitor to computer 1. Turn off your computer and unplug its power cable. 2. Connect the signal cable to the video port on the back of your computer. 3. Connect the power cable for your monitor to the DC adapter and connect the adapter the DC power jack on the back of your monitor. You must use the supplied adapter. 4. Plug the computer and monitor power cables into a nearby outlet. 5. Turn your computer and monitor on , if your monitor display an image , you have successfully installed the monitor. If the monitor does not display an image ,check all the connections. Connecting the monitor to the computer and the power supply 2
-
 1
1 -
 2
2 -
 3
3 -
 4
4 -
 5
5 -
 6
6 -
 7
7 -
 8
8 -
 9
9 -
 10
10 -
 11
11 -
12
-
13
 |
 |
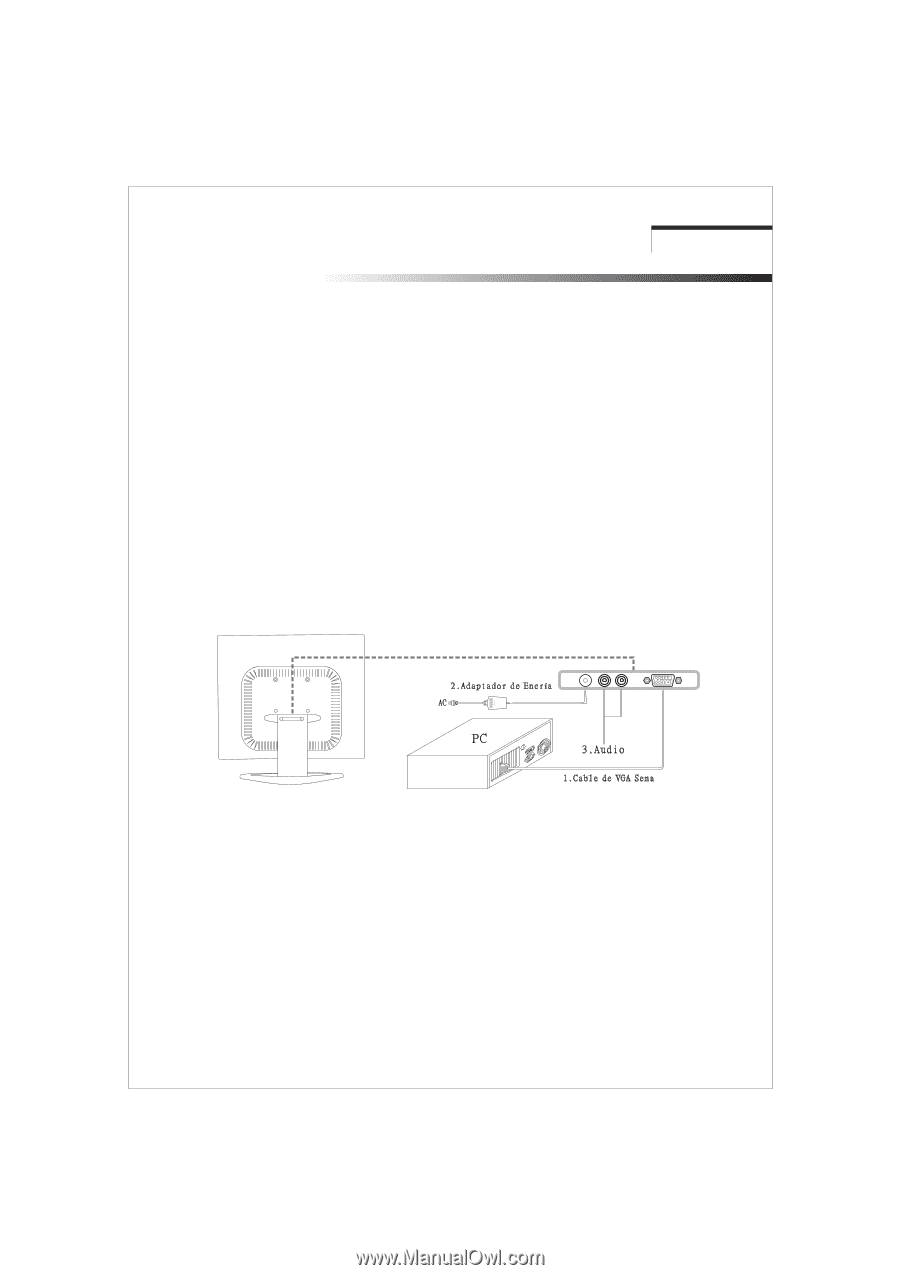
2.1 Connect your monitor to computer
1.
Turn off your computer and unplug its power cable.
2.
Connect the signal cable to the video port on the back of your
computer.
3.
Connect the power cable for your monitor to the DC adapter and
connect the adapter the DC power jack on the back of your monitor.
You must use the supplied adapter.
4.
Plug the computer and monitor power cables into a nearby outlet.
5.
Turn your computer and monitor on , if your monitor display an image ,
you have successfully installed the monitor. If the monitor does not
display an image ,check all the connections.
Connecting the monitor to the computer and the power supply
Chapter 2
Installation
Installation
2