Acer AcerPower SP Power Sp User Guide - Page 17
Install and upgrade CPU
 |
View all Acer AcerPower SP manuals
Add to My Manuals
Save this manual to your list of manuals |
Page 17 highlights
Install and upgrade CPU To install or upgrade the CPU, complete the following steps: 1. Unlock the socket lever. 2. Install the CPU chip into socket. 3. Return the lever to locked position. 4. Attach the fan/heat sink on top of the CPU. 5. Attach the fan/heat sink connectors to the connectors with marked with "CPU FAN". Warning! The CPU and heat sink may be hot if the system has been running. Also, there might be sharp pins and edges on some boards and/or chassis parts. 16
-
 1
1 -
2
-
3
-
4
-
5
-
6
-
7
-
8
-
9
-
10
-
11
-
 12
12 -
 13
13 -
 14
14 -
 15
15 -
 16
16 -
 17
17 -
 18
18 -
 19
19 -
 20
20 -
 21
21
 |
 |
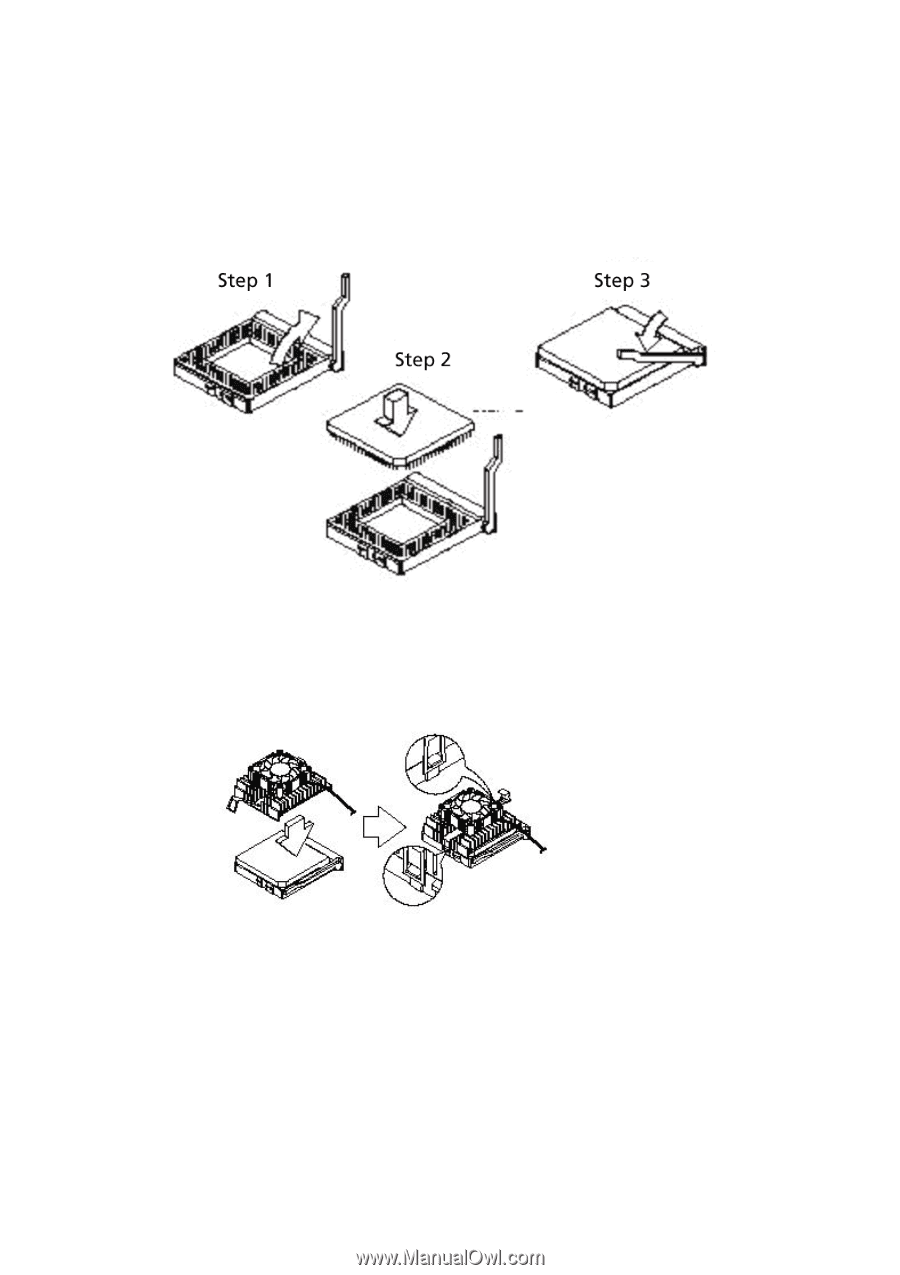
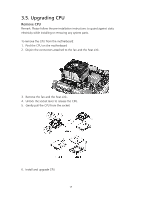
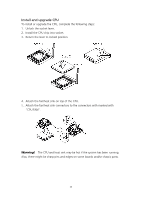
Install and upgrade CPU
To install or upgrade the CPU, complete the following steps:
1. Unlock the socket lever.
2. Install the CPU chip into socket.
3.
Return the lever to locked position.
4. Attach the fan/heat sink on top of the CPU.
5.
Attach the fan/heat sink connectors to the connectors with marked with
“CPU FAN”.
Warning!
The CPU and heat sink may be hot if the system has been running.
Also, there might be sharp pins and edges on some boards and/or chassis parts.
16