Acer Aspire 1 User Manual - Page 26
You will be shown the backup progress on the screen., Follow the process until it completes.
 |
View all Acer Aspire 1 manuals
Add to My Manuals
Save this manual to your list of manuals |
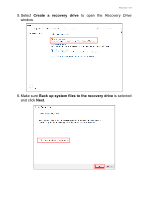
Page 26 highlights
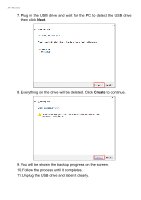
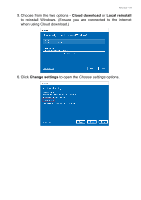
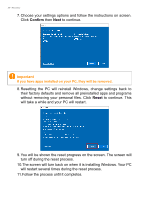
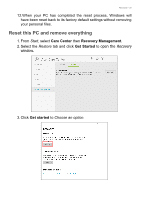
26 - Recovery 7. Plug in the USB drive and wait for the PC to detect the USB drive then click Next. 8. Everything on the drive will be deleted. Click Create to continue. 9. You will be shown the backup progress on the screen. 10.Follow the process until it completes. 11.Unplug the USB drive and label it clearly.
-
 1
1 -
2
-
3
-
4
-
5
-
6
-
7
-
8
-
9
-
10
-
11
-
12
-
13
-
14
-
15
-
16
-
17
-
18
-
19
-
20
-
 21
21 -
 22
22 -
 23
23 -
 24
24 -
 25
25 -
 26
26 -
 27
27 -
 28
28 -
 29
29 -
 30
30 -
 31
31 -
32
-
33
-
34
-
35
-
36
-
37
-
38
-
39
-
40
-
41
-
42
-
43
-
44
-
45
-
46
-
47
-
48
-
49
-
50
-
51
-
52
-
53
-
54
-
55
-
56
-
57
-
58
-
59
-
60
-
61
-
62
-
63
-
64
-
65
-
66
-
67
-
68
-
69
-
70
-
71
-
72
-
73
-
74
-
75
-
76
-
77
-
78
 |
 |

26 - Recovery
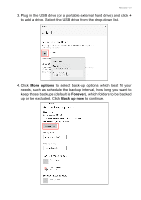
7.Plug in the USB drive and wait for the PC to detect the USB drive
then click
Next
.
8.Everything on the drive will be deleted. Click
Create
to continue.
9.You will be shown the backup progress on the screen.
10.Follow the process until it completes.
11.Unplug the USB drive and label it clearly.