Acer Aspire 2000 Aspire 2000 Notebook Service Guide
Acer Aspire 2000 Manual
 |
View all Acer Aspire 2000 manuals
Add to My Manuals
Save this manual to your list of manuals |
Acer Aspire 2000 manual content summary:
- Acer Aspire 2000 | Aspire 2000 Notebook Service Guide - Page 1
Aspire 2000 Service Guide Service guide files and updates are available on the ACER/CSD web; for more information, please refer to http://csd.acer.com.tw Service CD P/N.: VD.A20V5.001 PRINTED IN TAIWAN - Acer Aspire 2000 | Aspire 2000 Notebook Service Guide - Page 2
Revision History Please refer to the table below for the updates made on Aspire 2000 service guide. Date Chapter Updates II - Acer Aspire 2000 | Aspire 2000 Notebook Service Guide - Page 3
purpose. Any Acer Incorporated software described in this manual is sold or licensed "as is". Should the programs prove defective following their purchase, the buyer (and not Acer Incorporated, its distributor, or its dealer) assumes the entire cost of all necessary servicing, repair, and any - Acer Aspire 2000 | Aspire 2000 Notebook Service Guide - Page 4
Conventions The following conventions are used in this manual: SCREEN MESSAGES Denotes actual messages that appear on screen. NOTE WARNING CAUTION IMPORTANT Gives bits and pieces of additional information related to the current topic. Alerts you to any damage that might result from - Acer Aspire 2000 | Aspire 2000 Notebook Service Guide - Page 5
in the printed Service Guide. For ACER-AUTHORIZED SERVICE PROVIDERS, your Acer office may have a DIFFERENT part number code to those given in the FRU list of this printed Service Guide. You MUST use the list provided by your regional Acer office to order FRU parts for repair and service of customer - Acer Aspire 2000 | Aspire 2000 Notebook Service Guide - Page 6
51 Disassemble the Battery and HDD 53 Disassemble the Wireless 53 Disassemble the RAM and ODD 53 Disassemble the Middle Cover Board 54 Disassemble the Keyboard 54 Disassemble the LCD 55 Disassemble the MDC and RAM 55 Disassemble the Upper Case 55 Disassemble the Main Unit(Touchpad, Bluetooth - Acer Aspire 2000 | Aspire 2000 Notebook Service Guide - Page 7
62 External CD-ROM Drive Check 62 Keyboard or Auxiliary Input Device Check 63 Memory Check 63 Power System Check 63 Touchpad Check 65 Display Check 65 Sound Check 66 Insyde MobilePro BIOS POST Beep code and POST Messages 67 Index of Symptom-to-FRU Error Message 69 Intermittent Problems 73 - Acer Aspire 2000 | Aspire 2000 Notebook Service Guide - Page 8
! Intel® Pentium M processor at 1.4 ~ 1.7 GHz or higher ! Intel 855PM + Intel ICH4-M ! PC2700 DDR SDRAM, Maximum memory up to 2GB (with two 1024MB SO-DIMM when available) ! Internal slot-in optical drive ! High-capacity, Enhanced-IDE hard disk ! Li-Ion main battery pack ! Power management system - Acer Aspire 2000 | Aspire 2000 Notebook Service Guide - Page 9
! One RJ-45 network jack ! 4-1 Card Reader ! One DC-in jack for AC adapter ! One ECP/EPP-compliant parallel port ! One external monitor port ! One headphone/speaker/line-out jack (3.5mm mini jack) ! One microphone/line-in jack (3.5mm mini jack) ! One S-video-out (NTSC/PAL) port ! Three Universal - Acer Aspire 2000 | Aspire 2000 Notebook Service Guide - Page 10
AGP BUS H_A#(3..31) PSB 400MHz H_D#(0..63) Intel ODEM RevB MCH-M uFCBGA-593 Memory BUS(DDR) 2.5V DDR- 200/266/333 DDR-SO-DIMM X2 BANK 0, 1, BUS MDC & BT Conn AC-LINK Mini-PCI slot Primary IDE ATA-100 HDD Connector Secondary IDE ATA-100 CDROM Connector Power OK CKT. Power On/Off - Acer Aspire 2000 | Aspire 2000 Notebook Service Guide - Page 11
Board Layout Top View Rear View 4 Chapter 1 - Acer Aspire 2000 | Aspire 2000 Notebook Service Guide - Page 12
CONN. JP19 JP20 JP21 JP22 JP23 JP25 JP28 JP30 JP32 JP34 JP35 JP9 U12 U8 ITEM DESCRIPTION L-SPK CONN. T/P CONN. KB CONN. SO-DIMM1 CONN. CD-ROM CONN. HDD CONN. MINI-PCI CONN. SO-DIMM CONN. CARDREADER CONN. SUBWOOFER CONN. BLUETOOTH CONN. CPU NORTH BRIDGE SOUTH BRIDGE Chapter 1 5 - Acer Aspire 2000 | Aspire 2000 Notebook Service Guide - Page 13
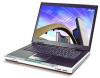
Outlook View A general introduction of ports allow you to connect peripheral devices, as you would with a desktop PC. Open View # Item Description 1 Display Wide screen display provides visual output. 2 Launch keys 4 buttons that can be programmed to start frequently used applications. 3 - Acer Aspire 2000 | Aspire 2000 Notebook Service Guide - Page 14
Jack Connects an external microphone for audio input 3 4 in 1 Card Reader Supports MS/MMC/SD/SM kinds of memory sticks 4 Latch Locks and releases the lid 5 Bluetooth Button Stares (optional) Bluetooth functionality 6 Wireless Button Turns an optional internal wireless device on or off - Acer Aspire 2000 | Aspire 2000 Notebook Service Guide - Page 15
1 Status Indicator LEDs that turn on and off to show the status of the computers. It's function and components. 2 Arcade Multimedia button 3 Console Display Panel control display 4 Stop Button Stop the Arcade application 5 Media Contrl Button Multimedia Button 8 Chapter 1 - Acer Aspire 2000 | Aspire 2000 Notebook Service Guide - Page 16
Left Panel # Item Description 1 PC Card Slot The slot supports a standard Type II PC card (PCMCIA or CardBus). 2 PC card eject button Press the eject button to remove a PC card from the PC card slot. 3 Eject Button Ejecting a Disc 4 Slot Loading Support an optical disc. Chapter 1 9 - Acer Aspire 2000 | Aspire 2000 Notebook Service Guide - Page 17
Right Panel # Item Description 1 Infrared Port Interfaces with infrared devices (e.g., infrared printer, IR-aware computer) 2 DC-in Jack Connect the AC adapter 3 Kensington lock slot For attaching a security connector. 4 Ventilation Hole Enables the computer to stay cool, even after - Acer Aspire 2000 | Aspire 2000 Notebook Service Guide - Page 18
Rear Panel # 1 2 3,4,8 5 6 7 9 Item Description S-Video Connects to a television or display device with S-video input. External display port Connects an external (VGA) display monitor. USB Ports Three USB2.0 ports for connecting USB devices. Network Jack Connects the computer to an - Acer Aspire 2000 | Aspire 2000 Notebook Service Guide - Page 19
4 Battery Pack 5 Sub-Woofer Description Slot for adding mini-PCI cards Removable cover provides access to the computer's hard drive. Removable cover provides access to the memory slots for upgrading the computer's memory. The computer's removable battery. Speaker to output base sound 12 - Acer Aspire 2000 | Aspire 2000 Notebook Service Guide - Page 20
of the palm rest area. These indicators show the status of the computer and its componetns. The three indicators located above the keyboard provide the following status information: Icon Description Caps Lock activity Num Lock activiy Scroll Lock activity NOTE: The keypad lock must be turned - Acer Aspire 2000 | Aspire 2000 Notebook Service Guide - Page 21
! Steady green --Power on ! Flashing oragne --Standby mode ! Orange --Hibernation mode ! Lights to Indicate when the hard disc drive is reading or writing data. Battery mode Bluetooth mode ! Blue -- fully charged ! Flashing orange -- being charged ! Orange -- low on power ! Lights to indicate that - Acer Aspire 2000 | Aspire 2000 Notebook Service Guide - Page 22
Keyboard The keyboard features full-size keys with an embedded keypad, separated cursor keys, two Windows keys, and twelve function keyboard. When Num Lock is on, the embedded numeric keyboard can be used. Toggle on and off by pressing the Fn+tkeys simultaneously. When Scroll Lock is on, the screen - Acer Aspire 2000 | Aspire 2000 Notebook Service Guide - Page 23
Embedded Keypad The embedded keypad functions like a desktop numeric keypad. It is indicated by small are possible: Desired Access Number keys on embedded keypad Cursor-control keys on embedded keypad Main keyboard keys Num Lock On Type numbers using embedded keypad in the normal way. Hold down - Acer Aspire 2000 | Aspire 2000 Notebook Service Guide - Page 24
Activates the next Taskbar button) + E (Opens the My Computer window) + F1 (opens Help and Support) + F (opens the Find: All Files dialog box) Application key + M (minimizes all windows) j + Windows logo key + M (undoes the minimize all windows action) + R (opens the Run dialog box) This key has - Acer Aspire 2000 | Aspire 2000 Notebook Service Guide - Page 25
by the computer (function available if supported by operating system). Puts the computer in Sleep mode. Switches display output between the display screen, external monitor ( if connected) and both the display screen and external monitor. Turns the display screen backlight off to save power. Press - Acer Aspire 2000 | Aspire 2000 Notebook Service Guide - Page 26
Euro key Your computer supports the new Euro currency character. First, hold down the Alt Gr key, and then press the Euro key. Chapter 1 19 - Acer Aspire 2000 | Aspire 2000 Notebook Service Guide - Page 27
Touchpad The build-in touchpad is a PS/2 compatible pointing device that senses movement on its surface. The cursor responds to your finger movements on the touchpad. In addition, the two click buttons provide the same functionality as a computer mouse, while the scroll key enables easy up and down - Acer Aspire 2000 | Aspire 2000 Notebook Service Guide - Page 28
the surface of the touchpad dry and clean. The touchpad is sensitive to your finger movements: the lighter the touch, the better the response. Tapping hard will not increase the touchpad's responsiveness. Chapter 1 21 - Acer Aspire 2000 | Aspire 2000 Notebook Service Guide - Page 29
Launch Keys Located at the top of the keyboard are four buttons, in addition to the power button. These buttons are launch keys can be set by the user. To set the launch keys, run the Acer Launch Manager. # Email Web browser P1 P2 Description Launches your email application. Launches your Internet - Acer Aspire 2000 | Aspire 2000 Notebook Service Guide - Page 30
Specification Intel Mobile Pentium M processor at 1.4~1.7 GHz or higher uFCPGA package Support automatic selection of power supply voltage 1.05V BIOS Item BIOS vendor BIOS Version BIOS ROM type BIOS ROM size BIOS package Bupported protocols BIOS password control Specification Insyde Insyde - Acer Aspire 2000 | Aspire 2000 Notebook Service Guide - Page 31
Bluethooth Interface Item Data modem data baud rate (bps) Supports modem/bluetooth protocol Modem connector type Modem connector location Specification 56K V.90 for MDC / Bluetooth 1.1 standard for BT modem RJ11 Rear side Hard Disk Drive Interface Item Vendor & Model Name Toshiba 20G MK2023 GAS - Acer Aspire 2000 | Aspire 2000 Notebook Service Guide - Page 32
95G/4.7G), DVD-RAM (2.6G/4.7G), DVD-RW CD: CD-Audio, CD-ROM(mode 1 and mode 2), CD-ROM XA ( mode2, form 1 and form 2), CD-I ( Ready) CD-I ( Bridge) CD-WO CD-RW Photo CD Video CD Enhanced Music CD CD-TEXT Load: The disc can be loaded semi-automatically ( To load the disc in the drive, it is needed - Acer Aspire 2000 | Aspire 2000 Notebook Service Guide - Page 33
Compatibility Mixed sound source CD 48 KHz No Yes / 2 Video Interface Item Video vendor Video name Chip voltage Supports ZV (Zoomed Video) port ATI M9+X Core/1.5V No Specification Video Resolution Mode (for both LCD Disable/Auto (BIOS or operating system chooses configuration) by BIOS setup Note: - Acer Aspire 2000 | Aspire 2000 Notebook Service Guide - Page 34
ENE CB1410 CardBus Type II One type-II Left panel No ZV support Yes Specification System Board Major Chips Item System core logic Super I/O controller Audio controller Video controller Hard disk drive controller Keyboard controller RTC Controller Intel 855PM and ICH4-M SMSC 47N227, LPC interface - Acer Aspire 2000 | Aspire 2000 Notebook Service Guide - Page 35
TS: Detector Battery Pin 5: EC_SMD1: N/A Pin 6: EC_SMC1: SMbus CLOCK Pin 7: GND> EC_SMD1=SMbus DATA Pin8: GND> Battery Ground Power Pin LCD Inverter Specification . One signal is named DAC_BRIG, which limits current to meet LCD lamp current specification. Another one is named PWM, which adjusts - Acer Aspire 2000 | Aspire 2000 Notebook Service Guide - Page 36
Electrical Characteristics No Paramete . r Symbol 1 Input voltage NV_PW R Min. 9 2 Input Iin -- current 3 Lamp IL 3.0 current 4 Lamp IL 2.7 current 4 Frequenc F 45 y 5 Output Pout -- power 6 Efficiency η 80% 7 Starting Vs voltage 1600 8 Starting Tvs 1 time 9 - Acer Aspire 2000 | Aspire 2000 Notebook Service Guide - Page 37
No Paramete . r Symbol 15 Turn off Voff voltage (Low side) Min. -- Typ. -- Max. 150Vp -p Unit V Comment PWM=30% 16 Voltage Trise -- -- 300us us PWM=30% Rise time (Low side) 17 Voltage Tfall -- -- 300us us PWM=30% fall time (Low side) NOTE: *1. The inverter can work - Acer Aspire 2000 | Aspire 2000 Notebook Service Guide - Page 38
) TFT WSXGA+ (1650* 1050) Supports colors Optical Specification Brightness control Contrast control Suspend/Standby control Electrical Specification Supply voltage for LCD display (V) Supply voltage for LCD backlight (Vrms) 262K keyboard hotkey No Yes 3.3 650 262K keyboard hotkey No Yes 3.3 690 - Acer Aspire 2000 | Aspire 2000 Notebook Service Guide - Page 39
25V (OVP) Short circuit protection Output can be shorted without damage, and auto recovery Electrostatic discharge (ESD) 15kV (at air discharge) 8kV (at contact discharge) Dielectric completely. Individual devices such as the CPU and hard disk may be power managed in this state. Chapter 1 - Acer Aspire 2000 | Aspire 2000 Notebook Service Guide - Page 40
Down PCMCIA Suspend Audio Power Down Hard Disk Power Down Super I/O Power 1.3G Mechanical Specification Item Dimensions Weight I/O Ports Drive Bays Material Indicators Switch Specification 330mm (W) x 273mm 94V0 Power, Media activity, Battery charge, Wireless/Bluetooth communication, Caps lock, Pad - Acer Aspire 2000 | Aspire 2000 Notebook Service Guide - Page 41
controller Motherboard resources Motherboard resources Motherboard resources Motherboard resources Motherboard resources Motherboard resources Motherboard resources Motherboard resources System timer Motherboard resources Motherboard resources Standard 101/102-Key or Microsoft Natural PS/2 Keyboard - Acer Aspire 2000 | Aspire 2000 Notebook Service Guide - Page 42
Function Primary IDE Channel Motherboard resources ISAPNP Read Data Port Motherboard resources ECP Printer Port (LTP1 Controller - 24C2 Motherboard resources Intel(R) Motherboard resources ENE CB1410 Cardbus Controller Function(Hardware) SystemTimer Standard 101/102-Key or Microsoft Natural PS/2 Keyboard - Acer Aspire 2000 | Aspire 2000 Notebook Service Guide - Page 43
RTL8139/810x Family Fast Ethernet NIC VIA OHCI Compliant IEEE 1394 Host Controller Function(Hardware) ECP Printer Port (LPT1) SMC IrCC - Fast Infrared Port Direct memory access controller 36 Chapter 1 - Acer Aspire 2000 | Aspire 2000 Notebook Service Guide - Page 44
refer to Chapter 4 Troubleshooting when problem arises. To activate the BIOS Utility, press m during POST (when "Press to enter Setup" message is prompted on the bottom of screen). The setup screen displays BIOS as follows: Function Screen Main Advanced Security Boot Exit Item Display system - Acer Aspire 2000 | Aspire 2000 Notebook Service Guide - Page 45
2003 5:40:09 Boot Exit ----Devices Product Name = Aspire 2000 Manufacture Name = Acer System BIOS Version = VGA BIOS Version = -----System CPU = Intel® Pentium ® CPU speed = 1400Mhz Internal Hard Disk = HITACHI_DK23EA-40-(PM) HDD Serial Number = 8D4648 DVD/CD-Rom Drive = UJDA740 DVD/CDROM-(SM - Acer Aspire 2000 | Aspire 2000 Notebook Service Guide - Page 46
Memory Parameter Base Extended VGA BIOS Version Description This field reports the base memory size of system. This field reports the extended memory size of the system. This field reports the VGA BIOS version of system. Chapter 2 39 - Acer Aspire 2000 | Aspire 2000 Notebook Service Guide - Page 47
this is selected, brightness of the LCD will be reduced for power saving when adaptor has been removed from the system. When this is not selected, brightness of the LCD will remain the same after adaptor has been removed from the system. When this is selected, Boot from LAN feature is enabled. When - Acer Aspire 2000 | Aspire 2000 Notebook Service Guide - Page 48
\ FIR Ports LPT Port ԩLegacy USB Security May 20, 2003 5:40:09 Boot Exit FIR Ports -----FIR I/O settings--- -Mode Setting for IRDA- ( ) Disabled or Disable. The table below describes the parameters in the screen. Settings in boldface are the default and suggested parameter settings. - Acer Aspire 2000 | Aspire 2000 Notebook Service Guide - Page 49
SCU Main Advanced \ Security May 20, 2003 5:40:09 Boot Exit FIR Ports FIR Ports -----Port Address Port Definition------------ ( Enable or Disable. The table below describes the parameters in the screen. Settings in boldface are the default and suggested parameter settings. Port - Acer Aspire 2000 | Aspire 2000 Notebook Service Guide - Page 50
Legacy Universal Serial Bus. Enabled: Enable support for Legacy Universal Serial Bus. Insyde Software SCU Main Advanced \ FIR Ports Security May 20, 2003 5:40:09 Boot Exit LPT Port ԩLegacy USB ( ) DMA1 Legacy USB keyboard Floppy Disk USB Mouse Support for Enable or Disable Chapter - Acer Aspire 2000 | Aspire 2000 Notebook Service Guide - Page 51
in this screen. Settings in boldface are the default and suggested parameter settings. Set Supervisor/User Password If password on boot is required, BIOS Setup Utility from unauthorized access. This allows users to protect their Hard Drive being accessed by enabling HDD security to their hard drive - Acer Aspire 2000 | Aspire 2000 Notebook Service Guide - Page 52
Parameter Password on Boot Description Defines whether a password is required or not while the events defined in this group happened. The following password was used to enter setup. Allows the user to specify whether or not a password is required to boot. Option Disabled/Enabled Chapter 2 45 - Acer Aspire 2000 | Aspire 2000 Notebook Service Guide - Page 53
2003 5:40:09 Boot Boot Device Exit Boot Device ---1st Boot Device--- ( ) Hard Disk C ( ) CD-ROM Drive (Ԧ) Diskette A ( ) Network Boot ---2nd Boot Device--- (Ԧ) Hard Disk C ( ) CD-ROM Drive ( ) Diskette A ( ) Network Boot --3rd Boot Device---- ( ) Hard Disk C (Ԧ) CD-ROM Drive (ʳ ʳ ) Diskette - Acer Aspire 2000 | Aspire 2000 Notebook Service Guide - Page 54
Boot Exit Exit Saving Changes Exit Saving Changes Exit Discarding Changes Press to save the current Load Setup Default Setup parameters to CMOS RAM or Disable. The table below describes the parameters in this screen. Parameter Exit Saving Changes Exit Discarding Changes Load Setup - Acer Aspire 2000 | Aspire 2000 Notebook Service Guide - Page 55
diskette. 3. Then boot the system from the bootable diskette. The Flash utility has auto-execution function. System Diagnostic Diskette This diagnostic diskette is for the Acer Aspire 2000 series notebook machine. However, system diagnostic utility is not ready as service CD released. Acer HQ CSD - Acer Aspire 2000 | Aspire 2000 Notebook Service Guide - Page 56
procedures on how to disassemble the notebook computer for maintenance and troubleshooting. To disassemble the computer, you need . During the disassembly process, group the screws with the corresponding components to avoid mismatch when putting back the components. When you remove the stripe cover - Acer Aspire 2000 | Aspire 2000 Notebook Service Guide - Page 57
General Information Before You Begin Before proceeding with the disassembly procedure, make sure that you do the following: 1. Turn off the power to the system and all peripherals. 2. Unplug the AC adapter and all power and signal cables from the system. 3. Remove the battery pack. 50 Chapter 3 - Acer Aspire 2000 | Aspire 2000 Notebook Service Guide - Page 58
Assy S ystem RAM Door Assy HDD Door S u b -As s y Bx2 K e yb o a rd Cx2 K/B Support Plate Assy Px4 Ix2 HDD Door Bus-Assuy Hx1 Strip Cover Door Assy Kx4 HDD Cover HDD M odule Dx13 Logic Assy LCD Coaxial C a b le LCD Panel Hinge L Assy Hinge R Assy LCD Cover Sub-Assy LCD Bezel S u b -As - Acer Aspire 2000 | Aspire 2000 Notebook Service Guide - Page 59
Item E F G H I J K L M N O P Description M2.5x14 M2.0x4 M2.5x4 M2.5x14 M2.5x10 M2.5x5 M3.0x3 M2.0x3 2.5x4 M2.5x4 M2.5x5 M2.5x4 52 Chapter 3 - Acer Aspire 2000 | Aspire 2000 Notebook Service Guide - Page 60
HDD 1. Release the battery lock and slide the battery latch. 2. Then remove the battery pack. 3. Remove the two screws to release the hard drive door.Then take it away. Disassemble the Wireless 1. Remove the one screw to release the mini door, and take it away. 2. Disconnect the two wireless cables - Acer Aspire 2000 | Aspire 2000 Notebook Service Guide - Page 61
cover board from cover. Disassemble the Keyboard 1. Remove the screws on each side. 2. Pull up both sides of the latches to disconnect the FFC from the mainboard. 3. Remove the screws on each side to release the keyboard bracket. 4. Then take the keyboard supporter bracket from the system. 54 - Acer Aspire 2000 | Aspire 2000 Notebook Service Guide - Page 62
the one screw from the LVDS board. 2. Pull the LCD coaxial board and the cable from the system. 3. Remove the two screws from the hinge on each side to release the LCD panel. 4. Pull the entire LCD module from the system. Disassemble the MDC and RAM 1. Remove the two screws to release the MDC board - Acer Aspire 2000 | Aspire 2000 Notebook Service Guide - Page 63
Disassemble the Main Unit ( Touchpad, Bluetooth and LCM Board) 1. Remove the seven screws to release the touchpad supporter bracket. 2. Disconnect the touchpad FPC connector. 3. Disconnect the cable as highlights. 4. Then detach the touchpad bracket from the position. 5. Detach the touchpad PC from - Acer Aspire 2000 | Aspire 2000 Notebook Service Guide - Page 64
Disassemble the Main Unit ( Speakers, Fan, Thermal and CPU) 1. Remove the one screw to release the up hinge saddle. 2. Remove the three screws to release the bottom hinge saddle. 3. Detach the right hinge saddle from the case. 4. Remove the two screws to release the right hinge saddle. 5. Take the - Acer Aspire 2000 | Aspire 2000 Notebook Service Guide - Page 65
VGA module from the mainboard. 3. Separate the VGA bracket and the VGA board. 4. Remove the ground screw to release the card reader. 5. Disconnect the card reader cables on each side. 6. Disconnect the sub-woofer cable 7. Remove the screws on each side to release the sub-woofer. 8. Detach the sub - Acer Aspire 2000 | Aspire 2000 Notebook Service Guide - Page 66
to release the inverter board. 6. Disconnect the LCD coaxial cables. 7. Remove the four screws to release the left LCD bracket. 8. Take the left LCD bracket from the panel. 9. Remove the four screws to release the right LCD bracket. 10. Take the right LCD bracket from the panel. Chapter 3 59 - Acer Aspire 2000 | Aspire 2000 Notebook Service Guide - Page 67
the two screws to separate the ODD drive. 2. Detach the ODD bracket. 3. Detach the ODD door. Disassemble the HDD Module 1. Remove the two screws on each side. 2. Separate the hard disk top cover and take the hard drive from the carrier. 3. Remove the hard disk connector from the rear position. 60 - Acer Aspire 2000 | Aspire 2000 Notebook Service Guide - Page 68
him or her to enter the password. verify with the customer that Wndows XP is installed on the hard disk. Operating systems that were not preinstalled by Acer can cause malfunction. make sure all optional equipment is removed from the computer. make sure the floppy disk is empty. 5. Use the following - Acer Aspire 2000 | Aspire 2000 Notebook Service Guide - Page 69
that the appropriate driver has been installed on the computer for the CD/DVD drive. 3. Boot from the diagnostics diskette and start the diagnostics program 4. See if CD-ROM Test is passed when the program runs to CD-ROM/DVD-ROM Test. 5. Follow the instructions in the message window. If an error - Acer Aspire 2000 | Aspire 2000 Notebook Service Guide - Page 70
.com to download the shareware "BurnIn Test V.3.0". You may test the memory with this program under Window XP environment. NOTE: Make sure that the DIMM is fully installed into the connector. A loose connection can cause an error. Power System Check To verify the symptom of the problem, power on - Acer Aspire 2000 | Aspire 2000 Notebook Service Guide - Page 71
power adapter cable. See the Problems". ! If the voltage is not correct, go to the next step. NOTE: An audible noise from the power adapter does not always indicate a defect. 3. If the DC-IN indicator does not light up, check the power cord of the power adapter for correct continuity and installation - Acer Aspire 2000 | Aspire 2000 Notebook Service Guide - Page 72
in the screen for Current Power Source and Total Battery Power Remaining are correct. 3. Repeat the steps 1 and 2, for both battery and adapter. 4. This helps you identify first the problem is on recharging or discharging. From Hardware: 1. Power off the computer. 2. Remove the battery pack and - Acer Aspire 2000 | Aspire 2000 Notebook Service Guide - Page 73
3. Follow the disassembling steps in Chapter 3. Esure the speaker cable is firmly connected to the main board. If the speaker is still a malfunction, go on next step. 4. If the speakers do not sound properly, the speakers may be defective or damaged. Replace the speakers. If the problem still occurs - Acer Aspire 2000 | Aspire 2000 Notebook Service Guide - Page 74
error messages that the BIOS displays on the screen and the error symptoms classified by function. NOTE: Most of the error messages occur during POST. Some of them display information about a hardware device, e.g., the amount of memory installed. Others may indicate a problem with a device, such as - Acer Aspire 2000 | Aspire 2000 Notebook Service Guide - Page 75
not generate system interrupts correctly. "UNEXPECTED AMOUNT OF MEMORY - RUN SCU" The system memory size does not match with the CMOS record. MACHINE IS LOCKED - TURN The keyboard operation is locked. KEY" "BOOT SECTOR 0 HAS CHANGED" The boot sector of the hard disk has been changed, probably - Acer Aspire 2000 | Aspire 2000 Notebook Service Guide - Page 76
BIOS Utility to execute "Load Setup Defaults" on Exit screen, then reboot system. Reconnect the LCD connectors. Keyboard (if contrast and brightness function key doesn't work). LCD cable LCD inverter LCD Main board Reconnect the LCD connector LCD cable LCD inverter LCD Main board LCD inverter LCD - Acer Aspire 2000 | Aspire 2000 Notebook Service Guide - Page 77
system doesn't resume from hibernation mode. Hard disk connection board Hard disk drive Main board The system doesn't resume from standby LCD cover switch mode after opening the LCD. Main board Battery fuel gauge in Windows doesn't go higher than 90%. Remove battery pack and let it cool for - Acer Aspire 2000 | Aspire 2000 Notebook Service Guide - Page 78
then reboot system. Reconnect hard disk/CD-ROM/diskette drives. See if there is an error beep. If there is an erro beep, then change main board. Power off. Then check if RAM CPU BIOS are wellconnected. Press Fn+F5 three times slowly LCD FPC LCD inverter LCD USB device cable is firmly connected into - Acer Aspire 2000 | Aspire 2000 Notebook Service Guide - Page 79
Modem-Related Symptoms Symptom / Error Internal modem does not work correctly. Action in Sequence Ensure the telephone cable is firmly plugged into the telephone wall socket and the modem port of the computer. Modem phone port is secured to the main board. modem - Acer Aspire 2000 | Aspire 2000 Notebook Service Guide - Page 80
discharge, or software errors. FRU replacement should be considered only when a recurring problem exists. When analyzing an intermittent problem, do the following: 1. Run the diagnostic test for several times to isolate the problem. 2. If no error is detected, do not replace any FRU. 3. If any - Acer Aspire 2000 | Aspire 2000 Notebook Service Guide - Page 81
are supported by the computer. 1. Power-off the computer. 2. Visually check them for damage. If any problems are found, replace the FRU. 3. Remove or disconnect all of the following devices: ! Non-Acer devices ! Printer, mouse, and other external devices ! Battery pack ! Hard disk drive ! DIMM ! CD - Acer Aspire 2000 | Aspire 2000 Notebook Service Guide - Page 82
Connector USB Connector Modem Connector PCMCIA Connector AGP Connector FAN Connector MDC Connector System Connector R-SPK Connector L-SPK Connector T/P Connector KB Connector SO-DIMM1 Connector CD-ROM Connector HDD Connector Cardreader Connector Chapter 5 75 - Acer Aspire 2000 | Aspire 2000 Notebook Service Guide - Page 83
JP34 JP35 U9 U12 U8 PCN2 PCN3 Item Description Subwoofer Connector Bluetooth Connector CPU North Bridge South Bridge AC Jack Battery Connector 76 Chapter 5 - Acer Aspire 2000 | Aspire 2000 Notebook Service Guide - Page 84
Bottom View JP28 JP30 Item Description Mini-PCI Connector SO-DIMM0 Connector Chapter 5 77 - Acer Aspire 2000 | Aspire 2000 Notebook Service Guide - Page 85
2000, yet the LCD modules are different in two model. Please note that WHEN ORDERING FRU PARTS, you should check the most up-to-date information available on your regional web or channel. For whatever reasons a part number change is made, it will not be noted on the printed Service Guide. For ACER - Acer Aspire 2000 | Aspire 2000 Notebook Service Guide - Page 86
Exploded Diagram 78 Chapter 6 - Acer Aspire 2000 | Aspire 2000 Notebook Service Guide - Page 87
Chapter 6 79 - Acer Aspire 2000 | Aspire 2000 Notebook Service Guide - Page 88
Picture ADAPTER N/A BATTERY BOARDS No. Part Name/ Description Part Number ADAPTER W/LED -DELTA 65W ADP-65B ADAPTER W/O LED - LITEON 65W PA1650-02CR AP.A1401.001 AP.T3503.001 BATTERY LI-ION 12 CELLS-PANASONIC GC86503PAJ0 BATTERY LI-ION 12 CELLS-SAMSUNG GC86508SMG0 BT.A1405.001 BT.A1401.001 - Acer Aspire 2000 | Aspire 2000 Notebook Service Guide - Page 89
Picture No. Part Name/ Description LCD INVERTER Part Number 19.A14V5.001 CABLES CARD READER WIRE SET 50.A14V5.001 LAUNCH BOARD CABLE MODEM CABLE 50.A14V5.002 50.A14V.003 TOUCHPAD FFC CABLE BLUETOOTH CABLE 50.A14V5.004 50.A14V5.005 LCD COAXIAL CABLE-15.4" WXGA LCD COAXIAL CABLE-15.4" - Acer Aspire 2000 | Aspire 2000 Notebook Service Guide - Page 90
COVER/CASE/BRACKET ASSSEMBLY MIDDLE COVER Part Number 42.A14V5.001 LOWER COVER 60.A14V5.001 N/A DIMM COVER UPPER CASE ASSY 42.A14V5.002 60.A14V5.002 MINI PCI COVER 42.A14V5.003 TOUCHPAD BRACKET W/FPC 33.A14V5.001 K/B SUPPORT PLATE VGA BRACKET LCD PANEL WITH LOGO 33.A14V5.002 - Acer Aspire 2000 | Aspire 2000 Notebook Service Guide - Page 91
Picture No. Part Name/ Description LCD BEZEL Part Number 42.A14V5.008 LCD BRACKET L 33.A14V5.006 LCD BRACKET R 33.A14V5.007 N/A COMMUNICATION MODULE PCMCIA SLOT ANTENNA ASSY 22.A14V5.001 50.A14V5.006 CPU/PROCESSOR N/A DVD/CDRW DRIVE N/A INTEL PENTIUM-M(BANIAS)1.4GHZ 1M/400MHZ FSB INTEL - Acer Aspire 2000 | Aspire 2000 Notebook Service Guide - Page 92
Picture No. Part Name/ Description DVD/CDRW COMBO BEZEL FOR HLDS(TRAY) Part Number 42.A14V5.004 OPTICAL DEVICE BRACKET 33.A14V5.004 HDD/HARD DISK DRIVE N/A HDD 2.5" HGST MORAGA IC25N030ATMR04-0 08K0910 30G 4200RPM HDD 2.5" HGST MORAGA IC25N040ATMR04-0 08K0633 30G 4200RPM HDD 2.5" HGST MORAGA - Acer Aspire 2000 | Aspire 2000 Notebook Service Guide - Page 93
Part Number 33.A14V5.005 HDD CONNECTOR 20.A14V5.001 KEYBOARD LCD MODULE LCD Chapter 6 KEYBOARD ARABIC KEYBOARD BELGIUM KEYBOARD CHINESE KEYBOARD CZECH KEYBOARD DANISH KEYBOARD FRENCH KEYBOARD GERMAN KEYBOARD ITALIAN KEYBOARD NORWEGIAN KEYBOARD PORTUGUESE KEYBOARD SPANISH KEYBOARD SWEDEN KEYBOARD - Acer Aspire 2000 | Aspire 2000 Notebook Service Guide - Page 94
No. Part Name/ Description LCD 15.4" WXGA SAMSUNG (LTN154I1-L02) LCD 15.4" WXGA CMO (LTN154X1-L02) LCD 15.4" WXGA LG (LP154W01-A3) LCD 15.4" WXGA CPT (CLAA154WA01) LCD 15.4" WSXGA LG (LP154W02-A1) LCD 15.4" WSXGA SAMSUNG (LTN154P1-L02) MAINBOARD W/PCMCIA SLOT, W/O CPU, MEMORY Part Number LK - Acer Aspire 2000 | Aspire 2000 Notebook Service Guide - Page 95
Picture POINTING DEVICE No. Part Name/ Description TOUCHPAD Part Number 56.A14V5.001 READER SPEAKER 4 IN 1 CARD READER BOARD 55.A14V5.006 SPEAKER SET (R&L) - VECO 6K.A14V5.001 SUB-WOOFER-FORTUNE 23.A14V5.002 MISCELLANEOUS N/A SCREW LIST N/A LCD RUBBER LCD SCREW PAD RUBBER FOOT SCREW,JIM - Acer Aspire 2000 | Aspire 2000 Notebook Service Guide - Page 96
Configuration Aspire 2000 series Model Number AS2001WLCi CPU PM1.4G AS2001WLMi PM1.4G AS2003WLMi PM1.6G 2001WLCi PM1.4G 2001WLMi PM1.4G 2002WLCi PM1.5G 2002WLMi PM1.5G 2003WLMi PM1.6G LCD 15.4 WXGA 15.4 WXGA 15.4 WXGA 15.4 WXGA 15.4 WXGA 15.4 WXGA 15.4 WXGA 15.4 WXGA Memory 1x256M - Acer Aspire 2000 | Aspire 2000 Notebook Service Guide - Page 97
tested under Windows XP Home environment. Refer to the following lists for components, adapter cards, and peripherals which have passed these tests. Regarding configuration, combination and test procedures, please refer to the Aspire 2000 Compatibility Test. Report released by the Acer Mobile System - Acer Aspire 2000 | Aspire 2000 Notebook Service Guide - Page 98
Microsoft Windows XP (Home) Environment Test Component LCD CABLE 15.4" WSXGA +LCD CABLE 86-Key Keyboard Inverter Trackpad 30GB HDD ATA-100 (4200RPM) 40GB HDD ATA-100 (4200RPM) 60GB HDD ATA-100 (4200RPM) 80GB HDD ATA-100 (4200RPM) 60GB HDD ATA-100(5400RPM) 80GB HDD ATA-100(5400RPM) DVD/RW (COMBO) DVD - Acer Aspire 2000 | Aspire 2000 Notebook Service Guide - Page 99
Component 802.11b (Mini-PCI) Modem(MDC) Windows XP Home Windows XP Pro Slimline 65W AC Adapter Manufacturer Intel Centrion Ambit Microsoft Microsoft LITEON Delta Specifications WM3B2100NA_MOW T60M283 w/SP1 w/SP1 PA-1650-02CR ADP-65B Appendix B 91 - Acer Aspire 2000 | Aspire 2000 Notebook Service Guide - Page 100
valuable support resources whenever you need them. In the Technical Information section you can download information on all of Acer's Notebook, Desktop and Server models including: ! Service guides for all models ! User's manuals ! Training materials ! Bios updates ! Software utilities ! Spare parts - Acer Aspire 2000 | Aspire 2000 Notebook Service Guide - Page 101
93 Appendix C