Acer Aspire V3-772G User Manual
Acer Aspire V3-772G Manual
 |
View all Acer Aspire V3-772G manuals
Add to My Manuals
Save this manual to your list of manuals |
Acer Aspire V3-772G manual content summary:
- Acer Aspire V3-772G | User Manual - Page 1
Aspire V3-772 User's Manual - Acer Aspire V3-772G | User Manual - Page 2
Aspire V3-772 User's Manual This revision: 03/2013 AcerCloud frees you to enjoy your digital life anytime, anywhere! This computer comes with AcerCloud pre-installed. AcerCloud is a personal cloud service website: www.acer.com/acercloud Model number: Serial number: Date of purchase: Place of purchase - Acer Aspire V3-772G | User Manual - Page 3
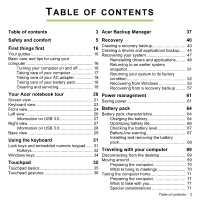
its factory Taking care of your AC adapter 18 condition 52 Taking care of your battery pack 18 Recovering from Windows 53 Cleaning and servicing 18 Recovering from a recovery backup ........ 57 Your Acer notebook tour 20 Power management 61 Screen view 21 Saving power 61 Keyboard - Acer Aspire V3-772G | User Manual - Page 4
75 Using passwords 75 Entering passwords 76 Why is Bluetooth 79 How do I check for Windows Adding a Bluetooth device 81 updates 98 HDMI 85 Where can I get more information?.......... 98 Troubleshooting 99 Universal Serial Bus (USB) 86 Troubleshooting tips 99 Error messages 99 BIOS - Acer Aspire V3-772G | User Manual - Page 5
for future reference. Follow all warnings and instructions marked on the product. Turning the product off before cleaning Unplug this product from the wall outlet before cleaning. Do not use liquid cleaners or aerosol cleaners. Use a damp cloth for cleaning. WARNINGS Accessing the power cord Be sure - Acer Aspire V3-772G | User Manual - Page 6
on power cord requirements, contact an authorized reseller or service provider. Protecting your hearing - Warning! Permanent hearing volume for prolonged periods of time. To protect your hearing, follow these instructions. - Increase the volume gradually until you can hear clearly and comfortably. - Acer Aspire V3-772G | User Manual - Page 7
. Save the dummies for use when no cards are in the slots. General - Do reliable operation of the product and to protect it from overheating. These openings must not be blocked or covered. To avoid damage of internal components and to prevent battery leakage, do not place the product on a vibrating - Acer Aspire V3-772G | User Manual - Page 8
performance, indicating a need for service. - The product does not operate normally after following the operating instructions. - Note: Adjust only those restore the product to normal condition. Guidelines for safe battery usage This computer uses a Lithium-ion battery. Do not use it in a humid, wet - Acer Aspire V3-772G | User Manual - Page 9
. Please recycle when possible. Do not dispose as household waste. - Note: Please refer to www.acer.com for battery shipping documents. Replacing the battery pack The computer uses lithium batteries. Replace the battery with the same type as that which came bundled with your product. Use of another - Acer Aspire V3-772G | User Manual - Page 10
when using your laptop under the following conditions. These devices may include, but are not limited to: wireless LAN (WLAN), Bluetooth and/or 3G to the ear with the hearing aid. Do not place credit cards or other magnetic storage media near the device, because information 10 - Safety and comfort - Acer Aspire V3-772G | User Manual - Page 11
a potentially explosive atmosphere and obey all signs and instructions. Potentially explosive atmospheres include areas where you would normally Switch off the device at refueling points such as near gas pumps at service stations. Observe restrictions on the use of radio equipment in fuel depots, - Acer Aspire V3-772G | User Manual - Page 12
dial out through your mobile phone or other telephone call system. DISPOSAL INSTRUCTIONS Do not throw this electronic device into the trash when discarding. by the U.S. Environmental Protection Agency. Acer is committed to offering products and services worldwide that help customers save money, - Acer Aspire V3-772G | User Manual - Page 13
to your computer. Acer ENERGY STAR qualified products: - produce less heat and reduce cooling loads in warmer climates. - automatically go into "display Sleep" and "computer Sleep" mode after 10 and 30 minutes of inactivity, respectively. - wake from "Sleep" mode if the keyboard is pressed or mouse - Acer Aspire V3-772G | User Manual - Page 14
shrugging your shoulders. - Install the external display, keyboard and mouse properly and within comfortable reach. - room lighting, poorly focused screens, very small typefaces and low your eyes from drying out. Display - Keep your display clean. - Keep your head at a higher level than the - Acer Aspire V3-772G | User Manual - Page 15
- Eliminate glare and reflections by: placing your display in such a way that the side faces the window or any light source, minimizing room light by using drapes, shades or blinds, using a task light, changing the display's viewing angle, using a glare-reduction filter, - Acer Aspire V3-772G | User Manual - Page 16
an Acer notebook your choice for meeting your mobile computing needs. Your guides To help you use your Acer notebook, we have designed a set of guides: First 's Manual. This guide contains detailed information on such subjects as system utilities, data recovery, expansion options and troubleshooting. - Acer Aspire V3-772G | User Manual - Page 17
on top of the computer. • Do not slam the computer display when you close it. • Never place the computer on uneven surfaces. First things first - 17 - Acer Aspire V3-772G | User Manual - Page 18
. Turn the power off before removing or replacing batteries. • Do not tamper with batteries. Keep them away from children. • Dispose of used batteries according to local regulations. Recycle if possible. Cleaning and servicing When cleaning the computer, follow these steps: 1. Turn off the - Acer Aspire V3-772G | User Manual - Page 19
2. Disconnect the AC adapter. 3. Use a soft, moist cloth. Do not use liquid or aerosol cleaners. If either of the following occurs: • The computer has been dropped or the body has been damaged; • The computer does not operate normally Please refer to "Frequently asked questions" on page 88. First - Acer Aspire V3-772G | User Manual - Page 20
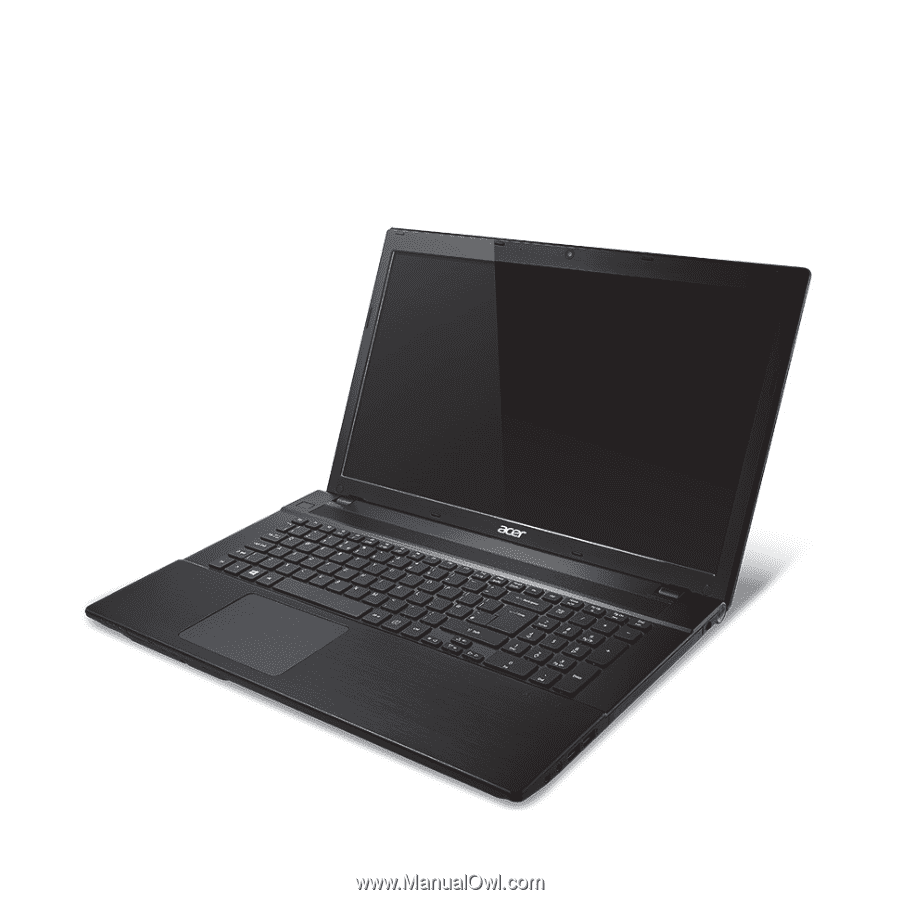
YOUR ACER NOTEBOOK TOUR After setting up your computer as illustrated in the setup poster, let us show you around your new Acer notebook. Aspire V3-772 20 - Your Acer notebook tour - Acer Aspire V3-772G | User Manual - Page 21
Screen view 1 4 2 3 # Icon Item 1 Microphone 2 Screen Description Internal microphone for sound recording. Also called Liquid-Crystal Display (LCD), displays computer output. Your Acer notebook tour - 21 - Acer Aspire V3-772G | User Manual - Page 22
Description For entering data into your computer. Caution: Do not use a keyboard protector or similar cover as the keyboard includes ventilation intakes for cooling. Web camera for video communication. A light next to the Webcam indicates that the webcam is active. 22 - Your Acer notebook tour - Acer Aspire V3-772G | User Manual - Page 23
Keyboard view 4 1 2 3 # Icon Item Description 1 Power button Turns the computer on and off. For entering data into your computer. Caution: Do not use a keyboard 2 Keyboard protector or similar cover as the keyboard includes ventilation intakes for cooling. Your Acer notebook tour - 23 - Acer Aspire V3-772G | User Manual - Page 24
the touchpad surface to perform a left click. Press down firmly on the lower right corner to perform a right click. Deliver stereo audio output. 24 - Your Acer notebook tour - Acer Aspire V3-772G | User Manual - Page 25
is amber when the battery is charging. Fully charged: The light is blue. Indicates when the hard disk drive is active. Indicates the computer's wireless connectivity device status. Accepts one Secure Digital (SD or SDHC) card. Note: Push to remove/install the card. Your Acer notebook tour - 25 - Acer Aspire V3-772G | User Manual - Page 26
Icon 1 2 Item Kensington lock slot 1 2 Ventilation and cooling fan 3 Ethernet (RJ-45) port 4 External display (VGA) port Connects to an Ethernet 10/100/1000based network. Connects to a display device (e.g., external monitor, LCD projector). Supports high-definition digital video - Acer Aspire V3-772G | User Manual - Page 27
jack Microphone jack USB ports 3 456 7 Description Connects to audio line-out devices (e.g., speakers, headphones). Accepts inputs from external microphones. Connect to USB devices. Your Acer notebook tour - 27 - Acer Aspire V3-772G | User Manual - Page 28
ports are blue. • Compatible with USB 3.0 and earlier devices. • For optimal performance, use USB 3.0-certified devices. • Defined by the USB 3.0 specification (SuperSpeed USB). 28 - Your Acer notebook tour - Acer Aspire V3-772G | User Manual - Page 29
Base view 4 1 3 2 # Icon 1 2 3 4 Item Battery release latch Memory compartment Ventilation and cooling fan Battery bay Description Releases the battery for removal. Insert a suitable tool and slide to release. Houses the computer's main memory. Allows the computer to stay cool. Do not cover - Acer Aspire V3-772G | User Manual - Page 30
and for dual-core computers, use the lower slot in each bank. Visit www.acer.com to find your specific model and refer to the detailed specifications to determine which processor your computer uses. If you're unsure, please contact an authorized Acer service center. 30 - Your Acer notebook tour - Acer Aspire V3-772G | User Manual - Page 31
has full-sized keys and an embedded numeric keypad, separate cursor, lock, Windows, function and special keys. Lock keys and embedded numeric keypad The keyboard has three lock keys which you can toggle on and off. Lock key Caps Lock Scroll Lock + Description When Caps Lock is - Acer Aspire V3-772G | User Manual - Page 32
Shift> while using cursor-control keys. Hold while typing Main keyboard keys letters on embedded keypad. Num Lock off Hold while using hotkeys or key combinations to access most of the computer's controls like screen brightness and volume output. To activate hotkeys, press and hold the - Acer Aspire V3-772G | User Manual - Page 33
the speakers on and off. + < > + < > + < > Brightness up Increases the screen brightness. Brightness down Decreases the screen brightness. Volume up Increases the sound volume. + < > + + file. Jump to the next media file. Using the keyboard - 33 - Acer Aspire V3-772G | User Manual - Page 34
keys • The keyboard has two keys that perform Windows-specific functions. Key Description Pressed alone it returns to the Start screen. Windows key It can also be used with other keys for special functions, please check Windows Help. Application key This key has the same effect as clicking - Acer Aspire V3-772G | User Manual - Page 35
(or 'cursor') on the screen. As you slide your finger across the touchpad, the cursor will follow this movement. Note: The touchpad is sensitive to finger movement; the lighter the touch, the better the response. Please keep the touchpad and your fingers dry and clean. The cursor is controlled by - Acer Aspire V3-772G | User Manual - Page 36
then slide a second finger across the touchpad to select all items in an area. Touchpad gestures Windows 8 and many applications support touchpad gestures that use one or more fingers. Note: Support for touchpad gestures depends on the active application. This allows you to control applications with - Acer Aspire V3-772G | User Manual - Page 37
functions to automatically recur as often as your like. To start Acer Backup Manager in Windows 8, simply start typing "Backup Manager". Alternatively, in Desktop mode, select Acer Backup Manager. This opens the Welcome screen; from this screen you can select the type of backup you'd like to create - Acer Aspire V3-772G | User Manual - Page 38
files from your old computer to your new one or any other computer with Acer Backup Manager. • Clear out / Restore Files: Remove seldom used files to select the files or drive you want to back up, then follow the onscreen instructions: 1. Select the content you want to back up. The less content you - Acer Aspire V3-772G | User Manual - Page 39
If you wish to change your settings at any time, go to the Acer Backup Manager profiles screen. To get there from the Acer Backup Manager welcome screen, click Launch My Backup Profiles. From here you can edit or delete existing backup profiles. Acer Backup Manager - 39 - Acer Aspire V3-772G | User Manual - Page 40
trouble with your computer, and the frequently asked questions (see page 88) do not help, you can 'recover' your computer - i.e. return it to an earlier state. This section describes the recovery tools available on your computer. Acer provides Acer Windows and all factory-loaded software and drivers. - Acer Aspire V3-772G | User Manual - Page 41
Note: Make sure you have a USB drive with a capacity of at least 16 GB. 1. From Start, type 'Recovery' and then click Acer Recovery Management in the list of apps. 2. Click Create Factory Default Backup. The Recovery Drive window Recovery - 41 - Acer Aspire V3-772G | User Manual - Page 42
opens. Make sure Copy contents from the recovery partition to the recovery drive is selected. This provides the most complete and safest recovery backup. 3. Plug in the USB drive then click Next. 42 - Recovery - Acer Aspire V3-772G | User Manual - Page 43
enough capacity before continuing. The recovery backup requires at least 16 GB of storage 4. You will be shown the backup progress on the screen. 5. Follow the process until it completes. 6. After creating the recovery backup, you can choose to delete the recovery information on your computer. If - Acer Aspire V3-772G | User Manual - Page 44
. Important: Write a unique, descriptive label on the backup, such as 'Windows Recovery Backup'. Make sure you keep the backup in a safe place that you will remember. Creating a drivers and applications backup To create a Drivers and Applications Backup, that contains the factoryloaded software and - Acer Aspire V3-772G | User Manual - Page 45
your computer features a DVD recorder, one or more blank recordable DVDs. 1. From Start, type 'Recovery' and then click Acer Recovery Management in the list of apps. 2. Click Create Drivers and Applications Backup. Plug in the USB drive or insert a blank DVD into the optical drive, then click Next - Acer Aspire V3-772G | User Manual - Page 46
• If you are using a USB drive, make sure your USB drive has enough capacity before continuing. • If using DVDs, it will also show the number of blank, recordable discs you will need to complete the recovery discs. Make sure that you have the required number of identical, blank discs. 46 - Recovery - Acer Aspire V3-772G | User Manual - Page 47
progress on the screen. 4. Follow drivers. To reinstall software and drivers that were pre-installed at the factory, see "Reinstalling drivers and applications" on page 48. For instructions on reinstalling software and drivers that were not preinstalled, see that product's documentation or support - Acer Aspire V3-772G | User Manual - Page 48
" on page 52. 4. Reset your system to its factory condition. If nothing else has solved the problem and you want to reset your system to factory condition, see "Returning your system to its factory condition" on page 52. Reinstalling drivers and applications As a troubleshooting step, you may need - Acer Aspire V3-772G | User Manual - Page 49
If you are reinstalling using Windows and the recovery information stored on your computer: • From Start, type 'Recovery' and then click Acer Recovery Management in the list of apps. • Click Reinstall Drivers or Applications. Recovery - 49 - Acer Aspire V3-772G | User Manual - Page 50
see the Contents section of the Acer Resource Center. • Click the install icon for the item you want to install, then follow the onscreen instructions to complete the installation. Repeat this step for each item you want to reinstall. If you are reinstalling from a Drivers and Applications Backup on - Acer Aspire V3-772G | User Manual - Page 51
section of the Acer Resource Center. toresolve software problems, you can return to one of these restore points to get your system running again. Windows automatically creates an additional restore point each day, and also each time you install software or device drivers. - Acer Aspire V3-772G | User Manual - Page 52
If your computer experiences problems that are not recoverable by other methods, you may need to reinstall everything to return your system to its factory condition. You can recover from either your hard drive or the recovery backup you have created. • If you can still run Windows and have not - Acer Aspire V3-772G | User Manual - Page 53
' and then click Acer Recovery Management in the list of apps. Two options are available, Restore Factory Settings (Reset my PC) or Customized Restore (Refresh my PC). Restore Factory Settings deletes everything on your hard drive, then reinstalls Windows and all software and drivers that were pre - Acer Aspire V3-772G | User Manual - Page 54
Restore Factory Settings with Acer Recovery Management 1. Click Restore Factory Settings. Caution: 'Restore Factory Settings' will erase all files on your hard drive. 2. The Reset your PC window opens. Images for reference only. 3. Click Next, then choose how to erase your files: 54 - Recovery - Acer Aspire V3-772G | User Manual - Page 55
during startup. A screen appears asking you to choose the keyboard layout. 2. Several options are now presented. Click Troubleshoot. 3. Click either Refresh your PC or Reset your PC. Note: "Refresh your PC" enables you to restore your computer to the default factory condition with files intact - Acer Aspire V3-772G | User Manual - Page 56
Customized Restore with Acer Recovery Management 1. Click Customized Restore (Retain User Data). 2. The Refresh your PC window opens. 3. Click Next, then Refresh. 4. The recovery process begins by restarting your computer, then continues by copying files to your hard drive. This process takes - Acer Aspire V3-772G | User Manual - Page 57
computer does not have a built-in keyboard, make sure a keyboard is attached to your computer. 3. of BIOS your computer uses, select Save Changes and Exit or Exit Saving Changes and press Enter. Select Enter. b. Windows starts from the recovery backup instead of the normal startup process. 6. Select - Acer Aspire V3-772G | User Manual - Page 58
of hard-to-resolve software problems, you can return to one of these restore points to get your system running again. b. Click Reset your PC to start the reset process: Reset your PC deletes everything on your hard drive, then reinstalls Windows and all software and drivers that were pre-installed - Acer Aspire V3-772G | User Manual - Page 59
hard drive. 1. The Reset your PC window opens. Images for reference select No. b. To completely restore your computer to Factory Settings, select Yes. 5. Choose how to erase clean the drive completely cleans the drive after each file is erased, so no files can be viewed after the recovery. Cleaning - Acer Aspire V3-772G | User Manual - Page 60
more secure as old files are completely removed. 6. Click Reset. 7. After the recovery has finished, you can start using your computer by repeating the first-start process. Refresh your PC from the recovery backup 1. The Refresh your PC window opens. 2. Click Next. 3. Select the operating system to - Acer Aspire V3-772G | User Manual - Page 61
one or more of the following devices: keyboard, mouse, hard disk, peripherals connected . These checks will slowly drain your computer's battery. If you prefer to reduce your computer's power Acer Instant On it will also be turned off. Your computer will also not start if it receives an instruction - Acer Aspire V3-772G | User Manual - Page 62
1. Open the Desktop. 2. Click Power Options in the Notification area. 3. Select More Power Options. 4. Select Choose what the power buttons do. 5. To access Shutdown Settings, select Change settings that are currently unavailable. 62 - Power management - Acer Aspire V3-772G | User Manual - Page 63
6. Scroll down and disable Turn on fast startup. 7. Select Save changes. Power management - 63 - Acer Aspire V3-772G | User Manual - Page 64
pack that gives you long use between charges. Battery pack characteristics The battery is recharged whenever you connect the computer to the AC adapter. Your computer supports charge-in-use, enabling you to recharge the battery while you continue to operate the computer. However, recharging with - Acer Aspire V3-772G | User Manual - Page 65
to temperatures below 0° C (32° F) or above 45° C (113° F). Extreme temperatures may adversely affect the battery pack. By following the battery conditioning process you condition your battery to accept the maximum possible charge. Failure to follow this procedure will prevent you from obtaining the - Acer Aspire V3-772G | User Manual - Page 66
), as they can continue to draw power. • Store the battery pack in a cool, dry place. The recommended temperature is 10° C (50° F) to 30° C (86° F). Higher temperatures cause the battery to self-discharge faster. • Excessive recharging decreases the battery life. • Look after your AC adapter and - Acer Aspire V3-772G | User Manual - Page 67
files. 3. Resume work. Turn off the computer if you want to recharge the battery rapidly. 1. Save all necessary files. An extra fully 2. Close all applications. charged battery 3. Turn off the computer. pack is available. 4. Replace the battery pack. 5. Turn on the computer and resume work - Acer Aspire V3-772G | User Manual - Page 68
enter first, and that the top surface of the battery is facing up. 2. Slide the battery into the battery bay and gently push until the battery locks in place. To remove a battery pack: 1. Slide the battery release latch to release the battery. 2. Pull the battery from the battery bay. 68 - Battery - Acer Aspire V3-772G | User Manual - Page 69
discs from optical drive(s). 3. Shut down the computer. 4. Close the display cover. 5. Disconnect the cord from the AC adapter. 6. Disconnect the keyboard, pointing device, printer, external monitor and other external devices. 7. Disconnect the Kensington lock if you are using one to secure the - Acer Aspire V3-772G | User Manual - Page 70
you may choose to shut down the computer: Press the Windows key + , click Settings > Power then click Shut Down power button. Note: The computer may enter Hibernation or Deep Sleep mode after being an electrical outlet, reduce the drain on the battery by putting the computer in Sleep mode. Press - Acer Aspire V3-772G | User Manual - Page 71
it if it should fall. Caution: Avoid packing items next to the top cover of the computer. Pressure against the top cover can damage the screen. What to take with you Unless you have some items at home, take the following items with you: • AC adapter and power cord. • The printed - Acer Aspire V3-772G | User Manual - Page 72
screen for condensation before turning on the computer. If the temperature change is greater than 10° , you might also want to add an external keyboard, monitor or mouse. Traveling with the computer When were taking it home. Make sure that the battery in the computer is charged. Airport security may - Acer Aspire V3-772G | User Manual - Page 73
What to take with you Take the following items with you: • AC adapter • Spare, fully-charged battery pack(s) • Additional printer driver files if you plan to use another printer Special considerations In addition to the guidelines for taking the computer home, follow these guidelines to protect - Acer Aspire V3-772G | User Manual - Page 74
• Power cords that are appropriate for the country to which you are traveling. • Spare, fully-charged battery packs. • Additional printer driver files if you plan to use another printer. • Proof of purchase, in case you need to show it to customs officials. • International Travelers Warranty - Acer Aspire V3-772G | User Manual - Page 75
of protection for your computer and data: • Supervisor Password prevents unauthorized entry into the BIOS utility. Once set, you must enter this password to gain access to the BIOS utility. See "BIOS utility" on page 87. • User Password secures your computer against unauthorized use. Combine the - Acer Aspire V3-772G | User Manual - Page 76
please get in touch with your dealer or an authorized service center. Entering passwords When a password is set, a password prompt appears in the center of the display screen. • When the Supervisor Password is set, a prompt appears when you the BIOS utility. • Type the Supervisor Password and press - Acer Aspire V3-772G | User Manual - Page 77
computer's wireless connection is turned on by default. Windows will detect and display a list of available networks during setup. Select your network and enter the password if required. Otherwise, open Internet Explorer and follow the instructions. Please refer to your ISP or router documentation - Acer Aspire V3-772G | User Manual - Page 78
to a high speed DSL internet connection. The ISP (Internet Service Provider) you have chosen normally supplies a modem/router with the subscription to their services. Read carefully the documentation supplied with your Access point/router for detailed setup instructions. 78 - Wireless networks - Acer Aspire V3-772G | User Manual - Page 79
tablets, wireless headsets, and keyboards. To use Bluetooth, you must ensure the following: 1. Bluetooth is enabled on both separate Bluetooth dongle plugged into the computer's USB port (if no internal Bluetooth adapter is available). Note: Please check your devices owner's manual to determine - Acer Aspire V3-772G | User Manual - Page 80
Then, from the notification area, click the Bluetooth icon, and select Open Settings. Select the Allow Bluetooth devices to find this computer check box, click Apply, and then click OK. 80 - Using a Bluetooth connection - Acer Aspire V3-772G | User Manual - Page 81
ready for you to add Bluetooth devices. To disable your computer's Bluetooth adapter, do the following: 1. Press the Windows key + and then type Wireless. 2. In the results, click on Wireless. 3. Click the toggle under Bluetooth to enable/disable it. Adding a Bluetooth device Every new device - Acer Aspire V3-772G | User Manual - Page 82
Click on the device you want to add. A code displays on your computer, which should match the code displayed on your device. Select Yes. Then, accept the pairing from your device. 82 - Using a Bluetooth connection - Acer Aspire V3-772G | User Manual - Page 83
Bluetooth technology require both devices to enter a PIN. In the case of one of the devices not having any inputs (as in a headset), the passcode is hardcoded into the device (usually "0000" or "1234"). Consult your device's user manual > Connect to operation window. Using a Bluetooth connection - 83 - Acer Aspire V3-772G | User Manual - Page 84
The operation window enables you to play music and audio from your device through your computer, send files to your device and change Bluetooth settings. 84 - Using a Bluetooth connection - Acer Aspire V3-772G | User Manual - Page 85
HDMI HDMI (High-Definition Multimedia Interface) is an industry-supported, uncompressed, all-digital audio/video interface. HDMI provides an interface between any compatible digital audio/video source, such as a set-top box, DVD player, and A/V - Acer Aspire V3-772G | User Manual - Page 86
UNIVERSAL SERIAL BUS (USB) The USB port is a high-speed serial bus which allows you to connect USB peripherals without taking up system resources. 86 - Universal Serial Bus (USB) - Acer Aspire V3-772G | User Manual - Page 87
. However, if you encounter configuration problems, you may need to run it. To activate the BIOS utility, press during the BIOS utility, activate the BIOS utility, then select Boot from the categories listed at the top of the screen. Setting passwords To set a password on boot, activate the BIOS - Acer Aspire V3-772G | User Manual - Page 88
are using on the battery, it may be low and unable to power the computer. Connect the AC adapter to recharge the battery pack. • Make > to restart the system. Nothing appears on the screen The computer's power management system automatically blanks the screen to save power. Press any key to turn the - Acer Aspire V3-772G | User Manual - Page 89
Check the following: • The volume may be muted. In Windows, look at the volume control (speaker) icon on the taskbar keyboard does not respond Try attaching an external keyboard to a USB port on the computer. If it works, contact your dealer or an authorized service center as the internal keyboard - Acer Aspire V3-772G | User Manual - Page 90
hand, especially when you travel, to receive the benefits from our support centers. Place your proof-ofpurchase in the flap located inside the front have an Acer-authorized ITW service site, you can still get in contact with our offices worldwide. Please visit www.acer.com. 90 - - Acer Aspire V3-772G | User Manual - Page 91
you call Please have the following information available when you call Acer for online service, and please be at your computer when you call. With your support, we can reduce the amount of time a call takes and help solve your problems efficiently. If there are error messages or beeps reported by - Acer Aspire V3-772G | User Manual - Page 92
the charms? Move the cursor to the upper or lower right-hand corner of the screen to access the charms, or press the Windows key + . How do I get to Start? Press the Windows key on the keyboard; press the Windows key + and click Start; or move the cursor to the lower left-hand corner of - Acer Aspire V3-772G | User Manual - Page 93
Store apps will automatically use the whole screen and don't require closing in the traditional way. Windows Store apps will be displayed on Start using live-tiles. What are 'live tiles?' Live tiles are similar to thumbnails of the apps that will be updated with new content whenever you're connected - Acer Aspire V3-772G | User Manual - Page 94
computer. If your account has a password set, you will need to enter the password to continue. How do I personalize my computer? You can To change the background, press the Windows key + and click Settings > Change PC settings > Personalize. Click Start screen at the top of the page and - Acer Aspire V3-772G | User Manual - Page 95
resolution? From Start, start typing 'Control Panel' to open Search and display the results; click Control Panel > Adjust screen resolution. I want to use Windows in the way that I'm used to - give me my desktop back! From Start click the Desktop tile to see a traditional desktop. You can pin apps - Acer Aspire V3-772G | User Manual - Page 96
it. Select Pin to taskbar from the menu that appears at the bottom of the screen. How do I install apps? You can download Windows Store apps from Store. You will need to have a Microsoft ID to purchase and download apps from Store. I can't find apps like Notepad and Paint! Where are they? From Start - Acer Aspire V3-772G | User Manual - Page 97
account and want to get one, press the Windows key + and click Settings > Change PC settings > Users > Switch to a Microsoft account, and follow the onscreen instructions. How do I add a favorite to Internet Explorer? Internet Explorer 10 doesn't have traditional favorites, instead you can pin - Acer Aspire V3-772G | User Manual - Page 98
for Windows updates? Press the Windows key + and click Settings > Change PC settings > Windows Updates. Click Check for updates now. Where can I get more information? For more information please visit: • Windows 8 tutorials: www.acer.com/windows8-tutorial • Support FAQs: www.acer.com/support 98 - Acer Aspire V3-772G | User Manual - Page 99
service center for assistance. Troubleshooting tips This computer incorporates an advanced design that delivers onscreen error message reports to help you solve problems messages CMOS battery bad CMOS checksum error Corrective action Contact your dealer or an authorized service center. Contact - Acer Aspire V3-772G | User Manual - Page 100
Contact your dealer or an authorized service keyboard connected center. Keyboard interface Contact your dealer or an authorized service error center. Memory size mismatch Press (during POST) to enter the BIOS utility, then press Exit in the BIOS utility to reboot. If you still encounter - Acer Aspire V3-772G | User Manual - Page 101
REGULATIONS AND SAFETY NOTICES FCC STATEMENT This device has been tested and found to comply with the limits for a Class radio frequency energy and, if not installed and used in accordance with the instructions, may cause harmful interference to radio communications. However, there is no guarantee - Acer Aspire V3-772G | User Manual - Page 102
manufacturing techniques. Nevertheless, some pixels may occasionally misfire or appear as black or red dots. This has no effect on the recorded image and for models with wireless LAN and / or Bluetooth only. To prevent radio interference to the licensed service, this device is intended to be operated - Acer Aspire V3-772G | User Manual - Page 103
Declaration of Conformity for EU countries Hereby, Acer, declares that this computer is in compliance with the areas of France have a restricted frequency band. The worst case maximum authorized power indoors is: - 10 mW for the entire 2.4 GHz band (2400 MHz - 2483.5 MHz) - 100 mW for frequencies - Acer Aspire V3-772G | User Manual - Page 104
MHz band is permitted with an EIRP of less than 100 mW indoors and less than 10 mW outdoors: 01 Ain Orientales 02 Aisne 03 Allier 05 Hautes Alpes 08 Ardennes 09 change over time, allowing you to use your wireless LAN card in more areas within France. Please check with ART for the latest information (www.art - Acer Aspire V3-772G | User Manual - Page 105
List of national codes This equipment may be operated in the following countries: Country ISO 3166 Country 2 letter code Austria AT Malta Belgium BE Netherlands Cyprus CY Poland Czech Republic CZ Portugal Denmark DK Slovakia Estonia EE Slovenia Finland FI Spain France FR - Acer Aspire V3-772G | User Manual - Page 106
4, and RSS-210, No 4 (Dec 2000) and No 5 (Nov 2001). "To prevent radio interference to the licensed service, this device is intended to be operated indoors and away from windows to provide maximum shielding. Equipment (or its transmit antenna) that is installed outdoors is subject to licensing." Cet - Acer Aspire V3-772G | User Manual - Page 107
Bluetooth card is far below the FCC radio frequency exposure limits. Nevertheless, the computer shall be used in such a manner that the potential for human contact during normal operation is minimized as follows: 1. Users are requested to follow the RF safety instructions on wireless option devices - Acer Aspire V3-772G | User Manual - Page 108
4, and RSS-210, No 4 (Dec 2000) and No 5 (Nov 2001). "To prevent radio interference to the licensed service, this device is intended to be operated indoors and away from windows to provide maximum shielding. Equipment (or its transmit antenna) that is installed outdoors is subject to licensing." Cet - Acer Aspire V3-772G | User Manual - Page 109
The maximum allowed antenna gain for use with this device is 6 dBi in order to comply with the E.I.R.P limit for the 5.25- to 5.35 and 5.725 to 5.85 GHz frequency range in pointto-point operation. Ver.: 01.01.01 - 109
-
 1
1 -
 2
2 -
 3
3 -
 4
4 -
 5
5 -
 6
6 -
 7
7 -
8
-
9
-
10
-
11
-
12
-
13
-
14
-
15
-
16
-
17
-
18
-
19
-
20
-
21
-
22
-
23
-
24
-
25
-
26
-
27
-
28
-
29
-
30
-
31
-
32
-
33
-
34
-
35
-
36
-
37
-
38
-
39
-
40
-
41
-
42
-
43
-
44
-
45
-
46
-
47
-
48
-
49
-
50
-
51
-
52
-
53
-
54
-
55
-
56
-
57
-
58
-
59
-
60
-
61
-
62
-
63
-
64
-
65
-
66
-
67
-
68
-
69
-
70
-
71
-
72
-
73
-
74
-
75
-
76
-
77
-
78
-
79
-
80
-
81
-
82
-
83
-
84
-
85
-
86
-
87
-
88
-
89
-
90
-
91
-
92
-
93
-
94
-
95
-
96
-
97
-
98
-
99
-
100
-
101
-
102
-
103
-
104
-
105
-
106
-
107
-
108
-
109
 |
 |
Aspire V3-772
User’s Manual