Acer P238HL User Manual - Page 14
Screen position adjustment, Wall Mount kit installation
 |
View all Acer P238HL manuals
Add to My Manuals
Save this manual to your list of manuals |
Page 14 highlights
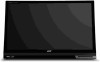
English Screen position adjustment 1 Carefully remove the monitor from its packaging. 2 Place the monitor on a stable surface in the upright position. 3 Pull the stand away from the monitor so that you can adjust the monitor tilt. The monitor can be adjusted approximately 10º or 30º to suit your preference. • The maximum tilt angle: 27°~31°. • The minimum tilt angle: 10°~14°. 27o 31o Wall Mount kit installation Wall mount items (sold separately) allow you to mount the monitor on the wall. For detailed information on installing the wall mount, see the instructions provided with the Wall Mount items. Warning! Do not install your Wall Mount Kit while your monitor is turned on. It may result in personal injury due to electric shock. 1 Purchase a VESA compatible wall bracket. 2 Locate your ideal monitor position on the wall. 3 Fix the wall bracket firmly on the wall. 4 Secure the monitor to the bracket using the 4 mount holes on the back and center of the monitor. 2 HDMI 1 HDMI 2 VGA IN AUDIO-OUT DC IN
-
 1
1 -
2
-
3
-
4
-
5
-
6
-
7
-
8
-
 9
9 -
 10
10 -
 11
11 -
 12
12 -
 13
13 -
 14
14 -
 15
15 -
 16
16 -
 17
17 -
 18
18 -
 19
19 -
20
-
21
-
22
-
23
-
24
-
25
-
26
-
27
-
28
 |
 |
