Acer Veriton 7700GX Veriton 3700G/5700G/7700G User's Guide (EN) - Page 65
Upgrading your computer, Installing additional memory - memory upgrade
 |
View all Acer Veriton 7700GX manuals
Add to My Manuals
Save this manual to your list of manuals |
Page 65 highlights
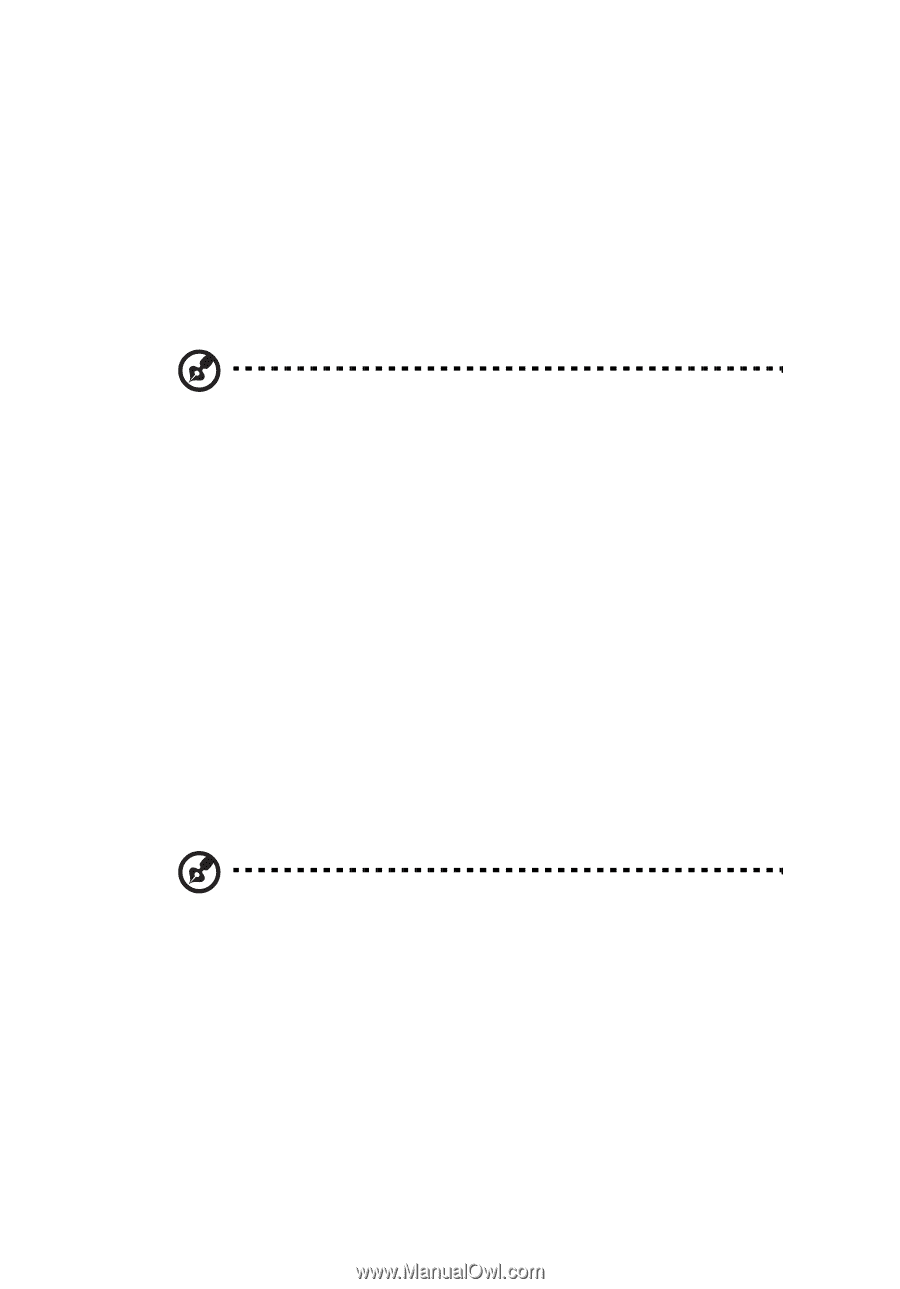
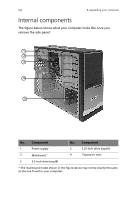
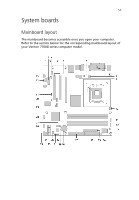
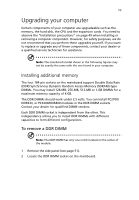
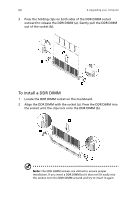
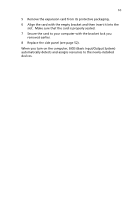
59 Upgrading your computer Certain components of your computer are upgradeable such as the memory, the hard disk, the CPU and the expansion cards. You need to observe the "Installation precautions" on page 49 when installing or removing a computer component. However, for safety purposes, we do not recommend that you perform these upgrades yourself. If you want to replace or upgrade any of these components, contact your dealer or a qualified service technician for assistance. Note: The mainboard model shown in the following figures may not be exactly the same with the one found in your computer. Installing additional memory The four 184-pin sockets on the mainboard support Double Data Rate (DDR) Synchronous Dynamic Random Access Memory (SDRAM)-type DIMMs. You may install 128-MB, 256-MB, 512-MB or 1-GB DIMMs for a maximum memory capacity of 4 GB. The DDR DIMMs should work under 2.5 volts. You can install PC2700/ DDR333, or PC3200/DDR400 modules in the DDR DIMM sockets. Contact your dealer for qualified DIMM vendors. Each DDR DIMM socket is independent from the other. This independence allows you to install DDR DIMMs with different capacities to form different configurations. To remove a DDR DIMM Note: The DDR DIMM has only one notch located on the center of the module. 1 Remove the side panel (see page 51). 2 Locate the DDR DIMM socket on the mainboard.
-
 1
1 -
2
-
3
-
4
-
5
-
6
-
7
-
8
-
9
-
10
-
11
-
12
-
13
-
14
-
15
-
16
-
17
-
18
-
19
-
20
-
21
-
22
-
23
-
24
-
25
-
26
-
27
-
28
-
29
-
30
-
31
-
32
-
33
-
34
-
35
-
36
-
37
-
38
-
39
-
40
-
41
-
42
-
43
-
44
-
45
-
46
-
47
-
48
-
49
-
50
-
51
-
52
-
53
-
54
-
55
-
56
-
57
-
58
-
59
-
 60
60 -
 61
61 -
 62
62 -
 63
63 -
 64
64 -
 65
65 -
 66
66 -
 67
67 -
 68
68 -
 69
69 -
 70
70 -
71
-
72
-
73
-
74
-
75
-
76
-
77
-
78
-
79
-
80
-
81
-
82
-
83
-
84
-
85
-
86
-
87
-
88
-
89
-
90
-
91
-
92
-
93
-
94
-
95
-
96
-
97
-
98
-
99
-
100
-
101
-
102
-
103
-
104
-
105
-
106
-
107
-
108
-
109
-
110
-
111
-
112
-
113
-
114
 |
 |