Acer Veriton M661 Veriton M661/T661/S661 Series User's Guide - EN - Page 22
Replacing the hard disk, To recon your computer - bios
 |
View all Acer Veriton M661 manuals
Add to My Manuals
Save this manual to your list of manuals |
Page 22 highlights
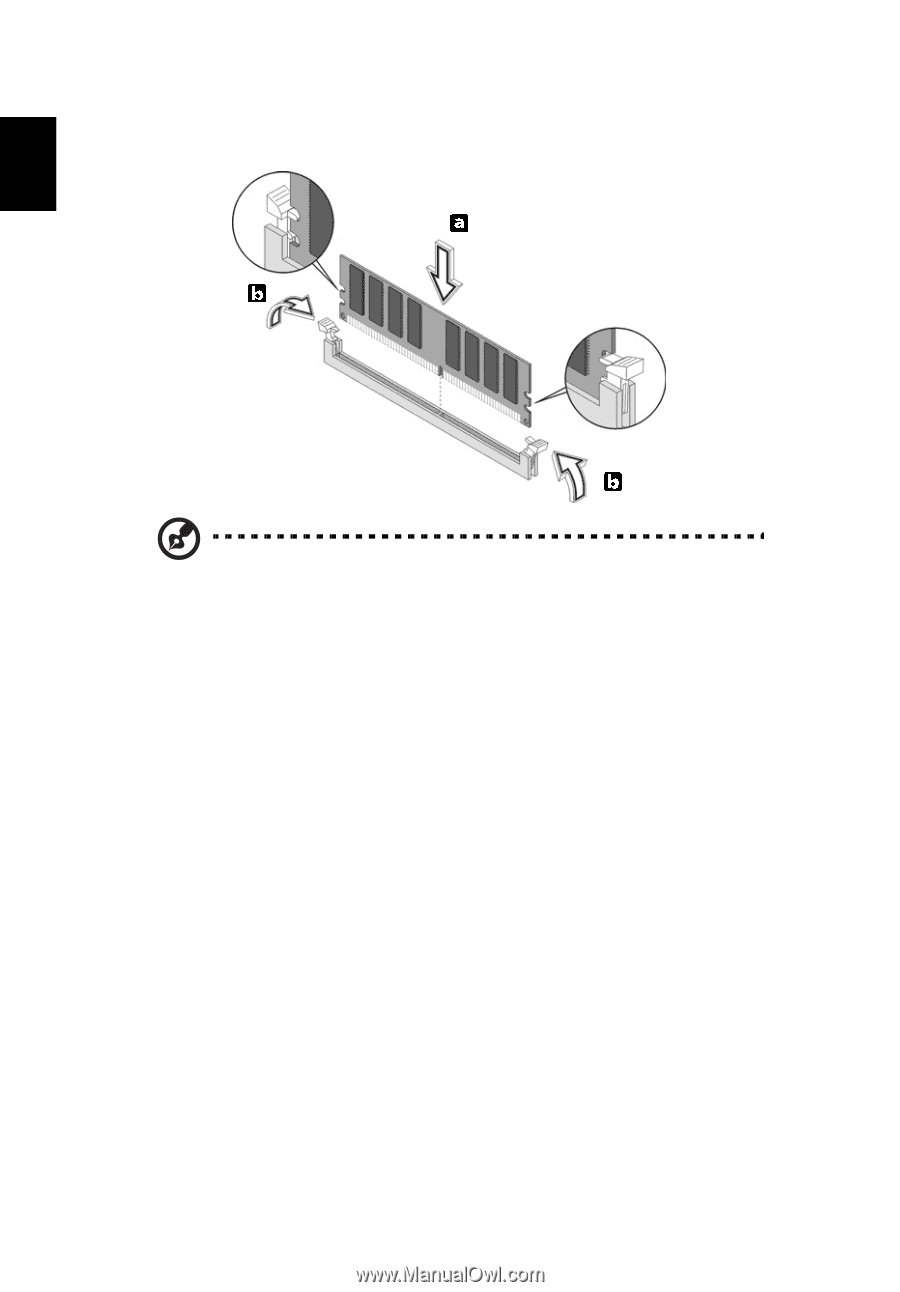
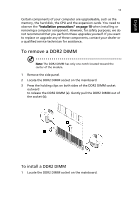
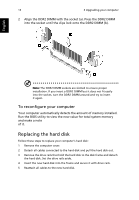
13 3 Upgrading your computer 2 Align the DDR2 DIMM with the socket (a). Press the DDR2 DIMM into the socket until the clips lock onto the DDR2 DIMM (b). English Note: The DDR2 DIMM sockets are slotted to ensure proper installation. If you insert a DDR2 DIMM but it does not fit easily into the socket, turn the DDR2 DIMM around and try to insert it again. To reconfigure your computer Your computer automatically detects the amount of memory installed. Run the BIOS utility to view the new value for total system memory and make a note of it. Replacing the hard disk Follow these steps to replace your computer's hard disk: 1 Remove the computer cover. 2 Detach all cables connected to the hard disk and pull the hard disk out. 3 Remove the drive rails that hold the hard disk to the disk frame and detach the hard disk. Set the drive rails aside. 4 Insert the new hard disk into the frame and secure it with drive rails. 5 Reattach all cables to the new hard disk.
-
 1
1 -
2
-
3
-
4
-
5
-
6
-
7
-
8
-
9
-
10
-
11
-
12
-
13
-
14
-
15
-
16
-
 17
17 -
 18
18 -
 19
19 -
 20
20 -
 21
21 -
 22
22 -
 23
23 -
 24
24 -
 25
25 -
 26
26 -
 27
27 -
28
-
29
-
30
-
31
-
32
-
33
-
34
-
35
-
36
-
37
 |
 |