Acer XF290C User Manual - Page 27
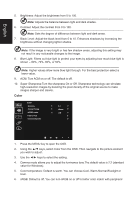
Color, Color temperature: Default is warm. You can choose Cool, Warm, Normal, Bluelight or
 |
View all Acer XF290C manuals
Add to My Manuals
Save this manual to your list of manuals |
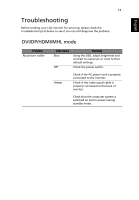
Page 27 highlights
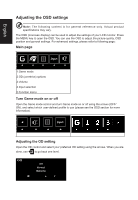
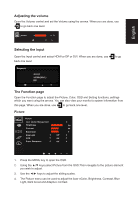
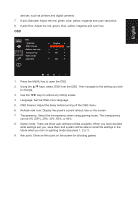
English 5. Brightness: Adjust the brightness from 0 to 100 Note: Adjusts the balance between light and dark shades. 6. Contrast: Adjust the contrast from 0 to 100 Note: Sets the degree of difference between light and dark areas. 7. Black Level: Adjust the black level from 0 to 10. Enhances shadows by increasing the brightness without changing lighter shades. Note: If the image is very bright or has few shadow areas, adjusting this setting may not result in any noticeable changes to the image. 8. Blue Light: Filters out blue light to protect your eyes by adjusting how much blue light is shown -- 80%, 70%, 60%, or 50%. Note: Higher values allow more blue light through. For the best protection select a lower value. 9. ACM: Turn ACM on or off. The default is off. 10. Super Sharpness:Turn the sharpness On or Off. Sharpness technology can simulate high-resolution images by boosting the pixel density of the original source to make images sharper and clearer. Color Color Gamma Colour Temp sRGB mode 6-axis Hue 6-axis Saturate 2.2 Warm Off 1. Press the MENU key to open the OSD. 2. Using the ▲/▼ keys, select Color from the OSD. Then navigate to the picture element you wish to adjust. 3. Use the ◄/► keys to select the setting. 4. Gamma mode allows you to adjust the luminance tone.The default value is 2.2 (standard value for Windows). 5. Color temperature: Default is warm. You can choose Cool, Warm,Normal,Bluelight or User. 6. sRGB: Default is off. You can turn sRGB on or off to better color match with peripheral
-
 1
1 -
2
-
3
-
4
-
5
-
6
-
7
-
8
-
9
-
10
-
11
-
12
-
13
-
14
-
15
-
16
-
17
-
18
-
19
-
20
-
21
-
 22
22 -
 23
23 -
 24
24 -
 25
25 -
 26
26 -
 27
27 -
 28
28 -
 29
29 -
 30
30 -
 31
31
 |
 |