Airlink APSUSB2 Quick installation guide - Page 8
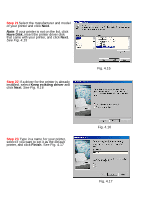
Step 8, Step 9, Step 10, Step 11, Step 12, Step 13, Step 14, Step 15 - driver
 |
View all Airlink APSUSB2 manuals
Add to My Manuals
Save this manual to your list of manuals |
Page 8 highlights
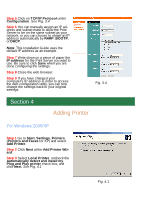
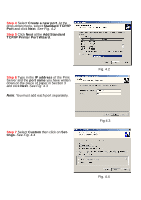
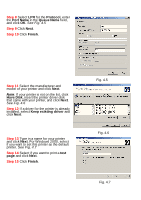
Step 8 Select LPR for the Protocol, enter the Port Name in the Queue Name field, and click OK. See Fig. 4.5 Step 9 Click Next. Step 10 Click Finish. Step 11 Select the manufacturer and model of your printer and click Next. Note: If your printer is not on the list, click Have Disk, insert the printer driver disk that came with your printer, and click Next. See Fig. 4.6 Step 12 If a driver for the printer is already installed, select Keep existing driver and click Next. Step 13 Type in a name for your printer and click Next. For Windows 2000, select if you want to set this printer as the default printer. See Fig. 4.7 Step 14 Select if you want to print a test page and click Next. Step 15 Click Finish. Fig. 4.5 Fig. 4.6 Fig. 4.7
-
 1
1 -
2
-
 3
3 -
 4
4 -
 5
5 -
 6
6 -
 7
7 -
 8
8 -
 9
9 -
 10
10 -
 11
11 -
 12
12 -
 13
13 -
14
-
15
-
16
-
17
 |
 |
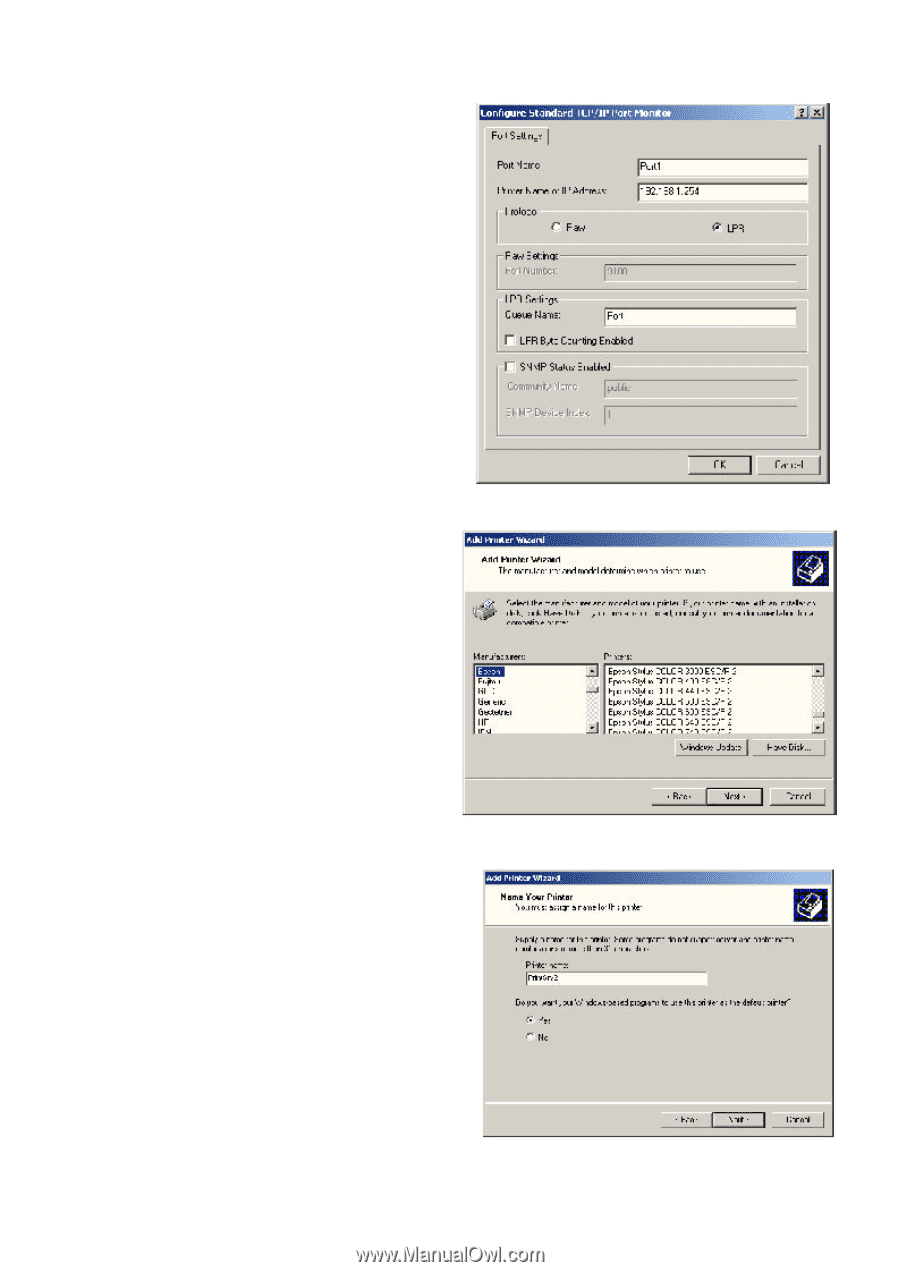
Step 8
Select
LPR
for the
Protocol
, enter
the
Port Name
in the
Queue Name
field,
and click
OK
.
See Fig. 4.5
Step 9
Click
Next
.
Step 10
Click
Finish
.
Fig. 4.5
Step 11
Select the manufacturer and
model of your printer and click
Next
.
Note
: If your printer is not on the list, click
Have Disk
, insert the printer driver disk
that came with your printer, and click
Next
.
See Fig. 4.6
Step 12
If a driver for the printer is already
installed, select
Keep existing driver
and
click
Next
.
Fig. 4.6
Step 13
Type in a name for your printer
and click
Next
. For Windows 2000, select
if you want to set this printer as the default
printer.
See Fig. 4.7
Step 14
Select if you want to print a
test
page
and click
Next
.
Step 15
Click
Finish
.
Fig. 4.7