Akai MPKMINI Quick Start Guide - Page 3
Box Contents, Software Cd, Top Panel Overview - mpk mini keyboard
 |
View all Akai MPKMINI manuals
Add to My Manuals
Save this manual to your list of manuals |
Page 3 highlights
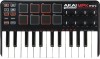
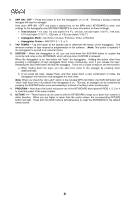
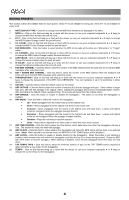
BOX CONTENTS y MPK mini y USB-mini cable y Software CD y Safety Instructions & Warranty Information SOFTWARE CD PC Users: To install the Akai Professional MPK mini Editor, open the contents of the disc, double-click Setup.exe, and follow the on-screen instructions. To open the editor, connect the MPK mini to your computer with a standard USB-mini cable (included) then double-click MPK mini Editor.exe. Mac Users: Drag the contents of the disc to an appropriate location on your hard drive. To open the editor, connect the MPK mini to your computer with a standard USB-mini cable (included) then double-click the MPK mini Editor. Note: Always connect the MPK mini to your computer before opening the editor. TOP PANEL OVERVIEW 44 65 2 89 10 11 2 12 12 22 22 2 1 3333 2 3333 7 1. USB CONNECTION - Plug a standard USB-mini cable into this outlet and into the USB port of your computer. The computer's USB port will provide power to the MPK mini. 2. 8 VELOCITY-SENSITIVE PADS - The pads can be used to trigger drum hits or other samples in your software. The pads are velocity-sensitive, which makes them very responsive and intuitive to play. 3. 8 ASSIGNABLE KNOBS - Each 270-degree knob can be used to send continuous control data to a desktop audio workstation or external MIDI device. 4. PAD BANK 1 / 2 - When either of these buttons are active, the MPK mini's pads will send MIDI Note messages (from Pad Bank 1 or 2). These messages are assignable in the included software editor. 5. PROG CHNG - When this button is active, the MPK mini's pads will send Program Change messages. These messages are assignable in the included software editor. 6. CC - When this button is active, the MPK mini's pads will send out MIDI Control Change messages. These messages are assignable in the included software editor. 7. KEYBOARD - This 25-note keyboard is velocity-sensitive and, in conjunction with the OCTAVE -/+ buttons, can control a nine-octave range. The ARP ON / OFF and PROGRAM buttons allow some of its keys to access additional commands (see below). 1
-
 1
1 -
 2
2 -
 3
3 -
 4
4 -
 5
5 -
 6
6 -
 7
7 -
 8
8 -
 9
9 -
10
 |
 |