Alesis Elevate 3 Quick Start Guide - Page 4
Front Panel, Speaker Placement, Speaker Height - studio monitors
 |
View all Alesis Elevate 3 manuals
Add to My Manuals
Save this manual to your list of manuals |
Page 4 highlights
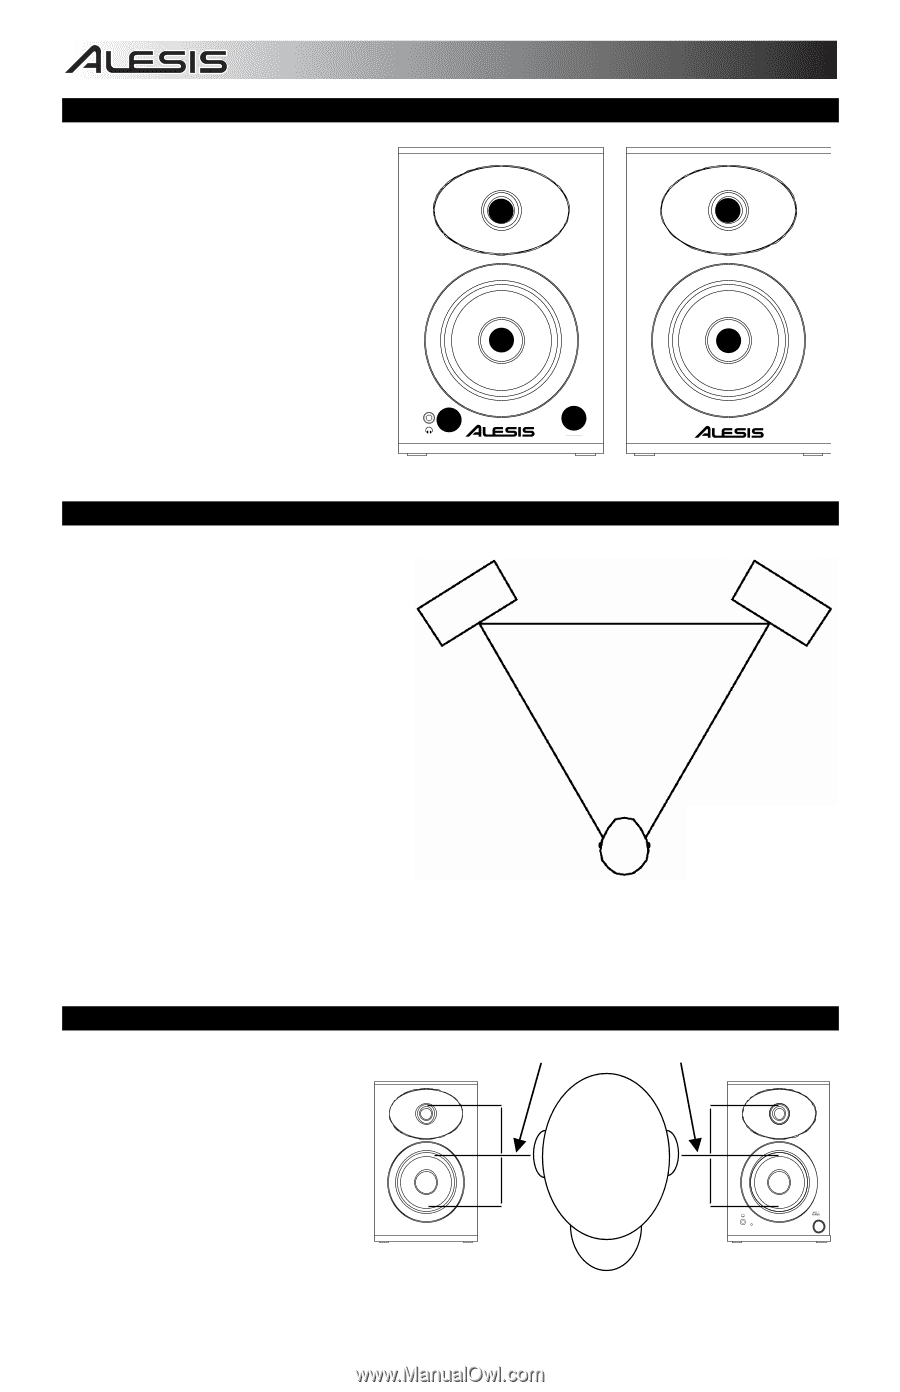
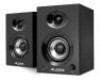
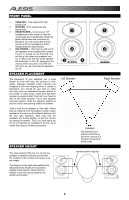
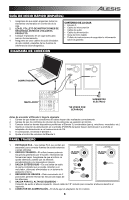
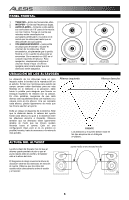
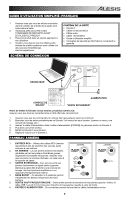
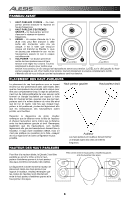
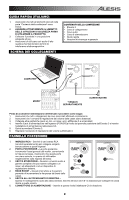
FRONT PANEL 1. TWEETER - This outputs the high frequencies. 2. WOOFER - This outputs the low frequencies. 3. HEADPHONES - Connect your 1/8" headphones to this output to hear the mix through your headphones. Note that while headphones are connected to Elevate 3, you will not be able to hear sound out of your speakers until the headphones are disconnected. 4. VOL/POWER - This knob is used to turn the speakers on and adjust their volume. To turn on, simply turn up the knob. You will feel a click when the speakers turn on. A LED on the left side of the speaker will illuminate. To turn off, simply turn the volume all the way down; the LED will turn off to let you know that the speakers are off. SPEAKER PLACEMENT The placement of your speakers has a huge impact on how well they will perform in your studio. Although nearfield studio monitors are designed to be more forgiving when it comes to placement, you should do your best to make sure they form an equilateral triangle relative to your head. In other words, make sure that each speaker is equally distant from both your head as well as the other speaker. Once each speaker has been placed, rotate the speakers slightly so that the drivers are pointing toward the listener. Take a look at the diagram on the right. Notice that the distance from the listener's head to each speaker is the same as the distance between the left and right speakers. Also note that the speakers are turned slightly so that the drivers are facing the listener. This is an ideal setup but if it is not practical (or possible) to do this, try to match this setup as closely as possible. SPEAKER HEIGHT The ideal height for Elevate 3 is so that the speaker is parallel to the ground and that the midpoint of the woofer and tweeter is at ear-height. The diagram to the right demonstrates the ideal placement height of the speakers relative to the listener. Notice that the listener's ears are directly between the woofer and tweeter. 3 4 5 6 1 2 3 4 VOLUME POWER Left Speaker 1 2 Right Speaker Listener The speakers and listener should be at the three corners of a triangle having equal length sides. tweeter/woofer midpoint 1 4
-
 1
1 -
 2
2 -
 3
3 -
 4
4 -
 5
5 -
 6
6 -
 7
7 -
 8
8 -
 9
9 -
 10
10 -
11
-
12
-
13
-
14
-
15
-
16
 |
 |