Alesis Harmony 54 User Guide - Page 4
Features
 |
View all Alesis Harmony 54 manuals
Add to My Manuals
Save this manual to your list of manuals |
Page 4 highlights
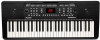
Features Top Panel 22 2 5 28 21 3 4 23 24 14 27 25 26 20 1 6 13 12 15 16 17 18 19 29 7 8 9 10 11 1. Power On/Off: Press this button to turn the keyboard on or off. Note: After 5 minutes of inactivity, Harmony 54 will power off. If you press any key, it will turn back on. 2. Display: This LED Display will update when you make changes to settings such as the tone, rhythm, tempo, etc. Upon power up, the Display shows the currently selected tempo by default. 3. Master Volume: Turn the Master Volume knob to increase or decrease the overall volume of the keyboard. 4. Number buttons and + / - buttons: Use these buttons to change the tone, accompaniment rhythm, or demo song. Before using the Number or + / - buttons, press the button corresponding to the setting that you would like to change. 5. Demo: Press this button to begin playback of one of the demonstration songs. See Operation > Demo Songs for more information. 6. Tone: Press this button and then use the Number buttons or + / - buttons to select a tone. See Operation > Choosing Your Keyboard Tone for more information. 7. Sustain: Press this button to activate or deactivate the sustain effect. See Operation > Choosing Your Keyboard Tone for more information. 8. Vibrato: Press this button to activate or deactivate the vibrato effect. See Operation > Choosing Your Keyboard Tone for more information. 9. Dual: Press this button to layer two tones together. See Operation > Choosing Your Keyboard Tone for more information. 10. Split: Press this button to use one tone on one side of the keyboard and a separate tone and the other side. See Operation > Choosing Your Keyboard Tone for more information. 11. Percussion: Press this button to play percussion sounds with the keys. On will temporarily appear on the Display when the percussion sounds are activated. See the image above each key in order to know what drum sound a key will play. Press the Percussion button again to disable this function. When disabled, OFF will temporarily appear on the Display. 12. Transpose: Press the Transpose + or Transpose - button to increase or decrease the pitch of the keyboard by a half-step. See Operation > Choosing Your Keyboard Tone for more information. 13. Beat: Press this button to cycle between the different metronome settings: 1/4, 2/4, 3/4, 4/4, and Off. When you power on the keyboard, the metronome will be set to Off by default. When changing the setting, the Display will show the selected setting temporarily. When the metronome is playing, the Display will flash three dots for the first beat of every measure and a single dot for each remaining beat. Use the Tempo + / - buttons to change the tempo of the metronome. 14. Rhythm: Press this button and then use the Number buttons or + / - buttons to select an accompaniment rhythm. See Operation > Adding Background Music > Accompaniment Rhythms for more information. 15. Start/Stop: Press this button to start or stop an accompaniment rhythm. See Operation > Adding Background Music > Accompaniment Rhythms for more information. 16. Sync: Press this button to activate the Sync feature. When the Sync feature is activated, playing any key below G2 will automatically start the currently selected accompaniment rhythm (so that you do not have to press the Start/Stop button). See Operation > Adding Background Music > Accompaniment Rhythms for more information. 4
-
 1
1 -
 2
2 -
 3
3 -
 4
4 -
 5
5 -
 6
6 -
 7
7 -
 8
8 -
 9
9 -
 10
10 -
11
-
12
-
13
-
14
-
15
-
16
-
17
-
18
-
19
-
20
-
21
-
22
-
23
-
24
-
25
-
26
-
27
-
28
-
29
-
30
-
31
-
32
-
33
-
34
-
35
-
36
-
37
-
38
-
39
-
40
-
41
-
42
-
43
-
44
-
45
-
46
-
47
-
48
-
49
-
50
-
51
-
52
-
53
-
54
-
55
-
56
 |
 |
