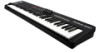
Alesis QX61 Controller Mapping - Page 1
Alesis QX61 Manual
 |
View all Alesis QX61 manuals
Add to My Manuals
Save this manual to your list of manuals |
Page 1 highlights
Alesis QX Series Controllers - Controller Mapping in Logic Pro For Alesis QX Series USB MIDI controllers like the QX25, QX49, and QX61. Assigning Transport Controls in Logic Pro 1. Connect your Alesis QX Series controller to a USB port on your computer and launch Logic Pro. Create a new project. Add 8 or more tracks (to accommodate slider mapping later on). 2. Select Logic Pro > Preferences > Key Commands. 3. At the left of the window that opens, under Command, click the arrow next to Global. 4. In the list that appears, click Record. 5. At the bottom-right of the window, click Learn New Assignment. 6. Press the Record button on the Alesis controller. The button on the Alesis controller will now trigger the Record function in the Logic Pro transport window. 7. Repeat steps 3-5 with other transport controls you'd like to assign. To assign sliders and knobs, proceed to the steps below. Assigning Sliders and Knobs in Logic Pro 1. Select Window > Mixer (CMD+2) to open the Mixer window. 2. In Logic, select Logic Pro > Preferences > Control Surfaces > Learn Assignment (CMD+L) to open the Controller Assignments window. 3. To map your first control, click and drag the volume slider in the first channel in Logic's Mixer window. The Controller Assignments window will register that you are assigning a control to this first volume slider, and will begin listening for MIDI input from any connected controllers. 4. Now move a knob or slider on your Alesis controller to associate it with the volume slider on the screen. The Controller Assignments window will list that the Volume control on the first channel in your mixer has been Learned. 5. Next, click and drag the volume slider in the second channel in the Logic Mixer window.
-
 1
1 -
 2
2
 |
 |
