Alesis TransActive 400 User Guide - Page 3
User Guide English - manual
 |
View all Alesis TransActive 400 manuals
Add to My Manuals
Save this manual to your list of manuals |
Page 3 highlights
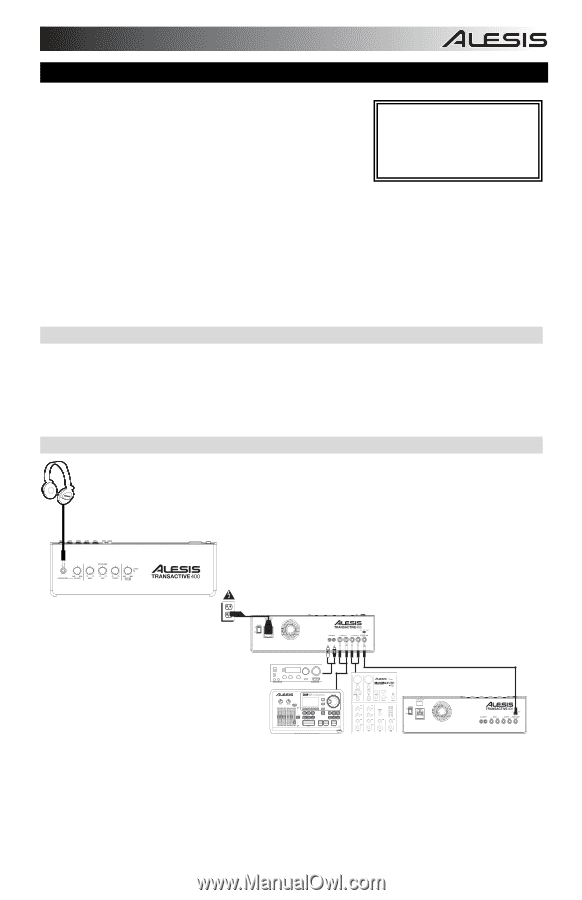
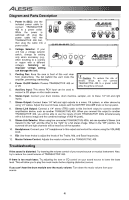
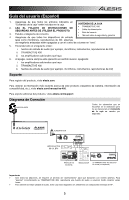
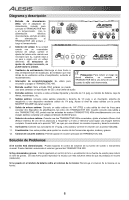
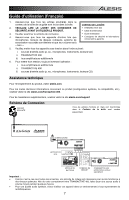
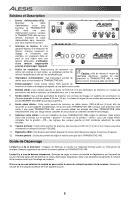
User Guide (English) 1. Make sure all items listed in the Box Contents are included in the box. 2. READ SAFETY INSTRUCTION BOOKLET BEFORE USING THE PRODUCT. 3. Study the connection diagram. 4. Make sure all input devices such as microphones, CD players, and linked amplifiers/PAs are turned off and volume settings are set at "zero." Box Contents TRANSACTIVE 400 Power Cable (standard IEC) User Guide Safety & Warranty Manual 5. Switch everything on in the following order. i. audio input sources (i.e. microphones, instruments, CD Players) ii. TRANSACTIVE 400 iii. any additional amplifiers 6. When shutting down, always reverse this operation by turning off: i. any additional amplifiers ii. TRANSACTIVE 400 iii. audio input sources (i.e. microphones, instruments, CD Players) Support For product registration, visit alesis.com. For the latest information about this product (system requirements, compatibility information, etc.), visit alesis.com/transactive-400. For additional product support, visit alesis.com/support. Connection Diagram HEADPHONES Any items shown here but not mentioned in the Box Contents are sold separately. POWER CD PLAYER, ETC. DRUM MODULE MIXER (additional TRANSACTIVE 400 sold separately) Important: • With all speakers, an initial "break-in" period is needed to perform at optimal levels. To properly "break- in" your TRANSACTIVE 400, play an audio source at medium volume for a few hours. • For best audio quality, avoid using this device in a high RF-radiated environment. 3
-
 1
1 -
 2
2 -
 3
3 -
 4
4 -
 5
5 -
 6
6 -
 7
7 -
 8
8 -
 9
9 -
10
-
11
-
12
-
13
-
14
-
15
-
16
 |
 |