Alesis Turbo Mesh Kit Turbo Drum Module - User Guide v1.2 - Page 4
Setup - manual
 |
View all Alesis Turbo Mesh Kit manuals
Add to My Manuals
Save this manual to your list of manuals |
Page 4 highlights
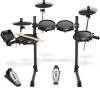
Setup Items not listed in Introduction > Box Contents are sold separately. Connecting the Drum Module Drum Module Rear Panel Connect the head of the included cable snake here (multipin with two screws). Then connect the 1/4" cables at the tail end of the cable snake to each pad in your drum kit. Selecting a Kit To select one of the module's 10 preset kits, do one of the following: • Press the Variation button so it is lit red, 1 2 3 4 5 VARIATION and then press the 1, 2, 3, 4, or 5 button to select Kit 1, 2, 3, 4, or 5 respectively. • Press the Variation button so it is lit green, and then press the 1, 2, 3, 4, or 5 button to select Kit 6, 7, 8, 9, or 10 respectively. The Kit Number will appear in the Display. Once you have selected a kit, you can select others by repeating one of the steps above or by using the - / + buttons. Playing the Pads If your electronic drum kit has velocity-sensitive pads, Turbo Drum Module will play sounds of varying timbres depending on how hard you hit the pads. Try hitting the pads with different amounts of force to experiment with the different sounds produced by the module! The hi-hat sound will vary based on the position of the hi-hat controller pedal: • Open hi-hat: With your foot off the pedal, hit the hi-hat pad. • Closed hi-hat: With your foot pressing the pedal all the way down, hit the hi-hat pad. • Pedal close: Press the hi-hat pedal all the way down without hitting the hi-hat pad. • Splash: Quickly press the hi-hat pedal all the way down, and then release it immediately. Learn more about using the drum module in the Operation section of this manual. 4
-
 1
1 -
 2
2 -
 3
3 -
 4
4 -
 5
5 -
 6
6 -
 7
7 -
 8
8 -
 9
9 -
 10
10 -
11
-
12
-
13
-
14
-
15
-
16
-
17
-
18
-
19
-
20
-
21
-
22
-
23
-
24
-
25
-
26
-
27
-
28
-
29
-
30
-
31
-
32
-
33
-
34
-
35
-
36
-
37
-
38
-
39
-
40
-
41
-
42
-
43
-
44
-
45
-
46
-
47
-
48
-
49
-
50
-
51
-
52
-
53
-
54
-
55
-
56
-
57
-
58
-
59
-
60
-
61
-
62
-
63
-
64
 |
 |
