Alpine KTX-H10 Installation Manual - Page 1
Alpine KTX-H10 Manual
 |
View all Alpine KTX-H10 manuals
Add to My Manuals
Save this manual to your list of manuals |
Page 1 highlights
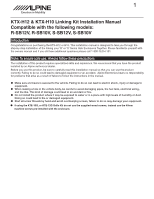
1 KTX-H12 & KTX-H10 Linking Kit Installation Manual Compatible with the following models: R-SB12V, R-SB10V, S-SB12V, S-SB10V Introduction Congratulations on purchasing the KTX-H12 or H10. This installation manual is designed to take you through the step-by-step installation of the linking your 'R' or 'S' Series Halo Enclosures Together. Please familiarize yourself with the owners manual and if you still have additional questions please call 1-800-TECH-101. Note: To ensure safe use, Always follow these precautions. The installation of this product requires specialized skills and experience. We recommend that you have the product installed by an Alpine authorized dealer. Before you use this product, be sure to carefully read this installation manual so that you can use the product correctly, Failing to do so could lead to damaged equipment or an accident. Alpine Electronics bears no responsibility for problems that arise as a result of failure to follow the instructions in the manual. ˜ Make sure enclosure is secured to the vehicle. Failing to do so can lead to electric shock, injury or damage to equipment. ˜ When making a hole in the vehicle body, be careful to avoid damaging pipes, the fuel tank, electrical wiring, and the like. This kind of damage could lead to an accident or fire. ˜ Do not install the product where it may be exposed to water or in a place with high levels of humidity or dust. Doing so could lead to fire or damaged equipment. ˜ Start all screw threads by hand and avoid overtourqing screws, failure to do so may damage your equipment. ˜ If using the KTE-10G, or KTE-12G Grille Kit do not use the supplied wood screws, instead use the 40mm machine screws pre-installed with the enclosure.
-
 1
1 -
 2
2 -
 3
3 -
 4
4 -
 5
5 -
 6
6 -
 7
7 -
8
 |
 |
