Alpine PSS-20WRA Owners Manual - Page 13
Subwoofer Installation passenger side seat
 |
View all Alpine PSS-20WRA manuals
Add to My Manuals
Save this manual to your list of manuals |
Page 13 highlights
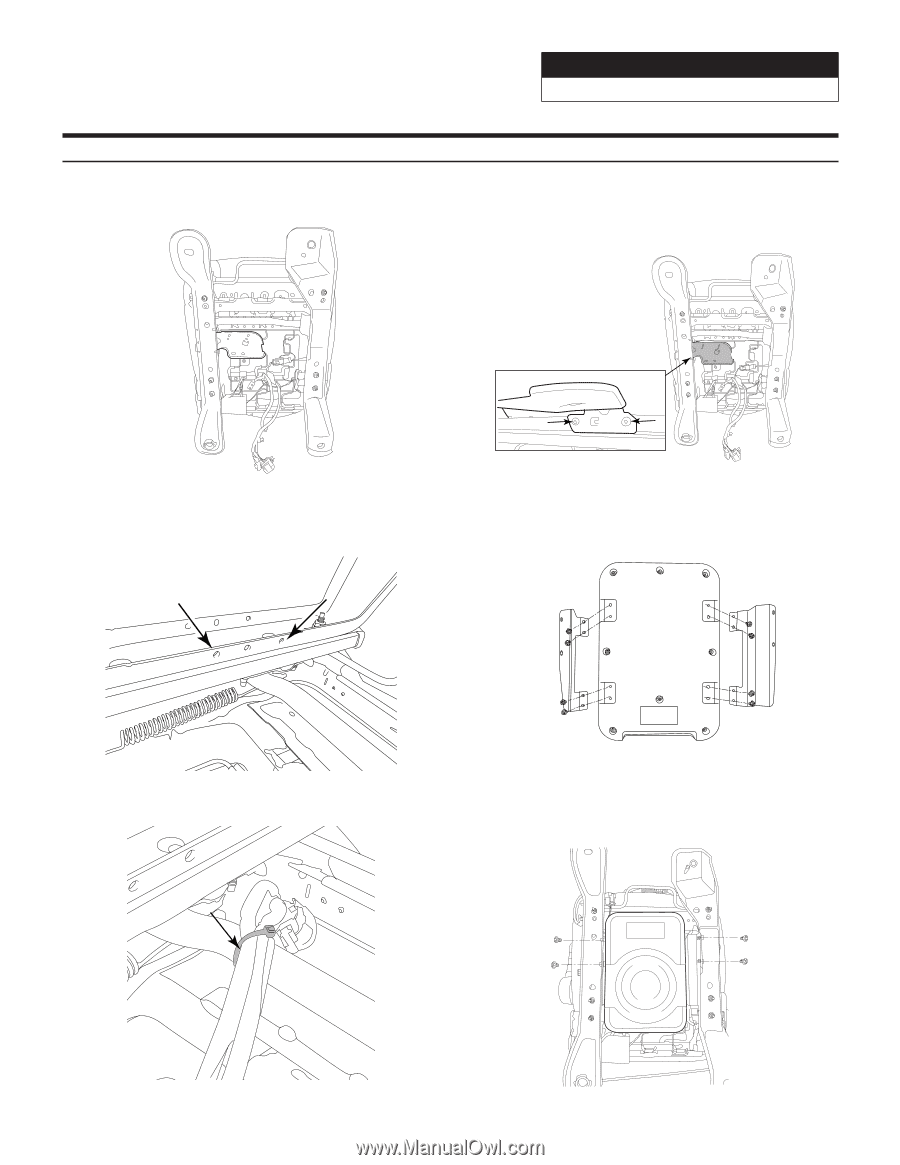
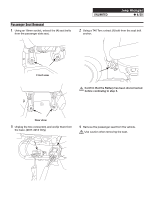
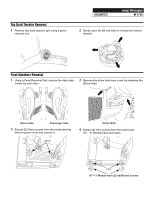
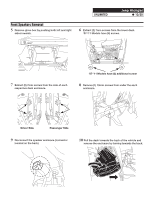
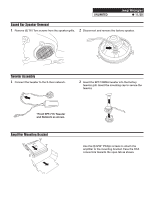
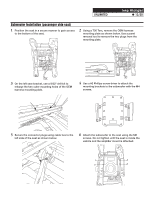
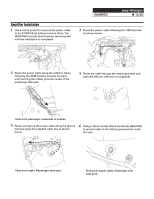
UNLIMITED Jeep Wrangler ˜ 13/20 Subwoofer Installation (passenger side seat) 1 Position the seat in a secure manner to gain access to the bottom of the seat. 2 Using a T30 Torx, remove the OEM harness mounting plate as shown below. Use a panel removal tool to remove the two plugs from the mounting plate. 3 On the left seat bracket, use a 9/32" drill bit to enlarge the two outer mounting holes of the OEM harness mounting plate. 4 Use a #2 Phillips screw driver to attach the mounting brackets to the subwoofer with the M4 screws. 5 Secure the connector plugs using cable ties to the left side of the seat as shown below. 6 Attach the subwoofer to the seat using the M6 screws. Do not tighten until the seat is inside the vehicle and the amplifier mount is attached.
-
 1
1 -
2
-
3
-
4
-
5
-
6
-
7
-
 8
8 -
 9
9 -
 10
10 -
 11
11 -
 12
12 -
 13
13 -
 14
14 -
 15
15 -
 16
16 -
 17
17 -
 18
18 -
19
-
20
 |
 |