Alpine TMI-M990 Owners Manual - Page 58
Alpine TMI-M990 - LCD Monitor Manual
 |
View all Alpine TMI-M990 manuals
Add to My Manuals
Save this manual to your list of manuals |
Page 58 highlights
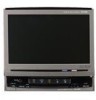
Installation and Connections 3 Installing the AV-Interface Unit When mounting the unit with the Velcro fasteners, be sure to choose a flat location. Do not hang the unit from the bottom of the dashboard or rear deck with the Velcro fasteners. Lock Pin Slide the TMI-M990 into the dashboard. When the unit is in place, make sure the locking pins are fully seated in the down position. This can be done by pressing firmly in on the unit while pushing the locking pin down with a small screwdriver. This ensures that the unit is properly locked and will not accidentally come out from the dashboard. Install the supplied Front Frame. Removal Protective paper 1 Remove the Protective paper and attach two pieces of Velcro fastener to the bottom of the AV-Interface Unit. AV-Interface Unit 1. Use a small screwdriver (or similar tool) to push the locking pins to the "up" position (see Step 3). As each pin is unlocked, gently pull out on the unit to make sure it does not re-lock before unlocking the second pin. 2. Pull the unit out, keeping it unlocked as you do so. < JAPANESE CAR > To install using the vehicle's standard bracket. Ground Lead TMI-M990 Screws (M4 x 3) (Included) Velcro Fasteners (Included) Protective paper 2 Check the position, and then fix the unit to the floor carpet. About the system switch It is necessary to change the system switch before installing this unit. • Change to "1:SYSTEM" when the TMIM990 is connected with an IONBUS compatible head unit. • When not connected to an IONBUS compatible head unit, change to "2:STANDALONE". 1:SYSTEM 2:STANDALONE (Initial Setting) Mounting Bracket 1 2 • Make sure to use the supplied screw (M4 x 3) to install the monitor. If you use another screw to install the monitor, it may cause a malfunction. • Be sure to turn the power off to the unit before changing the switch position. 54-EN
-
 1
1 -
2
-
3
-
4
-
5
-
6
-
7
-
8
-
9
-
10
-
11
-
12
-
13
-
14
-
15
-
16
-
17
-
18
-
19
-
20
-
21
-
22
-
23
-
24
-
25
-
26
-
27
-
28
-
29
-
30
-
31
-
32
-
33
-
34
-
35
-
36
-
37
-
38
-
39
-
40
-
41
-
42
-
43
-
44
-
45
-
46
-
47
-
48
-
49
-
50
-
51
-
52
-
 53
53 -
 54
54 -
 55
55 -
 56
56 -
 57
57 -
 58
58 -
 59
59 -
 60
60 -
 61
61 -
 62
62 -
 63
63 -
64
-
65
-
66
-
67
-
68
 |
 |
