Alpine X009-GM2 Installation Manual - Page 9
Installation Instructions
 |
View all Alpine X009-GM2 manuals
Add to My Manuals
Save this manual to your list of manuals |
Page 9 highlights
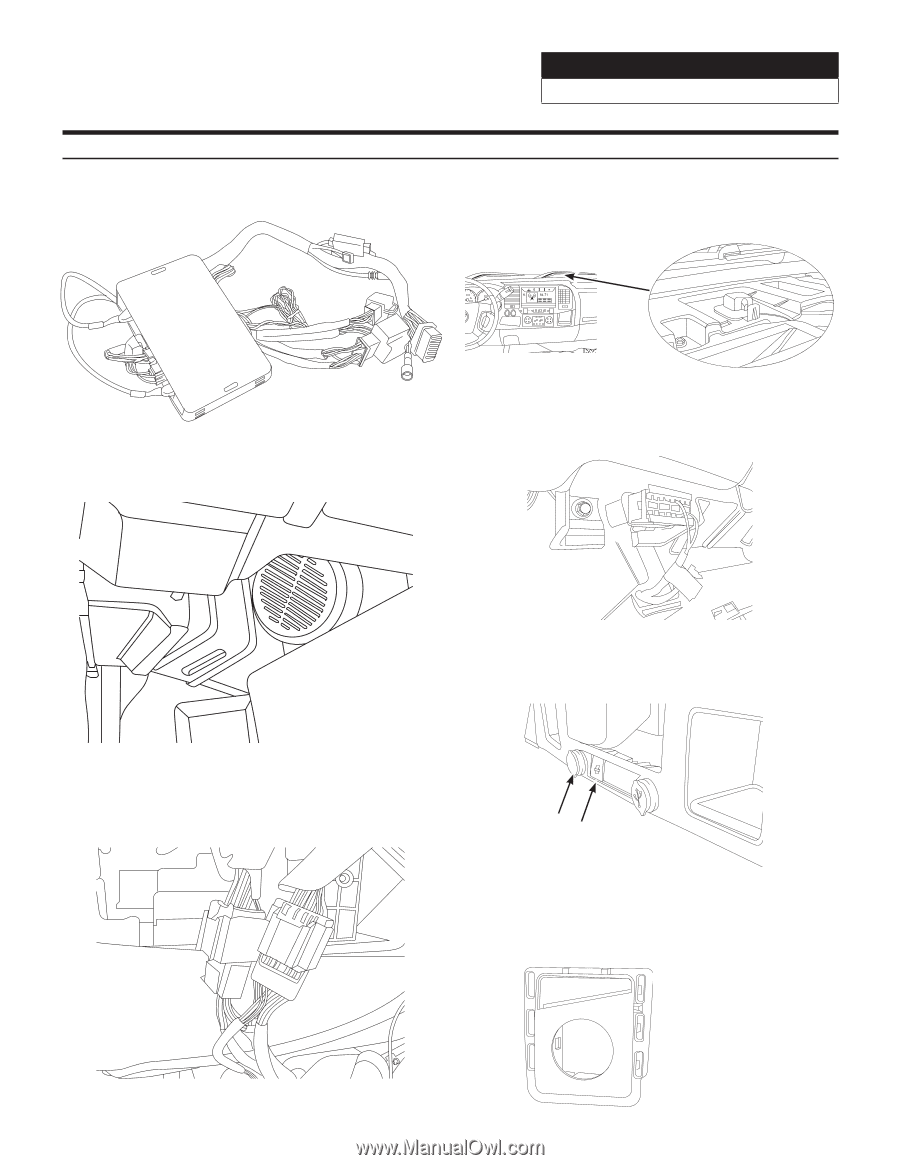
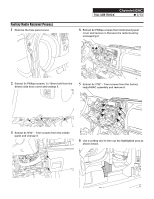
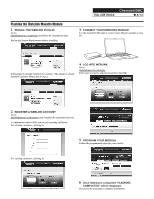
Installation Instructions 1 Connect the Maestro module to the X009 main harness. Chevrolet/GMC FULL SIZE TRUCK ˜ 9/13 4 Place the GPS antenna on the OEM GPS antenna location as illustrated and feed the cable to the radio cavity. Use the supplied metal base for the best signal strength. 2 Attach the chime speaker on the metal dash support to the right of the gas pedal. 5 Plug the OBDII connector to the port located under the driver side dashboard and run the wire extension to back of the headunit. 6 Remove and transfer the factory cigarette lighter socket, switch box, side pocket and vents to the X009-GM2 radio bezel. 3 Connect the X009-GM2 wire harness, antenna adapter and USB adapter to the factory radio harness and secure it. 7 If the vehicle is equipped with 4WD, use the 4WD rotary switch panel to mount the selector switch on the right pocket location of the X009-GM2 radio bezel.
-
 1
1 -
2
-
3
-
 4
4 -
 5
5 -
 6
6 -
 7
7 -
 8
8 -
 9
9 -
 10
10 -
 11
11 -
 12
12 -
 13
13
 |
 |