Alpine i109-WRA Installation Manual - Page 9
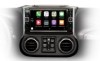
Wrangler
 |
View all Alpine i109-WRA manuals
Add to My Manuals
Save this manual to your list of manuals |
Page 9 highlights
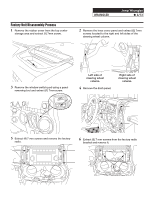
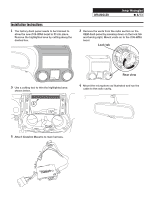
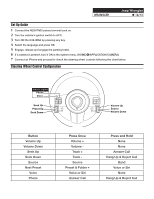
WRANGLER Jeep Wrangler ˜ 9/13 Installation Instructions 1 Attach the modified panel using the factory screws. 2 Attach the brackets using the provided (4) 8mm screws. 3 Route the USB extension cable to the glove box. Connect the main harness and adapters to the factory harness. 4 Secure the main harness to the antenna cable using a zip tie. (this will prevent the SW Remote connector from becoming loose) 5 Route the key harness through the top-left side of i109 headunit. Mount the i109 headunit using (4) 7mm factory screws. 6 Connect the radio bezel and snap it into place. A/C A/C
-
 1
1 -
2
-
3
-
 4
4 -
 5
5 -
 6
6 -
 7
7 -
 8
8 -
 9
9 -
 10
10 -
 11
11 -
 12
12 -
 13
13
 |
 |

Jeep Wrangler
WRANGLER
±
9/13
Installation Instructions
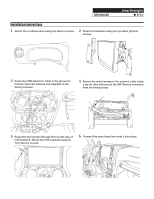
2
Attach the brackets using the provided (4) 8mm
screws.
4
Secure the main harness to the antenna cable using
a zip tie. (this will prevent the SW Remote connector
from becoming loose)
6
Connect the radio bezel and snap it into place.
A/C
A/C
1
Attach the modified panel using the factory screws.
3
Route the USB extension cable to the glove box.
Connect the main harness and adapters to the
factory harness.
5
Route the key harness through the top-left side of
i109 headunit. Mount the i109 headunit using (4)
7mm factory screws.