Alpine i109-WRA Owners Manual - Page 21
Screen/Lighting Setting, About i109, Demonstration Setup
 |
View all Alpine i109-WRA manuals
Add to My Manuals
Save this manual to your list of manuals |
Page 21 highlights
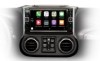
Screen/Lighting Setting Setting the Brightness of the Backlighting Backlighting is provided by LEDs behind the liquid crystal panel. The illumination control adjusts the brightness of the backlighting based on the car's ambient lighting for easier viewing. Setting item: Dimmer Setting contents: Auto (Initial setting) / On / Off Auto: On: Off: Adjust the brightness of the background illumination of the monitor automatically to the brightness of the car interior. Keep the background illumination of the monitor dark. Deactivate Auto Dimmer mode to keep the background illumination of the monitor bright. • When "Auto" or "On" is set, the setting is also applied for the button lighting in "Button Backlighting Adjustment" (page 21), and "Display Backlighting Adjustment" (page 21). Button Backlighting Adjustment You can adjust the brightness of the button lighting at night with the dimmer. Setting item: Key Illumination Level Setting level: -2 to +2 (Initial setting: 0) Display Backlighting Adjustment You can adjust the brightness of the backlight. This function could be used, for instance, to change the screen brightness while traveling at night. Setting item: Screen Dimmer Level Setting contents: -15 to +15 (Initial setting: 0) You can adjust the level between MIN (-15) and MAX (+15). When it reaches the minimum or maximum point, the display shows "MIN" or "MAX" respectively. Changing the Opening Image You can set the image file for the opening screen. Copy your desired image file from a Flash Memory device. Setting item: Opening Customization Setting contents: Default (Initial setting) / User The file selected in the User mode will be copied according to the following procedure. 1 Connect the Flash Memory device which contains the BMP file to be copied to the unit. 2 After the confirmation message is displayed, touch [OK]. The Opening image is changed. Copiable image files File format: Image size: Folder Name: File Name: BMP 800 × 480 pixels, RGB 24 bit or less OPENINGFILE openingfile.bmp About i109 Touch [About] on the General setup menu in step 3. Refer to "General Setup Operation" (page 19). Displaying the Product Information You can view the model name, serial number and version information of this product. Make note of the version information and refer to it whenever you contact Alpine Tech Support or an Alpine-authorized dealer. Contents: i109 (model name) / Serial Number / Firmware Version Initializing the System You can initialize all data, to restore the factory settings. Remove the USB Flash memory, from the system before operation Setting item: Clear All Settings 1 Touch [RESET] of "Clear All Settings". 2 After the confirmation message appears, touch [OK]. The system starts initialization. • Do not turn on/off the power, change the ignition key position or remove the screen panel until system restart is completed. Demonstration Setup [Demo mode] is selected on the General setup menu in step 3. Refer to "General Setup Operation" (page 19). Canceling the Demonstration This unit has a Demonstration feature for the display. When you install and use the unit for the first time, the unit will enter demo mode automatically. To quit demo mode, turn off the Demo mode. Setting item: Demo mode Setting contents: OFF / ON (Initial setting) • If you perform an operation during the Demo mode, the demonstration is temporarily stopped. 21-EN
-
 1
1 -
2
-
3
-
4
-
5
-
6
-
7
-
8
-
9
-
10
-
11
-
12
-
13
-
14
-
15
-
 16
16 -
 17
17 -
 18
18 -
 19
19 -
 20
20 -
 21
21 -
 22
22 -
 23
23 -
 24
24 -
 25
25 -
 26
26 -
27
-
28
-
29
-
30
-
31
-
32
-
33
-
34
 |
 |
