Alpine i207-WRA Instruction Manual - Page 10
Installation Instructions
 |
View all Alpine i207-WRA manuals
Add to My Manuals
Save this manual to your list of manuals |
Page 10 highlights
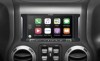
WRANGLER Jeep Wrangler ˜ 10/16 Installation Instructions 1 Attention: For 2011-2017 vehicles only. Insert the push clips from the factory bracket. Install the rear support bracket, using the (2) 7mm screws that were removed from the factory bracket, to attach head unit bracket in the same place. 2 Plug the OBDII connector on to the OBDII port below the driver side dash and run the extension to the radio cavity. 3 Attach the side brackets using the provided 8mm round head screws. 4 Mount the microphone as illustrated and run the cable to the radio cavity. You will need to use a T20 Torx to remove the visor. For optimal performance it should be mounted by the rear-view mirror as illustrated. 5 For 2011-2017 vehicles: For vehicles with uConnect refer to page 11. For vehicles without uConnect run the USB extension cable to the glove box, connect the main harness, antenna, and other adapters to the factory harnesses and secure them. Route all cables through the lower opening of the rear support bracket as shown below. For 2007-2010 vehicles: Connect the main harness, run the USB extension from the back of the head unit to desired location, connect antenna, other adapters, and secure them. 6 Mount the i207-WRA head unit using the factory 7mm screws and return factory panels to their corresponding place VOICE MENU
-
 1
1 -
2
-
3
-
4
-
 5
5 -
 6
6 -
 7
7 -
 8
8 -
 9
9 -
 10
10 -
 11
11 -
 12
12 -
 13
13 -
 14
14 -
 15
15 -
16
 |
 |
