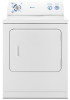
Amana NED4500VQ Use and Care - Page 5
Dryer Use - electric dryer
 |
UPC - 883049142425
View all Amana NED4500VQ manuals
Add to My Manuals
Save this manual to your list of manuals |
Page 5 highlights
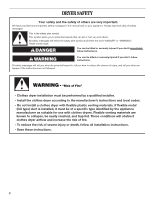
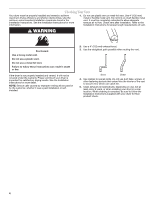
WARNING DRYER USE Starting Your Dryer WARNING Explosion Hazard Keep flammable materials and vapors, such as gasoline, away from dryer. Do not dry anything that has ever had anything flammable on it (even after washing). Failure to follow these instructions can result in death, explosion, or fire. Fire Hazard No washer can completely remove oil. Do not dry anything that has ever had any type of oil on it (including cooking oils). Items containing foam, rubber, or plastic must be dried on a clothesline or by using an Air Cycle. Failure to follow these instructions can result in death or fire. WARNING: To reduce the risk of fire, electric shock, or injury to persons, read the IMPORTANT SAFETY INSTRUCTIONS before operating this appliance. This booklet covers several different models. Your dryer may not have all of the cycles and features described. Before using your dryer, wipe the dryer drum with a damp cloth to remove dust from storing and shipping. 1. Clean lint screen before each load. See "Cleaning the Lint Screen." 2. Load clothes loosely into the dryer and close the door. Do not pack the dryer. Allow space for clothes to tumble freely. 3. Turn the Cycle Control knob to the recommended cycle for the type of load being dried. Use the Energy Preferred Automatic Setting (*) to dry most heavy to medium-weight fabrics. 4. If your dryer has a Temperature selector, set it to the recommended setting for the type of fabric being dried. See "Dryer Cycle Descriptions" (separate sheet) for temperature suggestions. On some models, temperature is included in the cycle selections. 5. (OPTIONAL) Your dryer may have a Wrinkle Prevent feature selector. When you are unable to remove a load from the dryer as soon as it stops, wrinkles can form. This feature periodically tumbles, rearranges and fluffs the load without heat to help avoid wrinkling. 6. (OPTIONAL) Your dryer may have an End of Cycle Signal. The signal is helpful when drying items that should be removed from the dryer as soon as it stops. The End of Cycle signal is part of the Start button and is selectable. Turn the Start button to ON or OFF. The signal will sound only if the selector is set to On. 7. Select the desired Option. See "Dryer Cycle Descriptions" (separate sheet). 8. If desired, add fabric softener sheet. Follow package instructions. 9. Press the Start button. Stopping and Restarting You can stop your dryer anytime during a cycle. To stop your dryer Open the dryer door or turn the Cycle Control knob to OFF. NOTE: The Cycle Control knob should point to an Off area when the dryer is not in use. To restart your dryer Close the door. Select a new cycle and temperature (if desired). Press the Start button. Drying Rack Option Use the Drying Rack to dry items such as sweaters and pillows without tumbling. The drum turns, but the rack does not move. If your model does not have a drying rack, you may be able to purchase one for your model. To find out whether your model allows drying rack usage and for information on ordering, please refer to the front page of the manual or contact the dealer from whom you purchased your dryer. NOTE: The rack must be removed for normal tumbling. Do not use the automatic cycle with the drying rack. To use the drying rack 1. Place drying rack in dryer. Slide rear pegs into the dimples on the back wall of the dryer. Lower the front legs to rest on the dryer opening. 2. Put wet items on top of rack, leaving space between items. Do not allow items to hang over the edge of the rack. Close the door. 3. Select a timed drying cycle and temperature, or an air cycle. Items containing foam, rubber, or plastic must be dried on a clothesline or by using an air cycle. Refer to the following table. 4. Start the dryer. Reset cycle to complete drying, if needed. Rack Dry Cycle Temp Time Washable wool items (block Timed Low 60 min. to shape, lay flat on rack) Drying Stuffed toys/pillows (cotton Timed Low 60 min. or polyester filled) Drying Stuffed toys/pillows Foam rubber filled Air N/A (no heat) 90 min. 5
-
 1
1 -
 2
2 -
 3
3 -
 4
4 -
 5
5 -
 6
6 -
 7
7 -
 8
8 -
 9
9 -
 10
10 -
 11
11 -
12
-
13
-
14
-
15
-
16
-
17
-
18
-
19
-
20
 |
 |
