Archos 500984 User Manual - Page 4
Locking the buttons, Recording from the Microphone, Recording from the Radio, Retro Recording
 |
View all Archos 500984 manuals
Add to My Manuals
Save this manual to your list of manuals |
Page 4 highlights
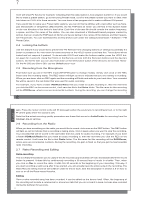
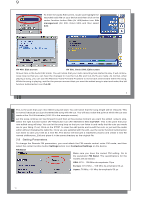
7 mote will show P2 Saved, for example, indicating that this radio station is now program number 2. If you would like to erase a preset station, go to the tuning Preset mode, scroll to the preset number you want to clear, then hold down on PLAY ` for three seconds. You now have a free program slot to make a different FM preset. If you would like to name your Preset radio stations, you can do this by editing, with a text editor such as Notepad (Windows®) or SimpleText (Macintosh®), the file FMPreset.txt which you will find in the System folder on the root directory of the device's hard drive. Each line of the text file should contain the station frequency, a space, and then the name of the station. You can also download a Windows® based program created by Archos that can create the FMPreset.txt file for you by just typing in the names of the stations and their respective frequencies. You can download this at www.archos.com under the category Download > Software > FM Preset Editor. 2.4 Locking the buttons Use this feature if you would like to prevent the FM Remote from changing stations or settings accidentally if a button is pressed or hit. Hold down for three seconds on the HOLD button to activate this. The buttons will be locked and not respond if pressed. To de-activate HOLD and make the buttons usable, press the HOLD button again for 3 seconds. Using the HOLD on the Remote will lock both the Remote's buttons and the device's buttons. On the AV 400, you can also hold down on the left function button of the device to de-activate HOLD. On the AV 500 and Gmini 500, use the Unlock action icon. 2.5 Recording from the Microphone First make sure you are in the MP3 mode (MP3/FM button to change modes). Simply click once on the REC button and the recording starts. The REC button will light up red to indicate that you are making a recording. When you are done, click on REC again and the recording will finish and write to your hard drive. Your recorded file will be saved in the last folder that was used for audio recording. For example, if you have a folder /HD/Music/Voice that you made an audio recording in, then the next time you click the REC on the remote control, it will save the file to that Voice folder. The file name for this recording will be VOICExxxx, where xxxx are incremental numbers. During the recording, you can change the recording 7 8 gain. Press the rocker control to the left __ (less gain) when the sound you're recording is loud, or to the right `` (more gain) when the sound is soft. Note that the actual recording quality parameters are those that are set in AudioCorder for recording from the Analog Line-in settings. 2.6 Recording from the Radio When you hear something on the radio you would like to record, click once on the REC button. The REC button will light up red to indicate that a recording is taking place. Click it again when you want to stop the recording. Your recorded file will be saved in the last folder that was used for audio recording. For example, if you have a folder /HD/Music/Radio that you made an audio recording in, then the next time you click the REC on the remote control, it will save the file to that Radio folder. The file name for this recording will be RADIOxxxx, where xxxx are incremental numbers. During the recording, the gain is fixed so that you get the best possible radio recording. 2.7 Retro Recording and Editing Retro-recording This is a feature that allows you to capture the 30 seconds (approximately) of radio broadcast before the record button is pressed. It does this by continuously recording a 30 second loop of music in a buffer. Then, when you click on Rec to record the radio, it adds this 30 seconds to the beginning of your recording. This way, if you start recording a radio song after it has started, you will actually have the entire song in the recording. The Retro-Record setting must be set to On in order for this to work. See the description in section 2.8 on how to turn on or off the Retro-record function. Editing Once a retro-recorded song has been recorded, it can be edited on the device itself. Often, the beginning of the recording will include a commercial or announcer talk that you do not want to keep, but was also recorded during the buffered 30 seconds. 8 English
-
 1
1 -
 2
2 -
 3
3 -
 4
4 -
 5
5 -
 6
6 -
 7
7 -
 8
8 -
 9
9
 |
 |
