Ariens Lawn Edger Owners Manual - Page 15
SERVICE AND ADJUSTMENTS, Blade Change, Belt Change
 |
View all Ariens Lawn Edger manuals
Add to My Manuals
Save this manual to your list of manuals |
Page 15 highlights
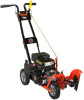
SERVICE AND ADJUSTMENTS WARNING: AVOID INJURY. Read and understand the entire Safety section before proceeding. Blade Change (Figure 11) WARNING: Blades are sharp and can cut you. Wear sturdy gloves warning 1. Stop engine, wait for all moving parts to stop and hot parts to cool. Make sure the engine shut off switch is in the off position. 2. Block the blade with a wooden block. 3. Remove the mounting hardware and blade from the unit. 4. Install the new blade with the original mounting hardware, and tighten the lock nut to 30 - 62 lbf-ft. (40.7 - 84.0 N•m). Remove mounting hardware and belt finger. Figure 12 5. Remove the belt from the front (cutter) pulley and from the engine pulley. NOTE: The belt is spring-loaded. Push the cutter head back towards the engine to slacken and remove belt. 6. Install a new belt on the engine pulley and on the front pulley. Make sure there are no twists or kinks in the belt. Remove blade and then remove belt from front pulley and engine pulley. Remove blade nut, washer, blade and bearing cap. Figure 11 Belt Change (Figure 12 & 13) 1. Stop engine, wait for all moving parts to stop and hot parts to cool. Make sure the engine shut off switch is in the off position. 2. Raise the cutting head all the way up. 3. Remove the belt finger from the engine. 4. Remove the blade and mounting hardware. Blade and mounting hardware. Figure 13 7. Replace the blade and mounting hardware and tighten the blade mounting hardware to 30 - 62 lbf-ft. (40.7 - 84.0 N•m). 8. Replace the belt finger. GB - 15
-
 1
1 -
2
-
3
-
4
-
5
-
6
-
7
-
8
-
9
-
 10
10 -
 11
11 -
 12
12 -
 13
13 -
 14
14 -
 15
15 -
 16
16 -
 17
17 -
 18
18 -
 19
19 -
 20
20 -
21
-
22
-
23
 |
 |
