Asko T701 User manual Use & Care Guide Asko T701,721,761,781 - Page 5
Connecting To A Ventilation Duct T701 And T761, Freestanding Installation, Built-in Installation
 |
View all Asko T701 manuals
Add to My Manuals
Save this manual to your list of manuals |
Page 5 highlights
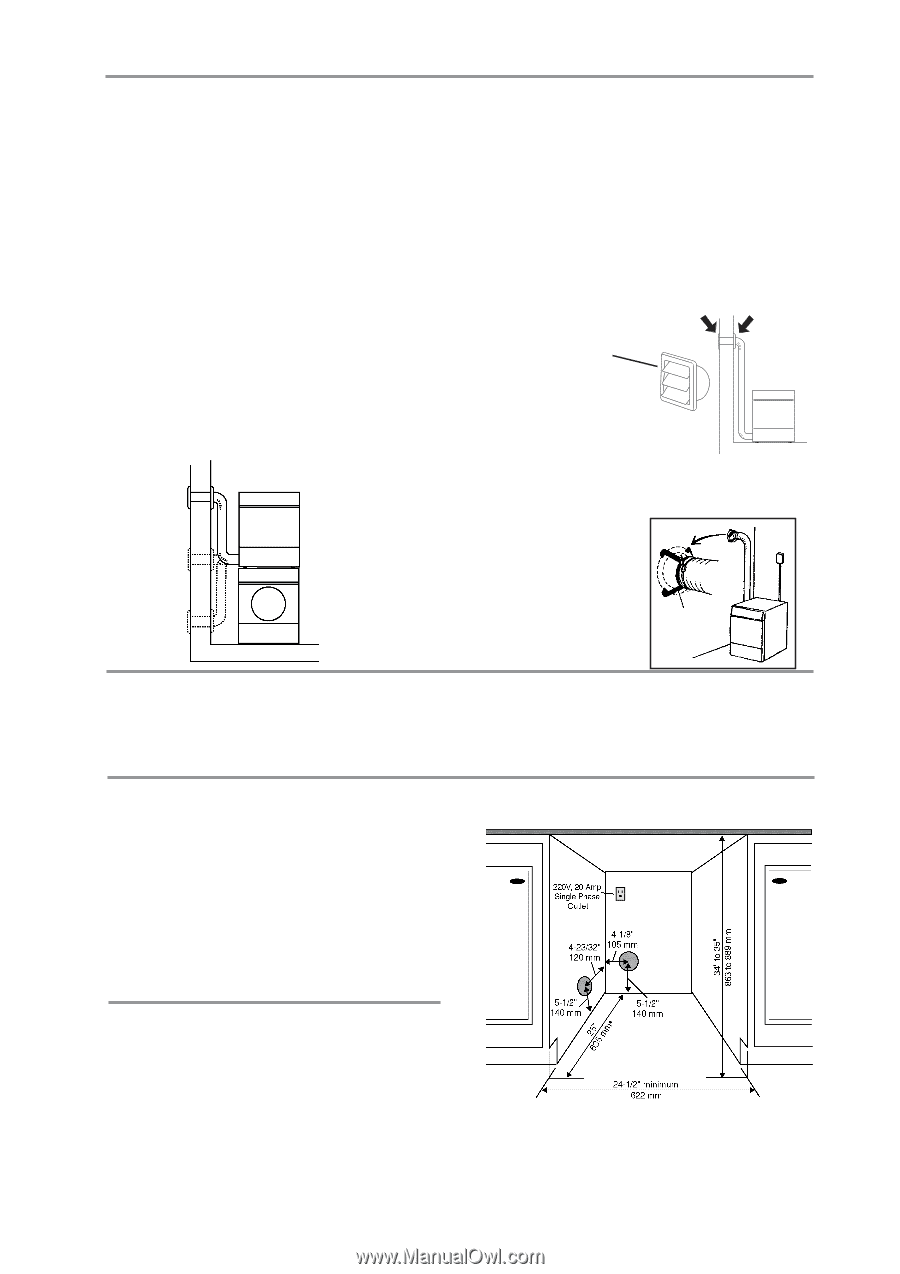
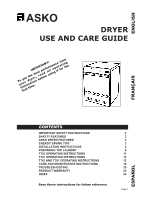
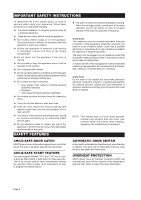
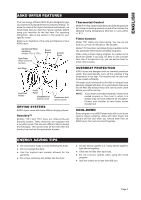
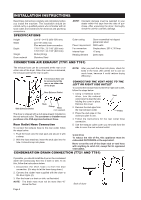
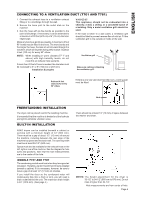
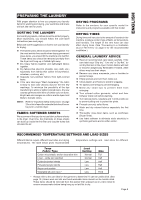
ENGLIESNHGLISH CONNECTING TO A VENTILATION DUCT (T701 AND T761) 1. Connect the exhaust hose to a ventilation exhaust fitting or to a discharge through the wall. 2. Secure the hose joint to the outlet stub on the machine. 3. Run the hose with as few bends as possible to the point of discharge. If necessary, it can be extended to a maximum of 20 feet (610 cm) of 4" (10 cm) diameter ridged pipe. Make any bends as gentle as possible. A maximum of four 90° bends may be fitted in the hose. The more bends and the longer the hose, the less air will circulate through the machine, which will impede drying performance. Subtract 4 feet (122 cm) for every 90° elbow. NOTE: When installing in warm climates (77° F and above) with high humidity levels, do not route the air exhaust hose upwards. If more than 20 feet of hose is needed, the diameter must be increased to 6" or 8" (152 mm or 203 mm). Installation Examples WARNING! This appliance should not be exhausted into a chimney, a wall, a ceiling, or a concealed space of a building. Only a metal ventilation grill should be used. If the hose is taken to a wall outlet, a ventilation grill should be fitted to prevent reverse flow of cold air. Fit the ventilation grill to the outside or inside of the wall. Ventilation grill Make sure nothing is blocking the ventilation grill. Subtract 4 feet (122 cm) for every 90° elbow. If there is only one vent duct from the room, a vent spacer must be fitted. Vent spacer FREESTANDING INSTALLATION The dryer can be placed next to the washing machine. It is essential that the machine is leveled and the locknuts are tight to eliminate vibration noise. BUILT-IN INSTALLATION ASKO dryers can be installed beneath a cabinet or worktop with a minimum height of 34" (864 mm). There must be a gap of about 1/2" (12 mm) all around the machine, including between the rear edge of the machine top panel and the back wall. The opening width must be at least 24-1/2" (622 mm). Space must also be available for the exhaust hose on the left, right or rear of the machine. See the diagram for hole sizes and positions. Note that the hole measurements are to the center of the hole. MODELS T721 AND T781 The condensing models work best when they have good air circulation. Therefore, we don't recommend they be installed beneath a cabinet. If it is necessary, however, be sure to leave a gap of at least 1/2" (12 mm) on all sides. If you install the dryer so the condensed water will continuously flow into a drain or sink, you will need a drain outlet behind the unit. The maximum drain height is 40" (1016 mm). (See page 4.) There should be at least 1/2" (12 mm) of space between the washer and dryer. NOTES: The height adjustment for the dryer is 33-1/2" to 34-1/2" (850 mm to 876 mm). Do not raise it higher than 34-1/2". Hole measurements are from center of hole. Page 5
-
 1
1 -
 2
2 -
 3
3 -
 4
4 -
 5
5 -
 6
6 -
 7
7 -
 8
8 -
 9
9 -
 10
10 -
 11
11 -
12
-
13
-
14
-
15
-
16
-
17
-
18
-
19
-
20
-
21
-
22
-
23
-
24
-
25
-
26
-
27
-
28
-
29
-
30
-
31
-
32
-
33
-
34
-
35
-
36
-
37
-
38
-
39
-
40
-
41
-
42
-
43
-
44
-
45
-
46
-
47
-
48
-
49
-
50
-
51
-
52
-
53
-
54
-
55
-
56
-
57
-
58
-
59
-
60
-
61
-
62
-
63
-
64
-
65
-
66
-
67
-
68
-
69
-
70
-
71
-
72
 |
 |