Asus Designo MX259HS MX259HS Series User Guide - Page 11
Monitor introduction
 |
View all Asus Designo MX259HS manuals
Add to My Manuals
Save this manual to your list of manuals |
Page 11 highlights
1.5 Monitor introduction 1.5.1 Using the Controls button Use the controls button on the back of the monitor to adjust the image settings. 1234567 1. Button: • Activates the QuickFit function. (Please refer to 1.5.2 QuickFit Function). 2. • • • Button: Press this hotkey to switch from eight video preset modes (Scenery Mode, Standard Mode, Theater Mode, Game Mode, Night View Mode, sRGB Mode, Reading Mode, and Darkroom Mode) with SPLENDID™ Video Intelligence Technology. Exit the OSD menu or go back to the previous menu as the OSD menu is active. Automatically adjusts the image to its optimized position, clock, and phase by pressing this button for 2~4 seconds (for VGA mode only). 1-4 Chapter 1: Product Introduction
-
 1
1 -
2
-
3
-
4
-
5
-
 6
6 -
 7
7 -
 8
8 -
 9
9 -
 10
10 -
 11
11 -
 12
12 -
 13
13 -
 14
14 -
 15
15 -
 16
16 -
17
-
18
-
19
-
20
-
21
-
22
-
23
-
24
 |
 |

1-4
Chapter 1: Product Introduction
1.5
Monitor introduction
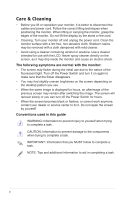
1.5.1
Using the Controls button
Use the controls button on the back of the monitor to adjust the image
settings.
2
1
3
4
5
6
7
1.
Button:
•
Activates the QuickFit function. (Please refer to 1.5.2 QuickFit
Function).
2.
Button:
•
Press this hotkey to switch from eight video preset modes
(
Scenery Mode
,
Standard Mode
,
Theater Mode
,
Game
Mode
,
Night View Mode
,
sRGB Mode
,
Reading Mode
,
and
Darkroom Mode
) with SPLENDID
Video Intelligence
Technology.
•
Exit the OSD menu or go back to the previous menu as the OSD
menu is active.
•
Automatically adjusts the image to its optimized position, clock,
and phase by pressing this button for 2~4 seconds (for VGA
mode only).