Asus ESC500 User Manual - Page 126
Installing AI Suite II
 |
View all Asus ESC500 manuals
Add to My Manuals
Save this manual to your list of manuals |
Page 126 highlights
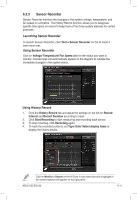
6.3 Installing AI Suite II AI Suite II is an all-in-one interface that integrates several ASUS utilities and allows you to launch and operate these utilities simultaneously. To install AI Suite II on your computer 1. Place the support DVD to the optical drive. The Drivers installation tab appears if your computer has enabled the Autorun feature. 2. Click Utilities tab > AI Suite II. 3. Follow the onscreen instructions to complete the installation. Using AI Suite II AI Suite II automatically starts when you enter the Windows® operating system (OS). The AI Suite II icon appears in the Windows® notification area. Click the icon to open the AI Suite II main menu bar. Click each button to select and launch a utility, to monitor the system, to update the motherboard BIOS, to display the system information, and to customize the settings of AI Suite II. Click to customize the interface settings Click to show the system information Click to update the motherboard BIOS Click to monitor sensors or CPU frequency Click to select a utility • The applications in the Tool menu vary with models. • The screeshots of AI Suite II in this user manual are for reference only. The actual screenshots vary with models. • Refer to the software manual in the support DVD or visit the ASUS website at www.asus.com for detailed software configuration. 6-8 Chapter 6: Driver installation
-
 1
1 -
2
-
3
-
4
-
5
-
6
-
7
-
8
-
9
-
10
-
11
-
12
-
13
-
14
-
15
-
16
-
17
-
18
-
19
-
20
-
21
-
22
-
23
-
24
-
25
-
26
-
27
-
28
-
29
-
30
-
31
-
32
-
33
-
34
-
35
-
36
-
37
-
38
-
39
-
40
-
41
-
42
-
43
-
44
-
45
-
46
-
47
-
48
-
49
-
50
-
51
-
52
-
53
-
54
-
55
-
56
-
57
-
58
-
59
-
60
-
61
-
62
-
63
-
64
-
65
-
66
-
67
-
68
-
69
-
70
-
71
-
72
-
73
-
74
-
75
-
76
-
77
-
78
-
79
-
80
-
81
-
82
-
83
-
84
-
85
-
86
-
87
-
88
-
89
-
90
-
91
-
92
-
93
-
94
-
95
-
96
-
97
-
98
-
99
-
100
-
101
-
102
-
103
-
104
-
105
-
106
-
107
-
108
-
109
-
110
-
111
-
112
-
113
-
114
-
115
-
116
-
117
-
118
-
119
-
120
-
 121
121 -
 122
122 -
 123
123 -
 124
124 -
 125
125 -
 126
126 -
 127
127 -
 128
128 -
 129
129 -
 130
130 -
 131
131 -
132
-
133
-
134
-
135
-
136
-
137
-
138
-
139
-
140
 |
 |
