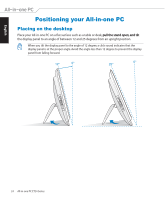
Asus ET2400XVT User Manual - Page 25
Mounting to the wall
 |
View all Asus ET2400XVT manuals
Add to My Manuals
Save this manual to your list of manuals |
Page 25 highlights
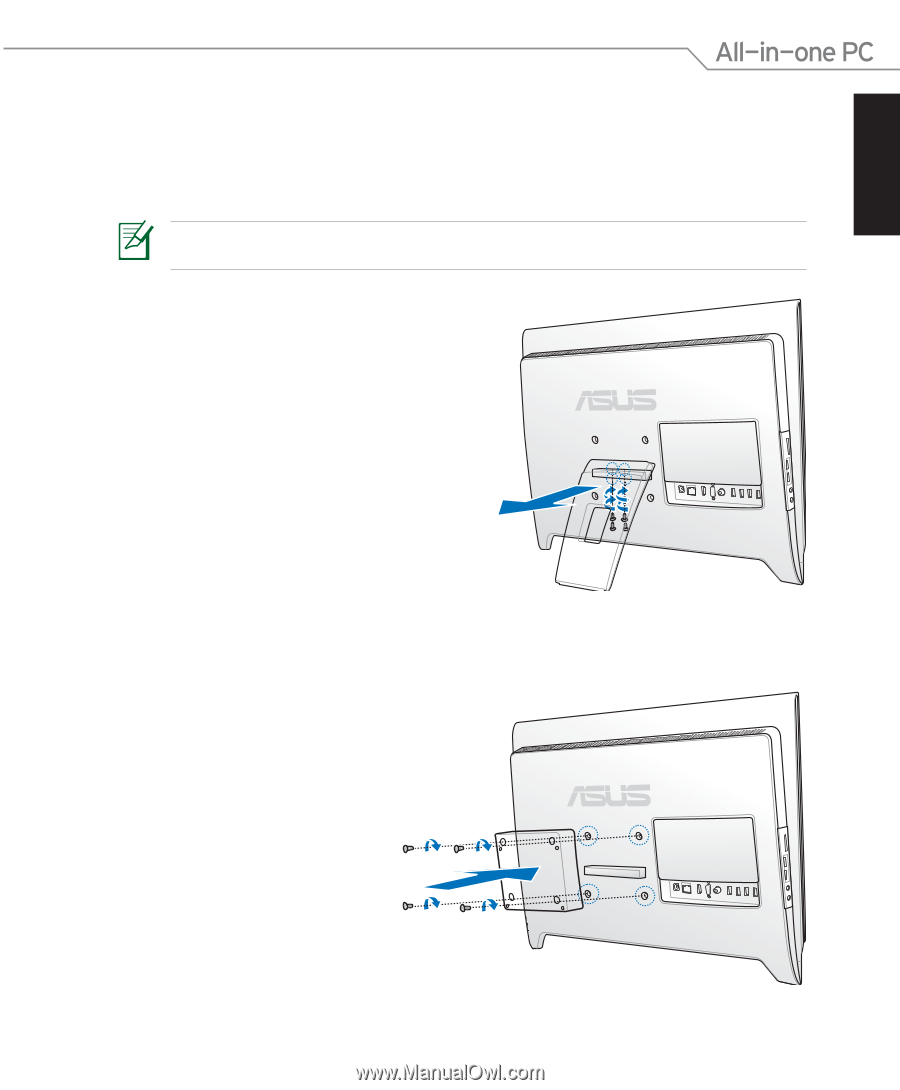
English Mounting to the wall To mount your All-in-one PC to the wall, purchase the optional wall mount pad adapter, wall mount pad and a wall mount kit. Install the wall mount pad according to the following instructions. The following instructions are for reference only.The actual installation procedures may vary depending on your purchased wall mount kit. 1. Remove the four screws on the stand to release the stand. Keep the screws for future use in case you want to reinstall the stand. 2. Align the wall mount pad adapter to the holes at the back of the All-in-one PC and install it. Secure the pad adapter with four screws. All-in-one PC ET24 Series 25
-
 1
1 -
2
-
3
-
4
-
5
-
6
-
7
-
8
-
9
-
10
-
11
-
12
-
13
-
14
-
15
-
16
-
17
-
18
-
19
-
 20
20 -
 21
21 -
 22
22 -
 23
23 -
 24
24 -
 25
25 -
 26
26 -
 27
27 -
 28
28 -
 29
29 -
 30
30 -
31
-
32
-
33
-
34
-
35
-
36
-
37
-
38
-
39
-
40
-
41
-
42
-
43
-
44
-
45
-
46
 |
 |
English
25
All-in-one PC ET24 Series
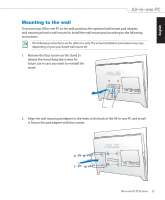
Mounting to the wall
To mount your All-in-one PC to the wall, purchase the optional wall mount pad adapter,
wall mount pad and a wall mount kit. Install the wall mount pad according to the following
instructions.
The following instructions are for reference only. The actual installation procedures may vary
depending on your purchased wall mount kit.
1.
Remove the four screws on the stand to
release the stand. Keep the screws for
future use in case you want to reinstall the
stand.
2.
Align the wall mount pad adapter to the holes at the back of the All-in-one PC and install
it. Secure the pad adapter with four screws.