Asus M3A76-CM User Manual - Page 18
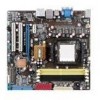
Central Processing Unit CPU - am2 am2 motherboard
 |
UPC - 610839169405
View all Asus M3A76-CM manuals
Add to My Manuals
Save this manual to your list of manuals |
Page 18 highlights
1.6 Central Processing Unit (CPU) The motherboard comes with an AM2+ / AM2 socket designed for AMD® AM2+ / AM2 Phenom™ FX / Phenom™ / Athlon™ / Sempron™ processor. The AM2/AM2+ socket has a different pinout from the 940-pin socket designed for the AMD Opteron™ processor. Use a CPU that is designed for the AM2/AM2+ socket. 1.6.1 Installing the CPU To install a CPU: 1. Locate the CPU socket on the motherboard. 2. Press the lever sideways to unlock the socket, then lift it up to a 90°100° angle. Socket lever Ensure that the socket lever is lifted up to 90°-100° angle, otherwise the CPU will not fit in completely. 1-8 ASUS M3A76-CM

1.6
Central Processing Unit (CPU)
The motherboard comes with an AM2+ / AM2 socket designed for AMD
®
AM2+ / AM2
Phenom™ FX / Phenom™ / Athlon™ / Sempron™ processor.
The AM2/AM2+ socket has a different pinout from the 940-pin socket designed for the AMD
Opteron™ processor. Use a CPU that is designed for the AM2/AM2+ socket.
1.6.1
Installing the CPU
To install a CPU:
1.
Locate the CPU socket on the motherboard.
2.
Press the lever sideways to unlock
the socket, then lift it up to a 90°-
100° angle.
Socket lever
Ensure that the socket lever is lifted up to 90°-100° angle, otherwise the CPU will not fit in
completely.
1-8
ASUS M3A76-CM


