Asus NR-LSR NR-LSR User Manual - Page 37
Expansion slots
 |
View all Asus NR-LSR manuals
Add to My Manuals
Save this manual to your list of manuals |
Page 37 highlights
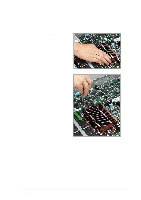
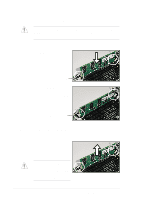
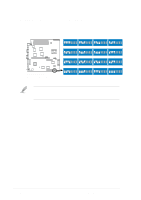
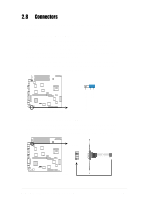
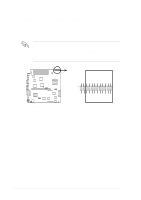
2.6 Expansion slots This motherboard has a 64-bit/133MHz PCI expansion slot that accommodates a dual slot riser card. The riser card implements the PCI-X (Peripheral Component Interconnect Extended) bus technology to support up to 133MHz data transfers, or about 1.06GB/s. This bus technology is primarily designed for servers to increase the performance of high bandwidth devices such as Gigabit Ethernet cards and Ultra3 SCSI interfaces. PCI-X is backward compatible with the earlier PCI bus technology making it possible to install PCI and PCI-X cards at the same time, but the bus speed will be that of the slowest card. Installing a card into one of the slots allows for 133MHz bus speed. Installing two cards reduces the bus speeds to 100MHz for both cards. Make sure to unplug the power cord before adding or removing expansion cards. Failure to do so may cause you physical injury and damage motherboard components. 2.6.1 Installing an expansion card Follow these steps to install an expansion card. 1. Before installing the expansion card, read the documentation that came with it and make the necessary hardware settings for the card. 2. Remove system cover and detach the riser card module from the expansion slot. 3. Install the expansion card into one of the PCI-X slots on the riser card. 4. Re-install the riser card into the system. 5. Replace the system cover. Refer to the AP160R-S system user guide for details on expansion card installation. ASUS NR-LSR motherboard user guide 2-11
-
 1
1 -
2
-
3
-
4
-
5
-
6
-
7
-
8
-
9
-
10
-
11
-
12
-
13
-
14
-
15
-
16
-
17
-
18
-
19
-
20
-
21
-
22
-
23
-
24
-
25
-
26
-
27
-
28
-
29
-
30
-
31
-
 32
32 -
 33
33 -
 34
34 -
 35
35 -
 36
36 -
 37
37 -
 38
38 -
 39
39 -
 40
40 -
 41
41 -
 42
42 -
43
-
44
-
45
-
46
-
47
-
48
-
49
-
50
-
51
-
52
-
53
-
54
-
55
-
56
-
57
-
58
-
59
-
60
-
61
-
62
-
63
-
64
-
65
-
66
-
67
-
68
-
69
-
70
-
71
-
72
-
73
-
74
-
75
-
76
-
77
-
78
-
79
-
80
-
81
-
82
-
83
-
84
-
85
-
86
-
87
-
88
-
89
-
90
-
91
-
92
-
93
-
94
-
95
-
96
-
97
-
98
-
99
-
100
-
101
-
102
-
103
-
104
-
105
-
106
 |
 |
