Asus P5GD2 Deluxe LGA775 CPU Installation Manual for Multi-Lingual - Page 4
C70740-001
 |
View all Asus P5GD2 Deluxe manuals
Add to My Manuals
Save this manual to your list of manuals |
Page 4 highlights
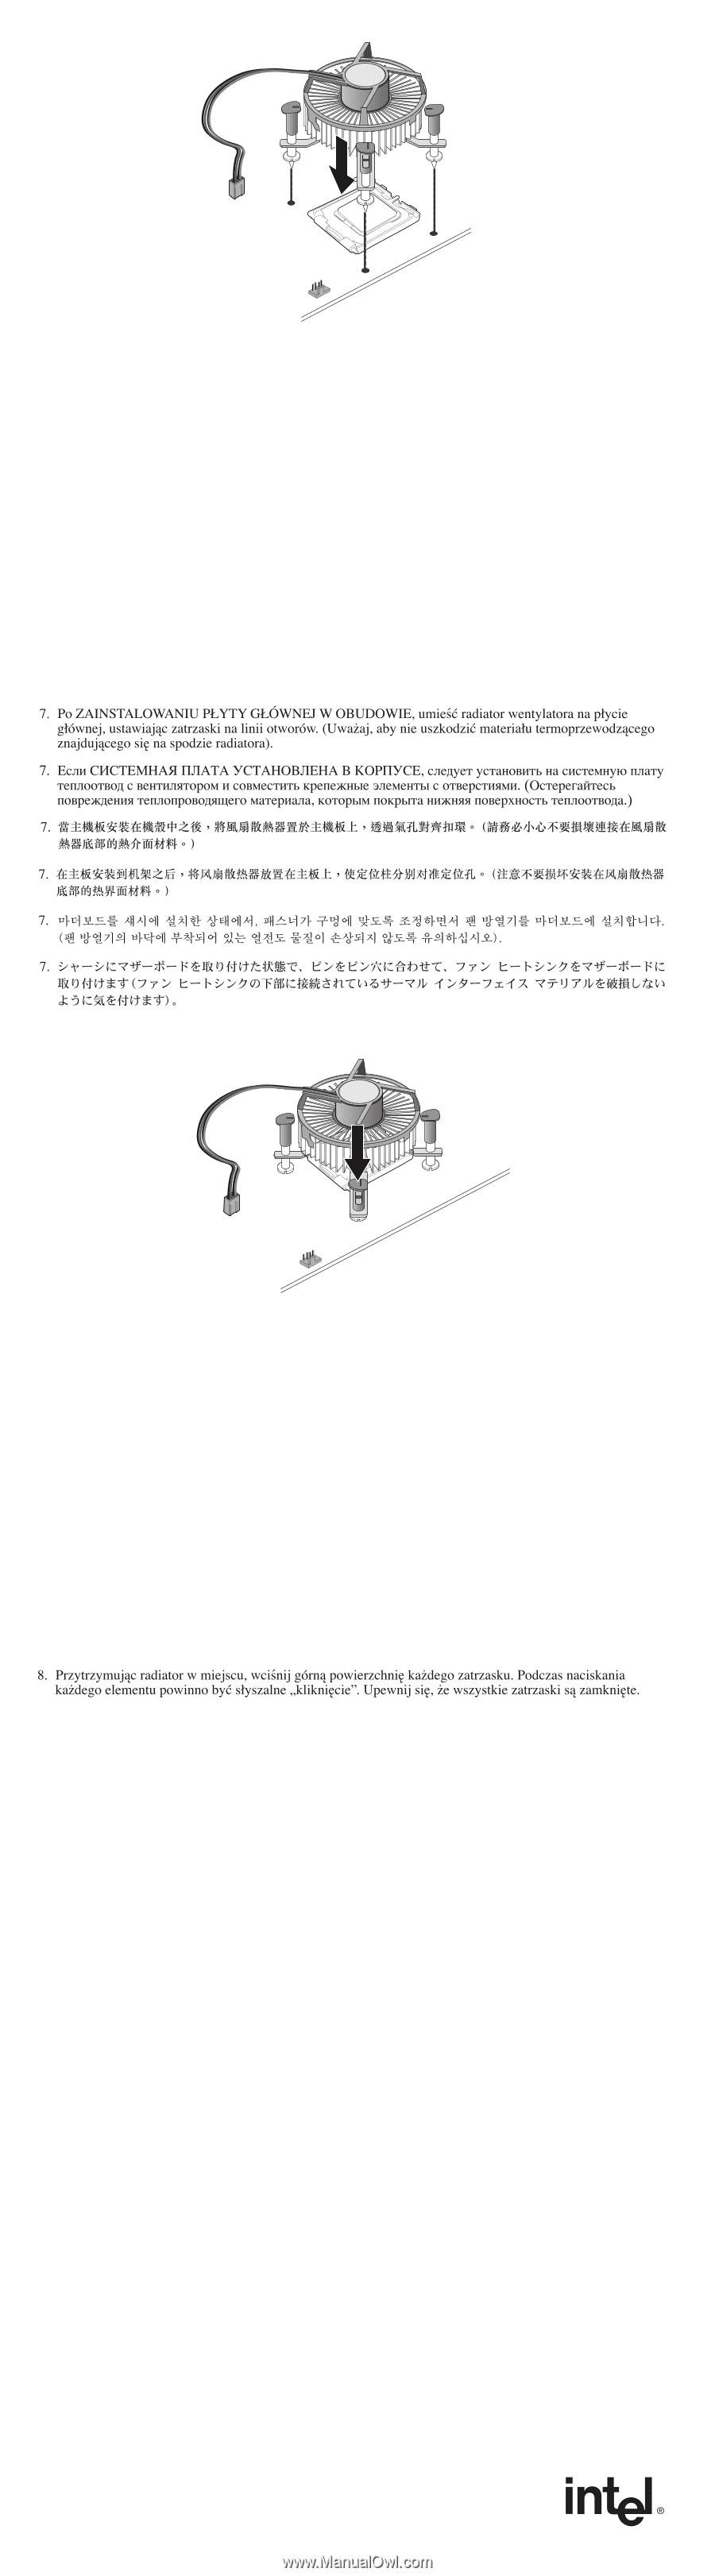
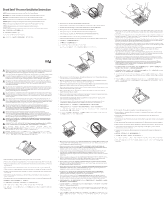
7. With the MOTHERBOARD INSTALLED IN THE CHASSIS, place the fan heatsink onto the motherboard, aligning the fasteners through the holes. (Be careful not to damage the thermal interface material attached to the bottom of the fan heatsink.) 7. Une fois la CARTE MERE INSTALLEE DANS LE CHASSIS, insérez le dissipateur du ventilateur sur la carte mère en alignant les éléments de fixation avec les orifices correspondants (veillez à ne pas endommager le matériau d'interface thermique recouvrant la partie inférieure du dissipateur du ventilateur.) 7. Nachdem Sie das Motherboard im Gehäuse eingebaut haben, setzen Sie den Lüfter auf das Motherboard und befestigen (beschädigen Sie dabei nicht die Unterseite des Lüfters.) 7. Con la PLACA MADRE INSTALADA EN EL CHASIS, coloque el disipador de calor del ventilador sobre la placa madre, introduciendo los tornillos por los orificios. (Tenga cuidado de no dañar el material de interfaz térmico adherido a la base del disipador de calor del ventilador.) 7. Com a PLACA-MÃE INSTALADA NO CHASSI, coloque a ventoinha de dissipação de calor na placa-mãe e alinhe as presilhas com os orifícios. (Cuidado para não danificar o material térmico de interface colocado no fundo da ventoinha de dissipação de calor.) 7. Una volta INSTALLATA LA SCHEDA MADRE NELLO CHASSIS, posizionare il dissipatore di calore con ventola sulla scheda madre, allineando i perni nei fori. Prestare attenzione a non danneggiare il materiale di interfaccia termico fissato sulla parte inferiore del dissipatore di calore con ventola. 8. Push down on the top of each fastener while holding the fan heat sink in place. You should hear a "click" when pushing down each fastener. Check that all four fasteners are securely attached. 8. Appuyez au sommet de chaque élément de fixation tout en maintenant le dissipateur du ventilateur en place. Vous devez entendre un déclic lorsque vous appuyez sur chaque élément de fixation. Vérifiez que les quatre éléments de fixation sont correctement fixés. 8. Drücken Sie auf jedes der vier Befestigungen, während Sie den Lüfter festhalten. Sie hören ein Klickgeräusch, wenn die jeweilige Befestigung einrastet. Vergewissern Sie sich, dass alle vier Befestigungen sicher angebracht sind. 8. Mientras mantiene el disipador de calor del ventilador en su sitio, presione la cabeza de los tornillos hacia abajo. Cada vez que empuje un tornillo hacia abajo se debería escuchar un "clic". Verifique que cada uno de los cuatro tornillos esté firmemente fijado. 8. Pressione a parte superior das presilhas enquanto segura a ventoinha de dissipação de calor em seu lugar. Deve-se ouvir um "clique" ao empurrar as presilhas para baixo. Verifique se todas as presilhas estão bem seguras. 8. Premere sulla parte superiore di ciascun perno tenendo in posizione il dissipatore di calore con ventola. Quando si preme sul perno, si sentirà un "clic". Verificare che i quattro perni siano correttamente inseriti. (C70740-001) Copyright © 2004 Intel Corporation. All rights reserved. Intel and the Intel logo are trademarks or registered trademarks of Intel Corporation or its subsidiaries in the United States and other countries. *Other names and brands may be claimed as property of others. C70740-001
-
 1
1 -
 2
2 -
 3
3 -
 4
4 -
 5
5 -
 6
6 -
 7
7 -
 8
8
 |
 |