Asus P5Q3 User Manual - Page 134
Audio I/O, Microphone, Noise Suppression, Acoustic Echo Cancellation, Beam Forming, 3D Audio Demo
 |
UPC - 610839167210
View all Asus P5Q3 manuals
Add to My Manuals
Save this manual to your list of manuals |
Page 134 highlights
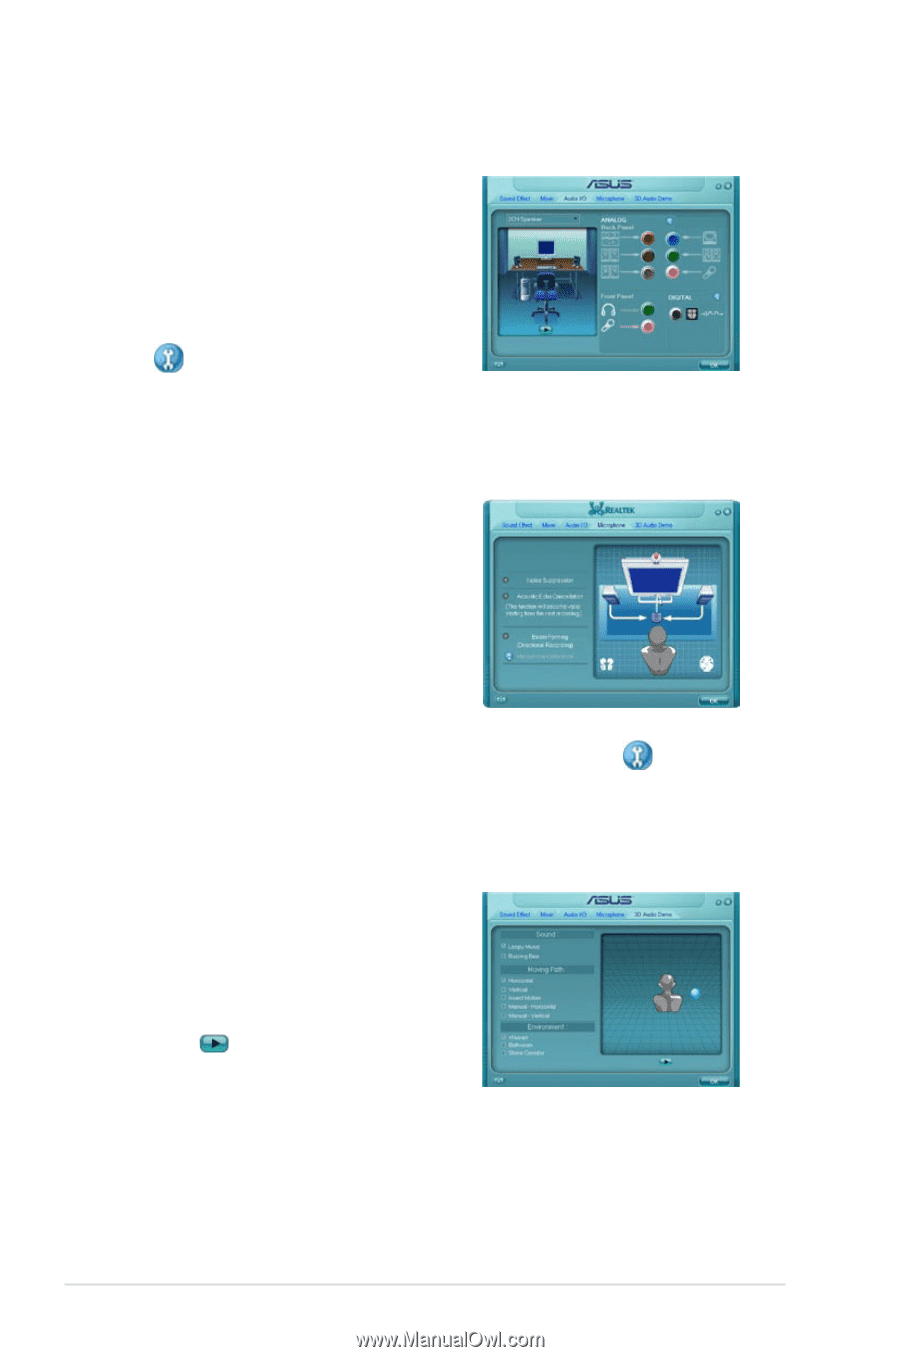
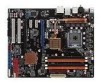
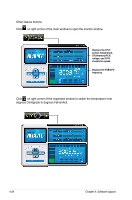
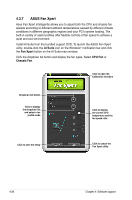
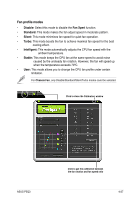
Audio I/O To set the Audio I/O options 1. Click the Audio I/O tab. 2. Click the drop-down menu to select the channel configuration. 3. The control settings window displays the status of connected devices. Click for analog and digital options. 4. Click OK to effect the Audio I/O settings and exit Microphone To set the Microphone options 1. Click the Microphone tab. 2. Click the Noise Suppression option button to reduce the static background noise when recording. 3. Click the Acoustic Echo Cancellation option button to reduce the echo from the front speakers when recording. 4. Click the Beam Forming option button to eliminate surrounding noise interferences. Click microphone calibration. 5. Click OK to effect the Microphone settings and exit. 3D Audio Demo To start the 3D Audio Demo 1. Click the 3D Audio Demo tab. 2. Click the option buttons to change the sound, moving path, or environment settings. 3. Click to test your settings. 4. Click OK to effect the 3D Audio Demo settings and exit. to start 4-22 Chapter 4: Software support
-
 1
1 -
2
-
3
-
4
-
5
-
6
-
7
-
8
-
9
-
10
-
11
-
12
-
13
-
14
-
15
-
16
-
17
-
18
-
19
-
20
-
21
-
22
-
23
-
24
-
25
-
26
-
27
-
28
-
29
-
30
-
31
-
32
-
33
-
34
-
35
-
36
-
37
-
38
-
39
-
40
-
41
-
42
-
43
-
44
-
45
-
46
-
47
-
48
-
49
-
50
-
51
-
52
-
53
-
54
-
55
-
56
-
57
-
58
-
59
-
60
-
61
-
62
-
63
-
64
-
65
-
66
-
67
-
68
-
69
-
70
-
71
-
72
-
73
-
74
-
75
-
76
-
77
-
78
-
79
-
80
-
81
-
82
-
83
-
84
-
85
-
86
-
87
-
88
-
89
-
90
-
91
-
92
-
93
-
94
-
95
-
96
-
97
-
98
-
99
-
100
-
101
-
102
-
103
-
104
-
105
-
106
-
107
-
108
-
109
-
110
-
111
-
112
-
113
-
114
-
115
-
116
-
117
-
118
-
119
-
120
-
121
-
122
-
123
-
124
-
125
-
126
-
127
-
128
-
 129
129 -
 130
130 -
 131
131 -
 132
132 -
 133
133 -
 134
134 -
 135
135 -
 136
136 -
 137
137 -
 138
138 -
 139
139 -
140
-
141
-
142
-
143
-
144
-
145
-
146
-
147
-
148
-
149
-
150
-
151
-
152
-
153
-
154
-
155
-
156
-
157
-
158
-
159
-
160
-
161
-
162
-
163
-
164
-
165
-
166
-
167
-
168
-
169
-
170
-
171
-
172
 |
 |