Asus PRIME B350M-E User Guide
Asus PRIME B350M-E Manual
 |
View all Asus PRIME B350M-E manuals
Add to My Manuals
Save this manual to your list of manuals |
Asus PRIME B350M-E manual content summary:
- Asus PRIME B350M-E | User Guide - Page 1
Motherboard PRIME B350M-E - Asus PRIME B350M-E | User Guide - Page 2
service will not be extended if: (1) the product is repaired, modified or altered, unless such repair, modification of alteration is authorized in writing by ASUS; or (2) the serial number of the product is defaced or missing. ASUS PROVIDES THIS MANUAL from http://support.asus.com/download problems - Asus PRIME B350M-E | User Guide - Page 3
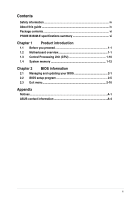
guide iv Package contents vi PRIME B350M-E specifications summary vi Chapter 1 Product introduction 1.1 Before you proceed 1-1 1.2 Motherboard overview 1-1 1.3 Central Processing Unit (CPU 1-10 1.4 System memory 1-12 Chapter 2 BIOS information 2.1 Managing and updating your BIOS 2-1 2.2 BIOS - Asus PRIME B350M-E | User Guide - Page 4
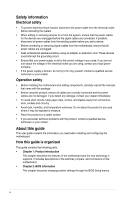
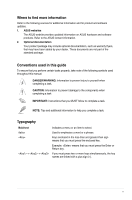
. • If you encounter technical problems with the product, contact a qualified service technician or your retailer. About this guide This user guide contains the information you need when installing and configuring the motherboard. How this guide is organized This guide contains the following parts - Asus PRIME B350M-E | User Guide - Page 5
to the following sources for additional information and for product and software updates. 1. ASUS websites The ASUS website provides updated information on ASUS hardware and software products. Refer to the ASUS contact information. 2. Optional documentation Your product package may include optional - Asus PRIME B350M-E | User Guide - Page 6
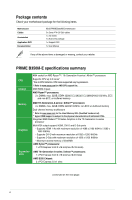
-E motherboard 2 x Serial ATA 6.0 Gb/s cables 1 x I/O shield 1 x M.2 screw package 1 x Support DVD 1 x User Manual If any of the above items is damaged or missing, contact your retailer. PRIME B350M-E specifications summary CPU Chipset Memory Graphics Expansion slots AM4 socket for AMD Ryzen - Asus PRIME B350M-E | User Guide - Page 7
PRIME B350M-E specifications summary Storage LAN Audio USB ASUS unique features AMD Ryzen™ processors: - 1 x M.2 socket 3 with M Key, Type 2242/2260/2280 (PCIe 3.0 x4 and SATA modes) storage devices support AMD 7th Generation A-series / Athlon™ processors: - 1 x M.2 socket 3 with M Key, Type 2242/ - Asus PRIME B350M-E | User Guide - Page 8
PRIME B350M-E specifications summary ASUS Quiet Thermal Solution Rear panel I/O ports Internal connectors BIOS features Manageability Support DVD OS support Form factor Quiet Thermal Design: - Stylish Fanless Design: Chipset Heat-sink solution - ASUS Fan Xpert 1 x PS/2 keyboard (purple) 1 x PS/2 - Asus PRIME B350M-E | User Guide - Page 9
EATX12V SOCKET AM4 DDR4 DIMM_A1 (64bit, 288-pin module) DDR4 DIMM_B1 (64bit,288-pin module) EATXPWR 22.6cm(8.9in) HDMI Place this side towards USB3_56 the rear of the chassis 1 USB3.1_12 CHA_FAN LAN_USB3_34 AUDIO LANGuard BATTERY 128Mb BIOS PCIEX16 16 Realtek 8111H Super PRIME B350M - Asus PRIME B350M-E | User Guide - Page 10
Volts Power Supply Wattage Calculator at http://support.asus.com/ PowerSupplyCalculator/PSCalculator.aspx?SLanguage=en-us for details. 2. CPU and chassis fan connectors (4-pin CPU_FAN, 4-pin CHA_FAN) Connect the fan cables to the fan connectors on the motherboard, ensuring that the black wire of - Asus PRIME B350M-E | User Guide - Page 11
place jumper caps on the fan connectors! The CPU_FAN connector supports a CPU fan of maximum 1A (12 W) fan power. CHA_FAN CPU_FAN GND CHA FAN PWR CHA FAN IN CHA FAN PWM 3. AMD AM4 CPU socket This motherboard comes with a AMD AM4 socket designed for AMD Ryzen™ / 7th Generation A-series / Athlon - Asus PRIME B350M-E | User Guide - Page 12
USB-chargeable devices, optimized power efficiency and backward compatibility with USB 2.0. USB3+5V IntA_P2_SSRXIntA_P2_SSRX+ GND IntA_P2_SSTXIntA_P2_SSTX and supports up to 480Mbps connection speed. Never connect a 1394 cable to the USB connectors. Doing so will damage the motherboard! USB34 - Asus PRIME B350M-E | User Guide - Page 13
RAM (2-pin CLRTC) This header allows you to clear the Real Time Clock (RTC) RAM in CMOS. You can clear the CMOS memory of date, and system setup parameters by erasing the CMOS RTC RAM data. The onboard button cell battery powers the RAM I/O module that supports either HD Audio ASUS PRIME B350M-E 1-5 - Asus PRIME B350M-E | User Guide - Page 14
specifications. 16. PCI Express x16 slot This motherboard supports one PCI Express x16 graphic card that complies with the PCI Express specifications. IRQ assignments for this motherboard • For AMD socket AM4 A-series/AthlonTM Series processors: A B C D E PCIEx16_1 - - - shared - PCIEx1_1 - Asus PRIME B350M-E | User Guide - Page 15
.1 Gen1 XHCI controller - - - - - AMD Promonotry Chip XHCI controller shared - - - - drivers support "Share IRQ" or that the cards do not need IRQ assignments. Otherwise, conflicts will arise between the two PCI groups, making the system unstable and the card inoperable. ASUS PRIME B350M - Asus PRIME B350M-E | User Guide - Page 16
is for a VGA monitor or other VGA-compatible devices. 3. USB 3.1 Gen 1 ports. These four 9-pin Universal Serial Bus (USB) ports connect to USB 3.1 Gen 1devices. • USB 3.1 Gen 1 devices can only be used for data storage. • Due to the design of the AMD AM4 series chipset, all USB devices connected to - Asus PRIME B350M-E | User Guide - Page 17
playback of HD DVD, Blu-ray, and other protected content. 10. DVI-D port. This port is for any DVI-D compatible device. DVI-D can not be converted to output from RGB Signal to CRT and is not compatible with DVI-I. 11. PS/2 keyboard (purple). This port is for a PS/2 keyboard. ASUS PRIME B350M-E 1-9 - Asus PRIME B350M-E | User Guide - Page 18
CPU) The motherboard comes with an AMD AM4 socket designed for AMD Ryzen™ / 7th Generation A-series / Athlon™ processors. Unplug all power cables before installing the CPU. The AM4 socket has a different pinout from the FM2+/FM2 socket. Ensure that you use a CPU designed for the AM4 socket. The CPU - Asus PRIME B350M-E | User Guide - Page 19
Installing the CPU heatsink and fan assembly Type 1 1 2 3 4 Type 2 1 2 Remove the screws and the retention module only. Do not remove the plate on the bottom. ASUS PRIME B350M-E 1-11 - Asus PRIME B350M-E | User Guide - Page 20
retailer to get the correct memory modules. • For system stability, use a more efficient memory cooling system to support a full memory load (2 DIMMs). • Refer to www.asus.com for the latest Memory QVL (Qualified Vendors List) Recommended memory configurations 1-12 Chapter 1: Product introduction - Asus PRIME B350M-E | User Guide - Page 21
Installing a DIMM 1 2 A To remove a DIMM A B A B ASUS PRIME B350M-E 1-13 - Asus PRIME B350M-E | User Guide - Page 22
1-14 Chapter 1: Product introduction - Asus PRIME B350M-E | User Guide - Page 23
motherboard's driver, software and firmware PRIME B350M-E 03/05/2017 Click to find and select the BIOS from file Click to select a boot logo Click to update the BIOS EZ Update requires an Internet connection either through a network or an ISP (Internet Service Provider). 2-1 ASUS PRIME B350M - Asus PRIME B350M-E | User Guide - Page 24
BIOS update process. Via Internet a) Select via Internet. b) Press the Left/Right arrow keys to select an Internet connection method, and then press . c) Follow the onscreen instructions to complete the update. 3. Reboot the system when the update process is done. • ASUS EZ Flash 3 supports - Asus PRIME B350M-E | User Guide - Page 25
failure! 2.1.4 ASUS BIOS Updater ASUS BIOS Updater allows you to update the BIOS in DOS environment. The screen captures used in this section are for reference only and may not be exactly the same as actually shown on your computer screen. Before updating BIOS • Prepare the motherboard support DVD - Asus PRIME B350M-E | User Guide - Page 26
BIOS Updater for DOS V1.31 [2014/08/01] Current ROM BOARD: PRIME B350M-E VER: 0216 (H :00 B :00) DATE: 03/05/2017 PATH: C:\ Update BIOS file and press . 4. After the BIOS Updater checks the selected BIOS file, select Yes to confirm the BIOS update. The BIOS Backup feature is not supported - Asus PRIME B350M-E | User Guide - Page 27
the CMOS and reset the motherboard to the default value. See section 1.2.1 Layout contents for information on how to erase the RTC RAM. BIOS menu screen The BIOS setup program can be used under two modes: EZ Mode and Advanced Mode. Press to change between the two modes. 2-5 ASUS PRIME B350M-E - Asus PRIME B350M-E | User Guide - Page 28
can be changed. Go to the Setup Mode item in the Boot menu. Displays the CPU/motherboard temperature, CPU voltage output, CPU/chassis fan speed, and SATA information Selects the display language of the BIOS setup program Displays the system properties of the selected mode. Click to switch - Asus PRIME B350M-E | User Guide - Page 29
to configure the BIOS settings. The figure Fan control Hot Keys Sub-menu item Menu items General help Configuration fields Pop-up window Scroll bar Searches FAQ Goes back to EZ Mode Last modified settings Displays the CPU temperature, CPU and memory voltage output 2-7 ASUS PRIME B350M - Asus PRIME B350M-E | User Guide - Page 30
changing the basic system configuration For changing the overclocking settings For changing the advanced system settings For your fans. Use this button to manually tweak the fans to your desired settings. Hot keys This button above the menu bar contains the navigation keys for the BIOS setup - Asus PRIME B350M-E | User Guide - Page 31
button This button shows the items that you last modified and saved in BIOS Setup. Search on FAQ Move your mouse over this button to show a QR code. Scan this QR code with your mobile device to connect to the ASUS BIOS FAQ web page. You can also scan the QR code below. 2-9 ASUS PRIME B350M-E - Asus PRIME B350M-E | User Guide - Page 32
2.3 Exit menu The Exit menu items allow you to load the optimal default values for the BIOS items, and save or discard your changes to the BIOS items. You can access the EZ Mode from the Exit menu. Load Optimized Defaults This option allows you to load the default values for each - Asus PRIME B350M-E | User Guide - Page 33
radio frequency energy and, if not installed and used in accordance with manufacturer's instructions, may cause harmful interference to radio communications. However, there is no guarantee compris celles susceptibles de provoquer un fonctionnement non souhaité de l'appareil. A-1 ASUS PRIME B350M-E - Asus PRIME B350M-E | User Guide - Page 34
substances in our products at ASUS REACH website at http://csr.asus.com/english/REACH.htm. DO NOT throw the motherboard in municipal waste. This the battery should not be placed in municipal waste. ASUS Recycling/Takeback Services ASUS recycling and takeback programs come from our commitment to - Asus PRIME B350M-E | User Guide - Page 35
metni şu adreste bulunabilir: www.asus.com/support Bosanski ASUSTeK Computer Inc. ovim izjavljuje da je ovaj uređaj usklađen sa bitnim zahtjevima i ostalim odgovarajućim odredbama vezanih direktiva. Cijeli tekst EU izjave o usklađenosti dostupan je na: www.asus.com/support A-3 ASUS PRIME B350M-E - Asus PRIME B350M-E | User Guide - Page 36
USA Telephone +1-510-739-3777 Fax +1-510-608-4555 Web site http://www.asus.com/us/ Technical Support Support fax Telephone Online support +1-812-284-0883 +1-812-282-2787 http://qr.asus.com/techserv ASUS COMPUTER GmbH (Germany and Austria) Address Harkort Str. 21-23, 40880 Ratingen - Asus PRIME B350M-E | User Guide - Page 37
2 Section 2. 1077(a) Responsible Party Name: Asus Computer International Address: 800 Corporate Way, Fremont, CA 94539. Phone/Fax No: (510)739-3777/(510)608-4555 hereby declares that the product Product Name : Motherboard Model Number : PRIME B350M-E Conforms to the following specifications: FCC
-
 1
1 -
 2
2 -
 3
3 -
 4
4 -
 5
5 -
 6
6 -
 7
7 -
8
-
9
-
10
-
11
-
12
-
13
-
14
-
15
-
16
-
17
-
18
-
19
-
20
-
21
-
22
-
23
-
24
-
25
-
26
-
27
-
28
-
29
-
30
-
31
-
32
-
33
-
34
-
35
-
36
-
37
 |
 |

Motherboard
PRIME B350M-E