Asus ROG GL702VM 7th Gen Intel Core Users Manual for English Edition - Page 88
Secure the HDD bay with the screws you removed earlier.
 |
View all Asus ROG GL702VM 7th Gen Intel Core manuals
Add to My Manuals
Save this manual to your list of manuals |
Page 88 highlights
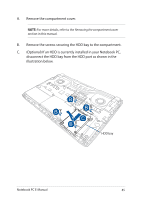
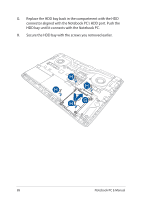
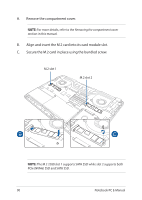
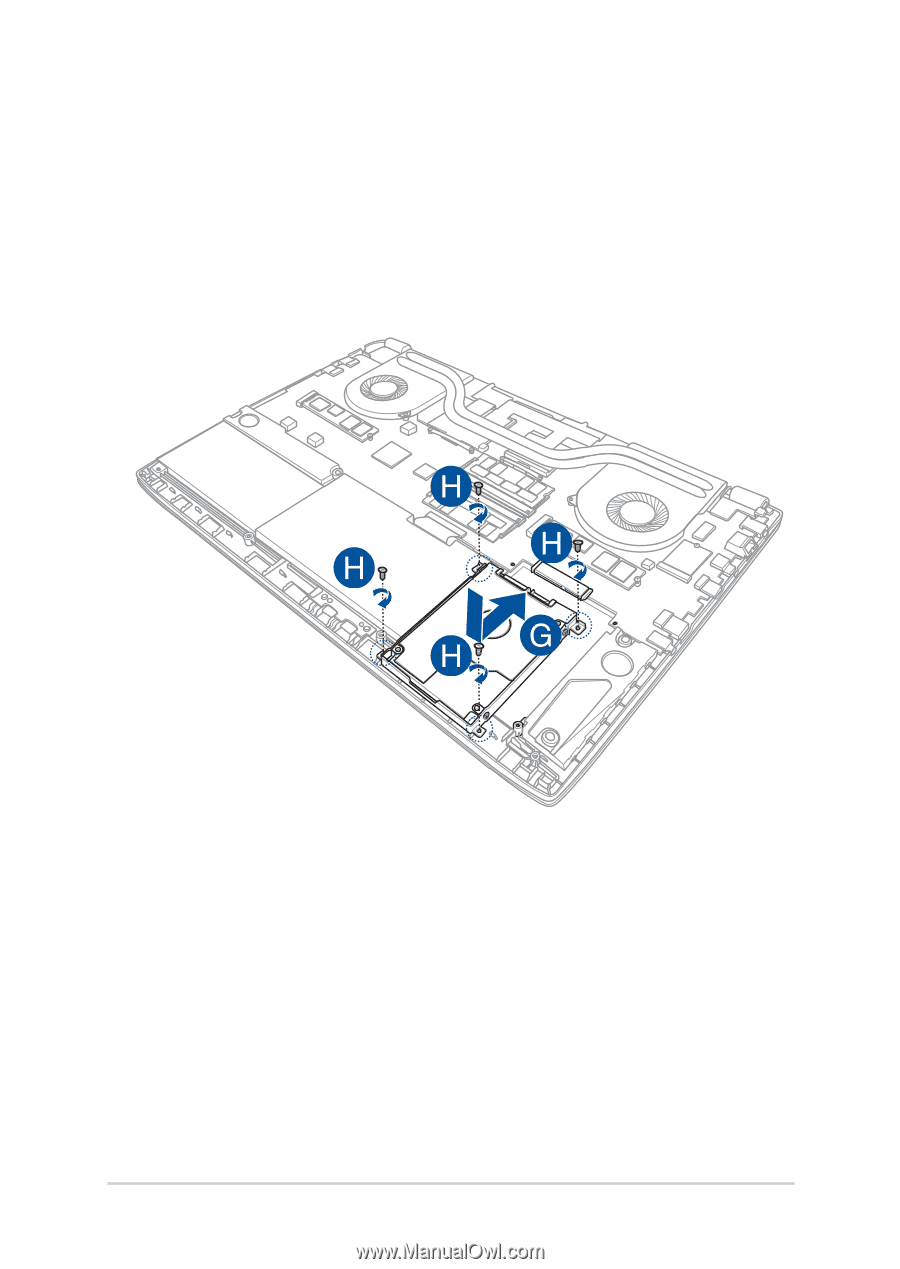
G. Replace the HDD bay back in the compartment with the HDD connector aligned with the Notebook PC's HDD port. Push the HDD bay until it connects with the Notebook PC. H. Secure the HDD bay with the screws you removed earlier. 88 Notebook PC E-Manual
-
 1
1 -
2
-
3
-
4
-
5
-
6
-
7
-
8
-
9
-
10
-
11
-
12
-
13
-
14
-
15
-
16
-
17
-
18
-
19
-
20
-
21
-
22
-
23
-
24
-
25
-
26
-
27
-
28
-
29
-
30
-
31
-
32
-
33
-
34
-
35
-
36
-
37
-
38
-
39
-
40
-
41
-
42
-
43
-
44
-
45
-
46
-
47
-
48
-
49
-
50
-
51
-
52
-
53
-
54
-
55
-
56
-
57
-
58
-
59
-
60
-
61
-
62
-
63
-
64
-
65
-
66
-
67
-
68
-
69
-
70
-
71
-
72
-
73
-
74
-
75
-
76
-
77
-
78
-
79
-
80
-
81
-
82
-
 83
83 -
 84
84 -
 85
85 -
 86
86 -
 87
87 -
 88
88 -
 89
89 -
 90
90 -
 91
91 -
 92
92 -
 93
93 -
94
-
95
-
96
-
97
-
98
-
99
-
100
-
101
-
102
-
103
-
104
-
105
-
106
-
107
-
108
-
109
-
110
-
111
-
112
-
113
-
114
-
115
-
116
-
117
-
118
-
119
-
120
-
121
-
122
 |
 |
88
Notebook PC E-Manual
G.
Replace the HDD bay back in the compartment with the HDD
connector aligned with the Notebook PC’s HDD port. Push the
HDD bay until it connects with the Notebook PC.
H.
Secure the HDD bay with the screws you removed earlier.