Asus ROG MAXIMUS Z790 EXTREME Users Manual English - Page 75
Motherboard rear and audio connections, 2.3.1 Rear I/O connection
 |
View all Asus ROG MAXIMUS Z790 EXTREME manuals
Add to My Manuals
Save this manual to your list of manuals |
Page 75 highlights
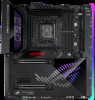
2.3 Motherboard rear and audio connections 2.3.1 Rear I/O connection Chapter 2 Rear panel connectors 1. Clear CMOS button (CLR_CMOS). Press this button to clear the BIOS setup information only when the systems hangs due to overclocking. 2. USB 3.2 Gen 2 Type-A ports E1 and EP2 3. Marvell® AQtion 10Gb Ethernet port* 4. Intel® 2.5Gb Ethernet port* 5. USB 3.2 Gen 2 Type-A ports 6, 7, and 8 6. BIOS FlashBack™ button 7. HDMI® port 8. USB 3.2 Gen 2 Type-A port E3 9. USB 3.2 Gen 2x2 Type-C® port C5 10. USB 3.2 Gen 2 Type-A port E4 11. Thunderbolt™ 4 USB Type-C® port EC1 12. USB 3.2 Gen 2x2 Type-C® port C3 13. Wi-Fi module 14. Optical S/PDIF OUT port 15. LED-illuminated audio jacks** * and ** : Refer to the tables on the next page for LAN port LEDs, and audio port definitions. We strongly recommend that you connect your devices to ports with matching data transfer rate. For example connecting your USB 3.2 Gen 1 devices to USB 3.2 Gen 1 ports for faster and better performance for your devices. ROG MAXIMUS Z790 EXTREME 2-29
-
 1
1 -
2
-
3
-
4
-
5
-
6
-
7
-
8
-
9
-
10
-
11
-
12
-
13
-
14
-
15
-
16
-
17
-
18
-
19
-
20
-
21
-
22
-
23
-
24
-
25
-
26
-
27
-
28
-
29
-
30
-
31
-
32
-
33
-
34
-
35
-
36
-
37
-
38
-
39
-
40
-
41
-
42
-
43
-
44
-
45
-
46
-
47
-
48
-
49
-
50
-
51
-
52
-
53
-
54
-
55
-
56
-
57
-
58
-
59
-
60
-
61
-
62
-
63
-
64
-
65
-
66
-
67
-
68
-
69
-
 70
70 -
 71
71 -
 72
72 -
 73
73 -
 74
74 -
 75
75 -
 76
76 -
 77
77 -
 78
78 -
 79
79 -
 80
80 -
81
-
82
-
83
-
84
-
85
-
86
-
87
-
88
-
89
-
90
-
91
-
92
-
93
-
94
-
95
-
96
-
97
-
98
-
99
-
100
-
101
-
102
-
103
-
104
 |
 |
