Asus ROG SWIFT PG348Q PG348 Series User Guide for English Edition - Page 15
Setup, 2.1 Assembling the monitor arm/base
 |
View all Asus ROG SWIFT PG348Q manuals
Add to My Manuals
Save this manual to your list of manuals |
Page 15 highlights
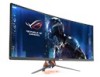
2.1 Assembling the monitor arm/base 1. Remove the stand side covers from monitor arm and take out the screws. (Figure 1) 2. Insert the arm into the base. (Figure 2) 3. Fasten the screws. (Figure 3) 4. Place the front of monitor face down on the table. 5. Attach stand assembly into the monitor, making sure the tab on the upper of stand fits into the groove on the back of monitor. (Figure 4) (Figure 1) (Figure 2) (Figure 3) 2 1 (Figure 4) We recommend that you cover the table surface with soft cloth to prevent damage to the monitor. • Do not touch the metal parts on the back of the monitor. • Do not connect the power cord before assembling the monitor arm/base. ASUS PG348Q Series LCD Monitor 2-1
-
 1
1 -
2
-
3
-
4
-
5
-
6
-
7
-
8
-
9
-
 10
10 -
 11
11 -
 12
12 -
 13
13 -
 14
14 -
 15
15 -
 16
16 -
 17
17 -
 18
18 -
 19
19 -
 20
20 -
21
-
22
-
23
-
24
-
25
-
26
-
27
-
28
-
29
-
30
 |
 |

2-1
ASUS PG348Q Series LCD Monitor
2.1
Assembling the monitor arm/base
1.
Remove the stand side covers from monitor arm and take out the screws.
(Figure 1)
2.
Insert the arm into the base. (Figure 2)
3.
Fasten the screws. (Figure 3)
4.
Place the front of monitor face down on the table.
5.
Attach stand assembly into the monitor, making sure the tab on the upper of
stand fits into the groove on the back of monitor. (Figure 4)
1
2
We recommend that you cover the table surface with soft cloth to prevent
damage to the monitor.
•
Do not touch the metal parts on the back of the monitor.
•
Do not connect the power cord before assembling the monitor arm/base.
(Figure 3)
(Figure 2)
(Figure 1)
(Figure 4)