Asus RS100-E5 User Guide - Page 33
Connect the other end of the, remove the ODD bay first before, Locate the Serial ATA drive plate,
 |
UPC - 610839665518
View all Asus RS100-E5 manuals
Add to My Manuals
Save this manual to your list of manuals |
Page 33 highlights
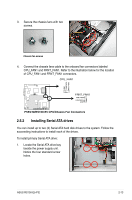
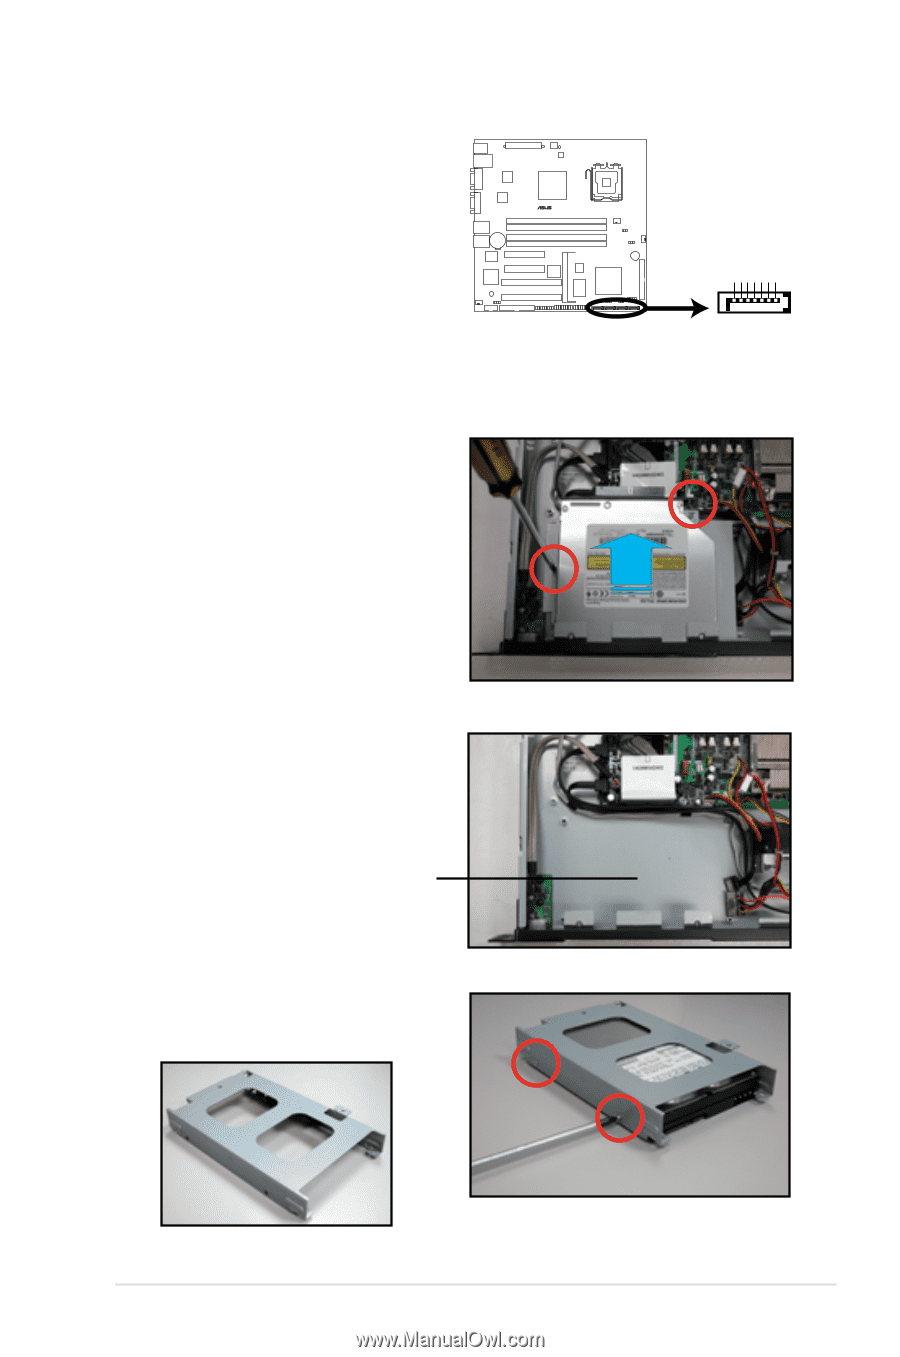
5. Connect the other end of the Serial ATA signal connector to the onboard SATA connector labeled SATA1. Refer to illustration below for the location of SATA1 connector. ® P5BV-M/RS100-E5 SATA1 GND RSATA_RXN1 RSATA_RXP1 GND RSATA_TXN1 RSATA_TXP1 GND P5BV-M/RS100-E5 SATA1 Connector To install secondary Serial ATA drive: 1. If you have an ODD installed, remove the ODD bay first before you install a secondary SATA disk drive. To remove, disconnect the ODD cable and power cable then use a screwdriver to remove all two screws. 2. Locate the Serial ATA drive plate under the optical disk drive (ODD) bay. SATA drive plate 3. Secure the hard disk drive brackets to the HDD with four screws. HDD bracket ASUS RS100-E5-PI2 2-15
-
 1
1 -
2
-
3
-
4
-
5
-
6
-
7
-
8
-
9
-
10
-
11
-
12
-
13
-
14
-
15
-
16
-
17
-
18
-
19
-
20
-
21
-
22
-
23
-
24
-
25
-
26
-
27
-
 28
28 -
 29
29 -
 30
30 -
 31
31 -
 32
32 -
 33
33 -
 34
34 -
 35
35 -
 36
36 -
 37
37 -
 38
38 -
39
-
40
-
41
-
42
-
43
-
44
-
45
-
46
-
47
-
48
-
49
-
50
-
51
-
52
-
53
-
54
-
55
-
56
-
57
-
58
-
59
-
60
-
61
-
62
-
63
-
64
-
65
-
66
-
67
-
68
-
69
-
70
-
71
-
72
-
73
-
74
-
75
-
76
-
77
-
78
-
79
-
80
-
81
-
82
-
83
-
84
-
85
-
86
-
87
-
88
-
89
-
90
-
91
-
92
-
93
-
94
-
95
-
96
-
97
-
98
-
99
-
100
-
101
-
102
-
103
-
104
-
105
-
106
-
107
-
108
-
109
-
110
-
111
-
112
-
113
-
114
-
115
-
116
-
117
-
118
-
119
-
120
-
121
-
122
-
123
-
124
-
125
-
126
-
127
-
128
-
129
-
130
-
131
-
132
-
133
-
134
-
135
-
136
-
137
-
138
-
139
-
140
-
141
-
142
-
143
-
144
-
145
-
146
-
147
-
148
 |
 |
2-15
ASUS RS100-E5-PI2
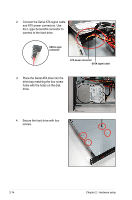
5.
Connect the other end of the
Serial ATA signal connector to
the onboard SATA connector
labeled SATA1. Refer to illustration
below for the location of SATA1
connector.
P5BV-M/RS100-E5
SATA1
Connector
P5BV-M/RS100-E5
SATA1
GND
RSATA_TXP1
RSATA_TXN1
GND
RSATA_RXP1
RSATA_RXN1
GND
To install secondary Serial ATA drive:
1.
If you have an ODD installed,
remove the ODD bay first before
you install a secondary SATA disk
drive.
To remove, disconnect the ODD
cable and power cable then use
a screwdriver to remove all two
screws.
2.
Locate the Serial ATA drive plate
under the optical disk drive (ODD)
bay.
SATA drive plate
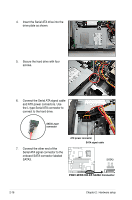
3.
Secure the hard disk drive brackets
to the HDD with four screws.
HDD bracket