Asus RS160-E4 User Guide - Page 46
Optical drive, 1.1 Removing the front cover
 |
UPC - 610839648061
View all Asus RS160-E4 manuals
Add to My Manuals
Save this manual to your list of manuals |
Page 46 highlights
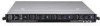
2.8.3 Optical drive To uninstall the slim optical drive 1. Follow step 1 to 8 of section 2.1.1 Removing the front cover to remove the front cover from the barebone server. 2. Use a Phillips screwdriver (cross) to remove the three screws that secure the drive. 3. Use a Phillips screw driver (cross) to remove the two screws that secure the backplane with the drive. Then, remove the backplane from the drive. 4. Carefully slide the optical drive inward for about half an inch, then lift it out of the bay. 5. Remove the screws that secure the optical drive to its metal bracket. To reinstall the optical drive, follow the instructions in the previous chapter in a reverse order. When installing a new optical drive, make sure to remove the drive front panel assembly and tray bezel before installing it to the chassis. 2-28 Chapter 2: Hardware setup
-
 1
1 -
2
-
3
-
4
-
5
-
6
-
7
-
8
-
9
-
10
-
11
-
12
-
13
-
14
-
15
-
16
-
17
-
18
-
19
-
20
-
21
-
22
-
23
-
24
-
25
-
26
-
27
-
28
-
29
-
30
-
31
-
32
-
33
-
34
-
35
-
36
-
37
-
38
-
39
-
40
-
 41
41 -
 42
42 -
 43
43 -
 44
44 -
 45
45 -
 46
46 -
 47
47 -
 48
48 -
 49
49 -
 50
50 -
 51
51 -
52
-
53
-
54
-
55
-
56
-
57
-
58
-
59
-
60
-
61
-
62
-
63
-
64
-
65
-
66
-
67
-
68
-
69
-
70
-
71
-
72
-
73
-
74
-
75
-
76
-
77
-
78
-
79
-
80
-
81
-
82
-
83
-
84
-
85
-
86
-
87
-
88
-
89
-
90
-
91
-
92
-
93
-
94
-
95
-
96
-
97
-
98
-
99
-
100
-
101
-
102
-
103
-
104
-
105
-
106
-
107
-
108
-
109
-
110
-
111
-
112
-
113
-
114
-
115
-
116
-
117
-
118
-
119
-
120
-
121
-
122
-
123
-
124
-
125
-
126
-
127
-
128
-
129
-
130
-
131
-
132
-
133
-
134
-
135
-
136
-
137
-
138
-
139
-
140
-
141
-
142
-
143
-
144
 |
 |
